Tag: lab

  • Have You Deployed an Availability Group?

    The last few weeks have been interesting, to put it mildly, with both more and less engagement online. I see more people holding video calls, both inside and outside of work, but I also see less engagement at SQLServerCentral, blogs, Slack, and some of the more common community tools we’ve had. I suspect this new way of working is strange, and it’s upset many of the rhythms that people have built over the years.

    In any case, one very important and common technology in the SQL Server platform is an Availability Group. This technology has been in the product since 2012, and unlike clustering, it’s relatively easy to set up. Not to say it’s easy, and you do need to develop some skills outside of T-SQL to understand how this works. This week I’m wondering how many of you might never have done this?

    Or maybe you’ve done it once or twice and forgotten about it.

    While we’re dealing with the various challenges of a pandemic, this is also a time where you might brush up on a few skills or learn new ones. Deploying, configuring, and testing an AG is something that is valuable to both DBAs and developers, and it’s a good skill to bring to your next interview. Every employer wants to know you understand HA/DR.

    We have a Stairway Series that can help you along with quite a few articles and blogs that people have written. There are various lab posts as well, including a good one from Ryan Adams, that can help you get started. If you don’t have equipment handy, you can build one in Azure for cheap, and even turn off the VMs when you’re not using them and spend just a few dollars a month on storage. That’s not much cost to build a valuable skill in your career.

    If you’ve built a lab, maybe you want to tackle something complex, like the scenarios that Allan Hirt writes about on his blog. If you’ve never done one, maybe try to build one, take notes and capture screenshots, and blog about it. In Word if you want to start a portfolio to send out with your resume, or on your live blog. It might be a good time to start a new blog.

    Focusing on a project like this can help shut out some of the noise in the world and engage you in a new way with your career. Hopefully you are doing well, and life is proceeding for you. If not, maybe tackle a project to take your mind away from things, and check out our daily coping tips in the newsletter.

    Steve Jones

    Listen to the podcast at Libsyn, Stitcher or iTunes.
  • Azure Labs–Minor Cluster Issues for SQL Server Setup

    During the process of building an Azure lab, I ran into a place where my cluster was not completely validated. I think this happened when a node failed and was re-provisioned, but in any case, when I ran SQL Server setup, the program failed cluster validation and would not install.

    If you find issues, try the command line to start setup. This is what I did. For the first node, I ran setup from the command line like this:

    Setup /SkipRules=Cluster_VerifyForErrors /Action=InstallFailoverCluster

    The same GUI popped up, and I was able to set various settings and save my config file.

    For the other nodes, I ran this:

    Setup /SkipRules=Cluster_VerifyForErrors /Action=AddNode

    Pretty simple, the platform installed and worked fine. Whatever cluster issue I had must have been transient, at least for my lab purposes.

  • Virtual Lab – Setting up a new VM

    This is part of a series where I set up a virtual lab for testing and misc. work. The other parts in the series are here: Building a Virtual Lab with Hyper-V.

    I have my disks set up, now it’s time to create my virtual machines. I’m going to show you how to create one, but all really are done the same way. The names change, but no matter what my purpose is, this is how I set up the VMs. Once this is done, I’ll use other posts to go into the customizations for each machine.

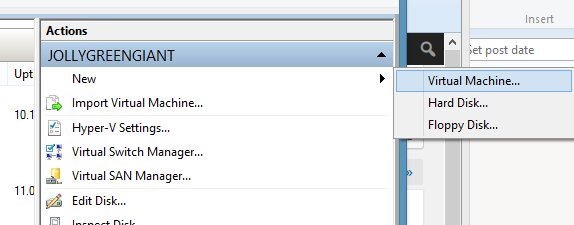
    We’ll start in Hyper-V manager, selecting a new VM.

    virtlab_p

    After the welcome screen, you need to name your VM and choose a location. I’ve got a folder set up for this lab on my machine, so I choose that, and set the name (for this machine) as DenverDC. This will be my domain controller and the first machine I set up.

    virtlab_q

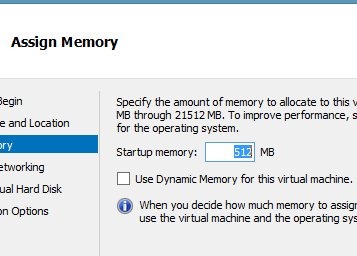
    Next we assign memory. I’ll want more for the SQL Servers, but this is easily changed at a later date, so I’ll leave this alone. One of the advantages of Core is less memory needed, and I could probably get by with less, but since I have 24GB on the host, I can spare half a gig.

    virtlab_r

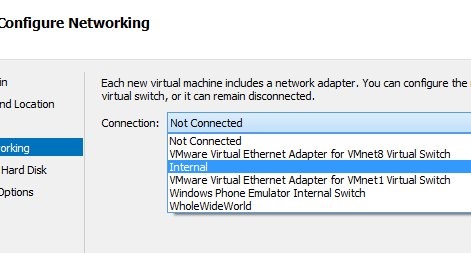
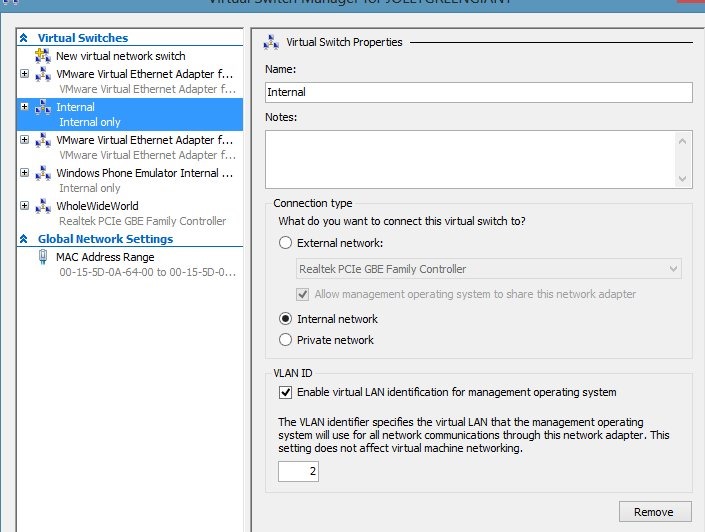
    After memory comes the networking. As you can see, I have a number of choices. The "WholeWideWorld" is the connection some of my VMs use to access the internet. In this case, I’m choosing the Internal network, which is the Internal switch I have set up. This is limited to connections between the VMs and since I want this to be an isolated network, this works fine.

    virtlab_s

    My internal switch is actually configured as follows:

    virtlab_v

    Now we need to set storage. Since I set up my disks before this and named them in a way that I can understand, I choose the one I need. The default here is a new hard disk, but I’m saving space with differencing disks.

    virtlab_t

    I get a summary. Please check this as you set things up. Note that my differencing disk is set.

    virtlab_u

    I click finish, and I have a VM. I start it up from Hyper-V Manager and connect.

    virtlab_w

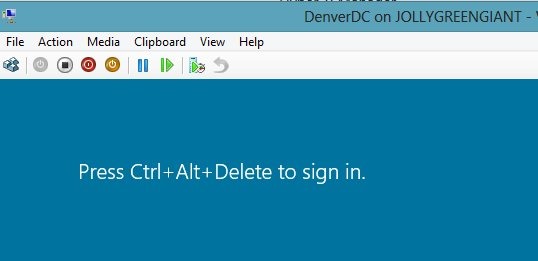
    Inside of Windows, I get the familiar Windows start screen (for Win8/WS2012). I click CTRL+ALT+DEL (leftmost icon on the toolbar) and then get prompted to change my password

    virtlab_x

    I change it,and I’ll use the same admin password on this machine that I use on a number of VMs.

    NOTE: This is NOT the password I use for any other services, including my VMWware VMs. At all. It’s only for Hyper-V VMs, but since I may have a few generations of VMs, I don’t want to forget this password. I also may end up starting up a few random VMs for talks, so I need to be able to get in.

    Once I log in, I get a basic session. Not much in Core.

    virtlab_y

    The only thing I really want to do here is rename the computer. I need to do more, but those will be in other posts. Let’s get the hostname.

    I could start server config (sconfig.exe) and get a basic setup, but I wanted to play with my PowerShell knowledge. So I started PoSh, and Google helped me find the computer name. I also used Google to find out the rename.

    virtlab_z

    The computer name (hostname) comes from

    $env:computername

    It doesn’t make sense, so I rename it with

    Rename-Computer -Newname "DenverDC"

    Once this machine restarts (Restart-Computer), it will have a new name.

    I know that I could use sconfig and it’s fast, or click around on my Standard servers and rename the machine, but once I get used to typing these commands in Powershell, it’s very, very quick.

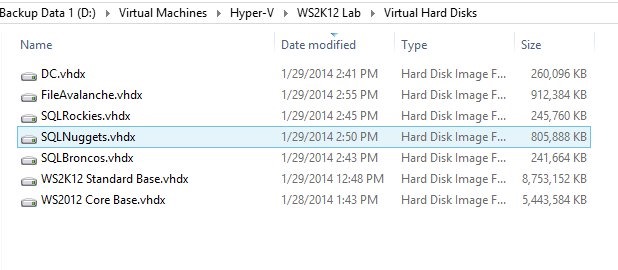
    Note that my disks have been updated with changes. Their sizes have grown from the original 4MB.

    virtlab_aa

    I repeat this process for all the other machines, just to get them set with a password and name. Once they’ve rebooted, they’re ready for the next step.

  • Virtual Lab – Creating Differencing Disks

    This is part of my series on building a virtual lab for use with SQL Server and Windows. You can see the entire series here: Building a Virtual Lab with Hyper-V.

    The whole point of virtualization is better use of resources. Whether it’s CPU, storage, networking, power, etc., we are trying to save having to purchase 5 or 6 machines and connect them all, pay for them, etc. It’s much, much easier to use virtualization.

    This is especially true of storage. When we build a lab, we don’t want to have to allocate a ton of space for our systems. In my case, for my design, this is what I want to end up with.

    virtlab_o

    From my last post, I had the bottom two files already set up. These are my installations of Windows Server 2012 R2 Standard and Core, sysprep’d and ready to use.

    Differencing – Saving Space

    The idea in differencing disks is similar to the snapshot feature I used in VMWare to do this same process. I take a base disk, and create a “copy” of it. Except the copy doesn’t have everything from the base disk. Like a database snapshot in SQL Server, if I need to read something that’s in the base disk, I reference that. If I change something, or add something, I read from the copy.

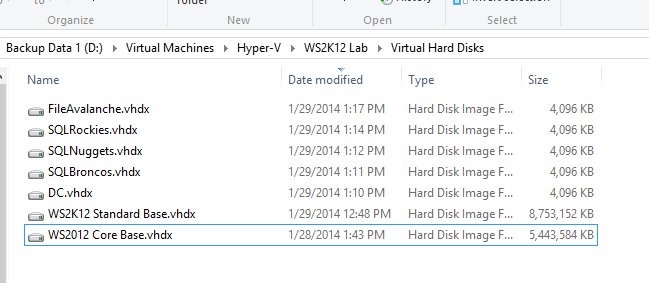
    As you can see above, I have 5 small disks at 4MB and my 2 large base disks. Each of the small disks is a differencing disk off either the Standard or Core base installations.

    I created these by selecting New Hard Disk in Hyper-V Manager

    virtlab_i

    After the intro screen, I make sure I’ve picked VHDX.

    virtlab_j

    At the next screen, I choose the differencing option.

    virtlab_k

    Now I need to pick a location for the copy. On my setup, I’m trying to keep this lab contained, so I have a WS2K12 Lab folder. I choose that as my location for the differencing disk. I give it a name, in my case, I’m using “Function” concatenated with the name of the Windows host. As seen below, my file server will be named “FileAvalanche.vhdx”.

    virtlab_l

    Next I choose the parent disk. this is the base image. Depending on what I had in my design, I choose the Standard or Core images for various machines.

    virtlab_m

    I get a summary where I can see all my options, and then click finish.

    virtlab_n

    I do this five times and all of a sudden I have a lab.

    A few things. Use some naming convention so you can tell which disk is which. Also, make sure you stick things in a location. I set a specific folder location for my VMs and disks, and then altered the Hyper-V Manager settings to default to this folder. On my machine that’s D:\Virtual Machines.

    That helps me keep things contained, and it also means that when I want to copy a VM for a backup or to another machine, it’s easy.