Category: Blog

  • Another MVP Award and a Few Thoughts

    I got the news of my MVP award last week. I’m honored that Microsoft feels I do quite a bit for the community. This was my 10th or 11th, though I’m not sure since they changed around the award periods. In any case, it’s been a long time.

    As I saw quite a few people posting their award (or re-award), I also noted a few people that weren’t renewed. I wasn’t surprised, even at some of the big names, since I haven’t seen them in the community much in the last year. Keep in mind, the award is for the most recent award period, not your past.

    I ran across this Twitter account, which I’m guessing is someone that wasn’t re-awarded as an MVP. Personally, I think this is a poor showing of one’s professionalism. I’m sure this is why the account is somewhat anonymous.

    This year we had quite a few that weren’t renewed that have been MVPs for a long time. Usually this isn’t a surprise to the individual, as they often know if they’ve been doing lots of blogging, speaking, etc. This can be surprising to others, since often we assume that person XX is always helping others. The thing I always think about is whether someone has done enough in the most recent period, not in the distant past.

    And, of course, done enough in the area Microsoft cares about. If you’re the number one expert in the world with Notification Services, writing and speaking about how to keep it alive, I’m not sure you’re getting designated as an MVP.

    I have no doubt that if I stopped blogging here and speaking at events, I wouldn’t be renewed. I do some work at SQLServerCentral, but I’m not sure it would be enough if I weren’t volunteering more of my time and knowledge in other ways.

    The award is recognition by Microsoft. It isn’t, nor should it be, any validation of your efforts to help others. You might be a great community volunteer that does a lot of writing, speaking, organizing, and more. Those are all efforts to be proud of and continue to do, if you enjoy them. They just might not be enough to beat out everyone else, again, in Microsoft’s view.

    As a friend told me, play your game. Do what works for you, and reap the rewards if they come. If they don’t, you should still be happy with what you’ve done.
  • Setting Up Pi-Hole.Net

    I saw a tweet a short time ago from Drew Furgiuele about pi-hole.net. He noted this was a near use of a Raspberry Pi, and I wanted to give it a try. I got one awhile ago, and used it for a few things. We started with a media streaming device, but when I got a Fire Stick, this wasn’t needed or used. Then I tried a Bluetooth audio bridge to the stereo. It wasn’t as reliable as I’d like, and it added complexity to turning this on, letting it boot, etc.

    As a result, it’s been sitting a bit as I thought of some other project. The pi-hole seemed like something to try, so I decided to give it a go. It was pretty easy, and it blocks some ads. Not all of them, but

    First, I grabbed the latest release, Stretch, of Raspbian. I chose the lite version, since this will be headless. I downloaded that and also grabbed Etcher to flash the card. This took a bit, but I let it run in the background as I did other things.

    From there, I used Explorer to connect to the drive and create an empty “ssh” file. I read this tutorial, and ended up just creating a new text file in Windows, and removing the extension.

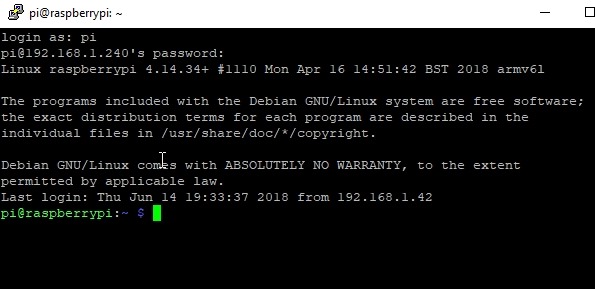
    Once this was done, I took the device up and plugged it into the router, both the Ethernet and the USB cables. This booted and connected the device. Back at my machine, I used Putty to connect. I did have to upgrade Putty to get the proper encryption level, but if you get a new copy, you’ll be fine.

    2018-06-14 14_00_42-pi@raspberrypi_ ~

    A few people pointed out ssh is in Windows now. Great, that works, I like Putty.

    Once connected, I ran the curl command to get pi-hole installed. It was fairly simple, and once installed, walks you through some basic config and networking. I use the 192.168.1.0/24 network that most people do, but my DHCP is set to give out addresses from 2 to 199. 200 and above are statics for me, so I configured this to use one.

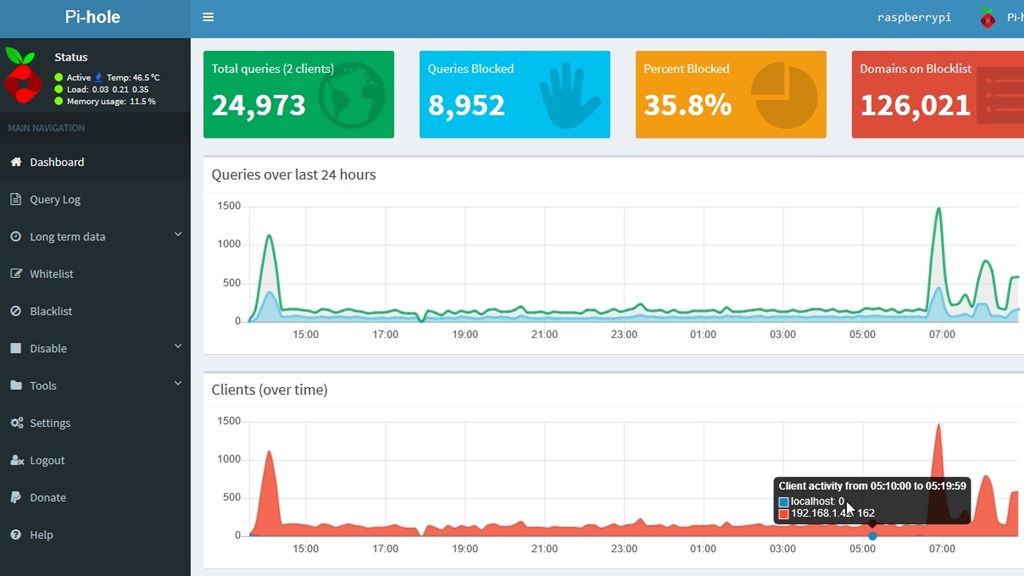
    After that, I got a password for the device and I went to my static IP/admin to see the Pi-hole dashboard. I logged in and I could see traffic. This is from the next day.

    2018-06-15 09_11_16-Pi-hole Admin Console

    It’s an interesting project and I’ll see how this goes. I could add a other software to this device, and I may. We’ll see.

    I’m not against advertising, but there are some shady sites and some data gathering. Right now, a lot of blocks are for some telemetry service, which is fine. I can’t get info on it, so I’m guessing it’s not legitimate.

    In case you are wondering, there are lots of queries to telemetry.servers.getgo.com that are being blocked.

    If you want to try it, this is a cheap experiment, and you can also play with Linux, some hardware, and SSH.

  • Testing BackBlaze Restores

    The most important thing for a data guy is having a way to restore data. If security, performance, etc. are broken, those can be fixed is we have the data. If we don’t have data, does security matter? It’s important, but secondary.

    When Crashplan stopped providing a multi computer setup, I needed to get a new solution for home. I asked on Twitter and then wrote a bit about my evaluation and choices.  These were my particular requirements, and yours may be different. In any case, I decided to evaluate BackBlaze under their couple week evaluation and keep the system simple for both my wife and I. As a part of that evaluation, I tested restores.

    Missing a File

    I didn’t simulate a crash and restore all my files, but instead decided to test this while out of town. I was in the UK, at the Redgate Software office and wanted to check an expense report I’d submitted. I also wanted to get the latest expense report to add some items to it. I keep these on my desktop, but I haven’t setup a home VPN for access, nor would that have helped. My desktop was powered down for my 11 day trip.

    I decided to see how BackBlaze was working. My first step was to connect to my account on the BackBlaze.com site. I logged in and saw my machine listed in the Overview. (I reshot these images later, so the dates aren’t shown)

    2018-06-28 08_41_14-Window

    Note: I didn’t have Backblaze software installed on my laptop.

    I selected Restore and went to a new screen where I had a choice for the restore. I selected getting a ZIP file, but it’s nice to have other options for large files. If I were pulling back 2TB of images, I might just pay for a hard drive.

    2018-06-28 08_41_24-Window

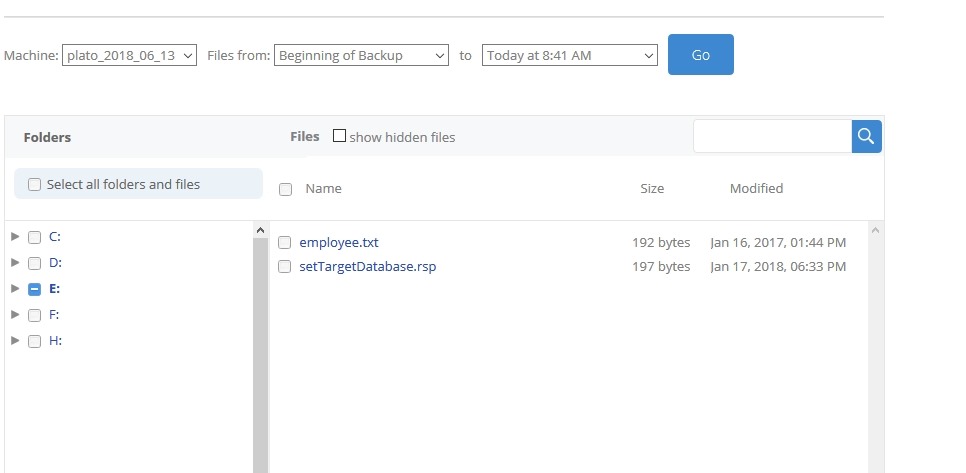
    Below this, I saw my drives and I could navigate to select select files.

    2018-06-28 08_44_21-Window

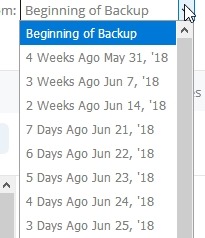
    I also had options to  see different versions of backups.

    2018-06-28 08_44_42-Window

    Once I found files, I picked the one I needed and started the restore. Just for a test, I picked a file on a different drive to see what would happen.

    2018-06-28 08_42_14-Window

    I went on with my day, and within an hour, I’d gotten an email. This let me know my restore was ready and I needed to securely sign in to get the download. I like that this was a sign in and now just a link to some random file.

    2018-06-28 08_47_19-Window

    I downloaded the zip file and inside were the files I’d selected. I unzipped them and filled out more of my expense report.

    This was a smooth process and validates my decision to use BackBlaze. It’s easy for my wife, which she’ll appreciate, and I can easily access things on the road.

    My trial goes until the end of June, but I’ll sign up for the service once I return home as this will work well for me.

  • Updating VSTS to SQL Change Automation

    We (Redgate) released SQL Change Automation a few weeks back. This is the first stage to implementing a combined toolset that works with both state/comparison development and migrations based development. The change updated both our migrations toolset (previously ReadyRoll) and our build/release cmdlets (DLM Automation) to SQL Change Automation (SCA).

    I have pipelines that are setup with Redgate DLM Automation tasks. This post shows how I updated the first of these to SCA.

    Finding the Build

    Here’s my current VSTS build pipeline for a project. Note that these are DLM Automation 2 tasks. There is a single task that you configure with the Operation (on the right) to build, test, or sync a database.

    2018-06-28 16_56_49-SQL Server Builds - SOC-CI - Visual Studio Team Services

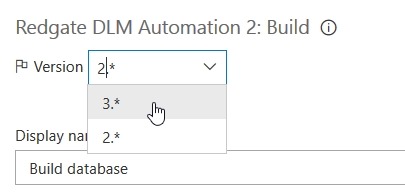
    Note that there is a version drop down at the top of the right side. Here I need to drop this down to find the SCA task, which is version 3.

    2018-06-28 16_58_05-SQL Server Builds - SOC-CI - Visual Studio Team Services

    Once I select this, you’ll see that my task changes to SCA, both on the left and right.

    2018-06-28 16_58_14-SQL Server Builds - SOC-CI - Visual Studio Team Services

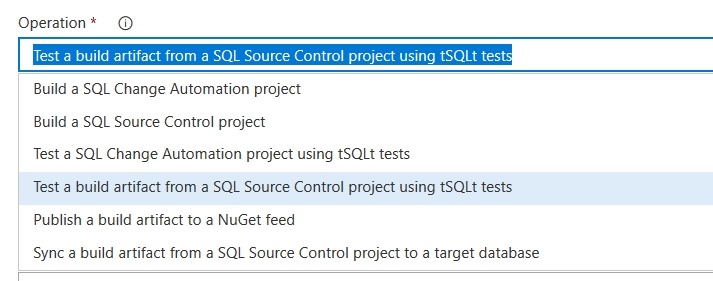
    I can change both tasks to v3 and I’m set. This is really the change that we’ve done, and we’ve combined operations. If you drop this down you will see there are SCA (migrations) projects here along with SQL Source Control state projects.

    2018-06-28 16_59_28-SQL Server Builds - SOC-CI - Visual Studio Team Services

    This means that if I convert from a SQL Source Control/state project, my pipeline stays intact. I’ll just change the operation from a build with SQL Source Control to one with SCA.

    This mostly works, but there are some path differences for release, so I’ll talk about those in another post.

    This is a simple change, but it’s important for future strategy. You can watch a bit of our strategy in this SQL in the City video on the database deployment pipeline. If you want to give this a try, download SQL Source Control and/or SQL Change Automation and start a test project.