Tag: Git

  • DevOps Basics–Git log

    Another post for me that is simple and hopefully serves as an example for people trying to get blogging as #SQLNewBloggers. This is also a part of a basic series on git and how to use it.

    In a few previous posts I’ve looked at getting going with git, and in this post we continue by looking at how we can get some information about the actions we’ve taken.

    If we want to see what has happened in our repo, lots of clients will show a list of changes, but from the command line we use a simple “git log”. When I do this, I see the reverse chronological view of commits.
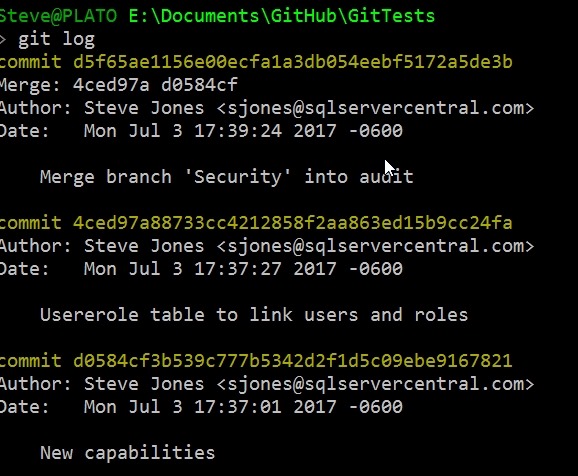
    2017-07-05 11_21_52-cmd - git log

    There are a lot of options for the log command, but there are a few I use often.

    Limit Entries

    I often use a –n, where n is a number, to limit what’s returned. For example, I’ll use –3 to show the last 3 commits.
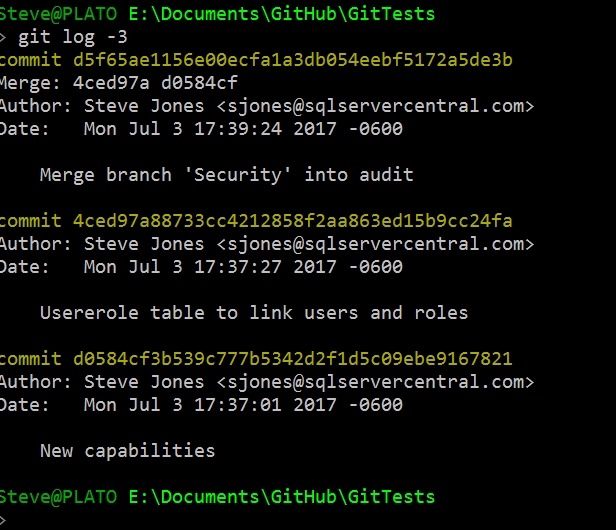
    2017-07-05 11_27_17-cmd

    I also like the –p option, which will show differences. As you can see here, I added the UserRoles.SQL file, putting in new lines.

    2017-07-05 11_28_53-cmd - git log -3 -p

    At times, I like the –decorate option, which lets me know which branch was affected. This is helpful if I’m moving around on branches and I get confused. That does happen.

    2017-07-05 11_32_29-cmd - git log -4 --decorate

    There are lots of search options, and I use them at times, but rarely, so I’m usually searching for the documentation to know the dates or patterns. I do look at the –committer= syntax with my name. That lets me find my changes among others.

    I also like to keep things small, so using the –pretty=oneline option is handy.

    2017-07-05 11_36_04-cmd

    Now I can easily see what I’ve done lately.

    There are lots of ways to look at history, and certainly a client makes things easier, but I’d say that you should learn the command line, just in case there’s some issue and your client doesn’t display it properly.

    Last thing, when you run git log and end up with a colon prompt, you’re in the less utility (I think, been a long time since Unix). To get out just type:

    q

  • DevOps Basics–Staging and Committing Changes

    Another post for me that is simple and hopefully serves as an example for people trying to get blogging as #SQLNewBloggers. This is also a part of a basic series on git and how to use it.

    In the course of normal work, you’ll change your code files. Git requires that you specify those changes that you want to commit, and those that you don’t. This means I can make changes to a few files, but not commit all those changes.

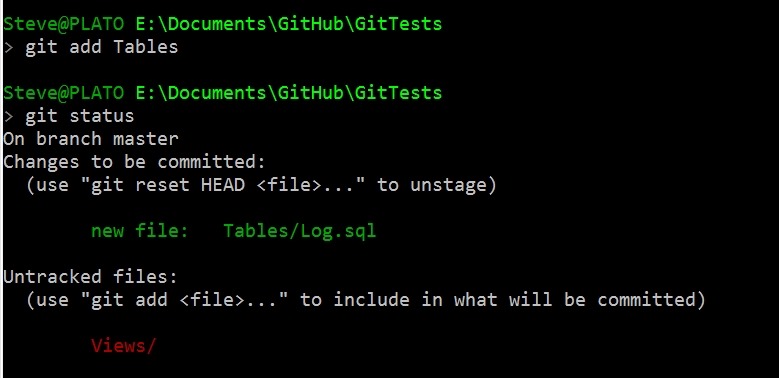
    For example, let’s say that I add a couple files to my repo. I’ll add the Tables/Log.sql and Views/LogView.sql to my repo. This will give me a status in git that shows these are new files. In this case, I see the folders as they are new as well.

    2017-06-27 21_21_16-cmd

    If I add these files as being tracked, I’ll use “git add Tables” to add that folder and file. I get a new status.

    2017-06-27 21_22_07-cmd

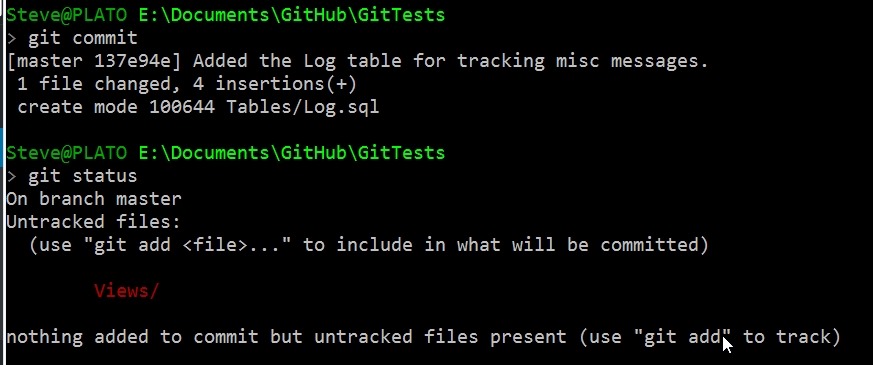
    Here my Log.sql file is being tracked (and the folder) as changes that are staged to be committed. If I commit now, I’ll get just that file added, but not Views\LogView.sql.

    2017-06-27 21_23_40-cmd

    Staged and Changed

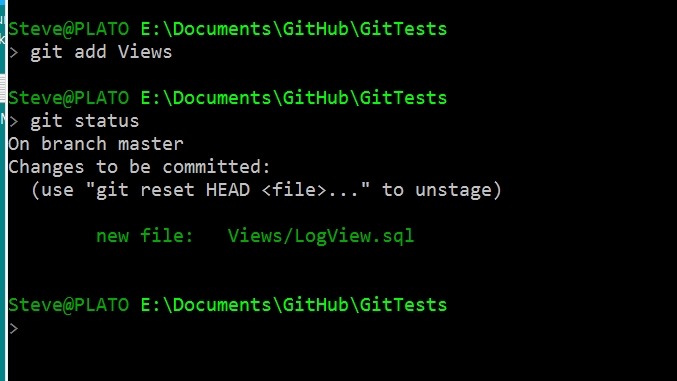
    There is one strange thing I’ve run into, at least, strange to me. If I stage my Views folder, I’ll get this:

    2017-06-28 12_12_23-cmd

    Now I’ll change the LogView.sql file, removing the SELECT * and adding columns. When I check the status, I now see the file in both the staged and unstaged areas.

    2017-06-28 12_13_25-cmd

    This is allowed, but if I commit, I’ll get the original version of LogView.sql as it existed when I ran the git add command. See below that after my commit, I still see the modified file.

    2017-06-28 12_15_50-cmd

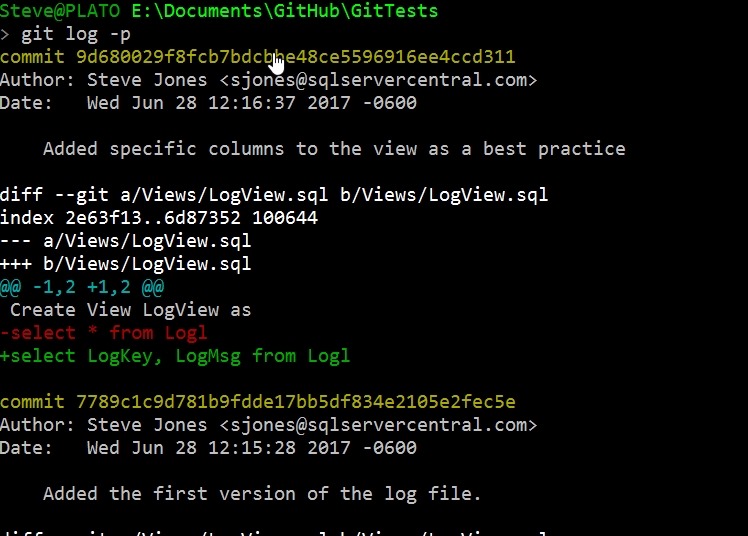
    If  I add and commit that file, I can use git log to see the actual changes. See the line in red with the – is the original line, while the green line with + is the change.

    2017-06-28 12_17_02-cmd - git  log -p

    Git add and git commit are the main ways you’ll commit files. If you have issues with a GUI client, then this is a good way for you to debug and clean up your repo. Knowing the command line is always the best way to truly understand what is happening.

  • DevOps Basics – Connecting to a Git Remote

    Another post for me that is simple and hopefully serves as an example for people trying to get blogging as #SQLNewBloggers. This is also a part of a basic series on git and how to use it.

    As I work more and more with Git, I find myself learning little tips and tricks that are helpful. One of those tricks is adding a remote to my local repo so that I can sync with it, and start collaborating with others. In many cases, I find myself pulling from a remote repo and pushing back, and much of the work is done for me. However, if I create a local repo, how do I get this to a remote service?

    Certainly some tools like VS or GitHub for Windows/OSX/etc help, but I like to understand the process myself, so I spent a few minutes practicing.

    First, I create a new repo with some documents. This is basic git stuff that you should understand, but if not, I’ve written a few posts on git basics. Here’s the first steps I took in another post.

    2017-04-26 14_01_08-cmd

    Create a Remote

    The next step is to have a remote git repo, which is really a remote git init spot. For this post, I’ll make on at Github, but the process is similar anywhere. In my repositories list, there is a new button.

    2017-04-26 14_32_08-Your Repositories

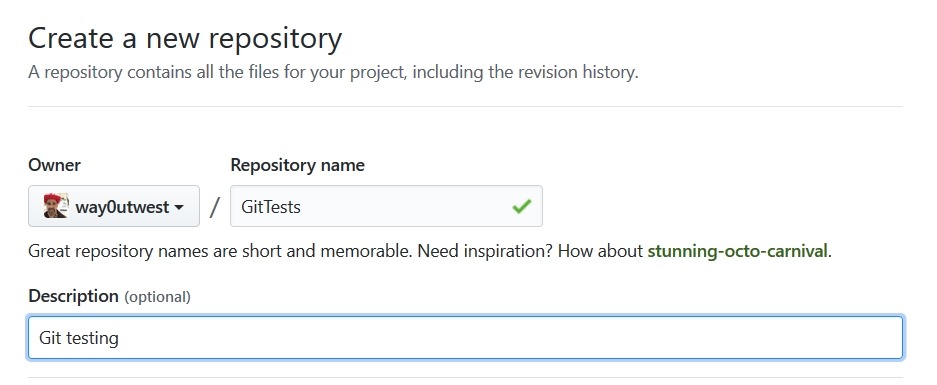
    I click that and get a form. In my case, I’ll name this to match the repo on my local machine. Life is easier if you match names, but you don’t have to.

    2017-04-26 14_33_51-Create a New Repository

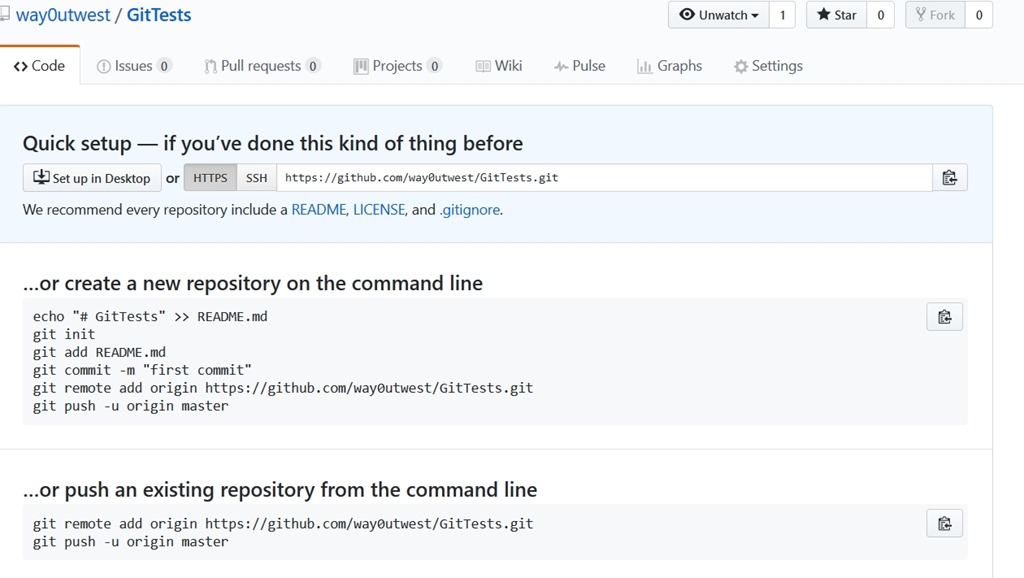
    Once I do that, Github guides me along. I get a page with quick setup.

    2017-04-26 14_34_24-way0utwest_GitTests

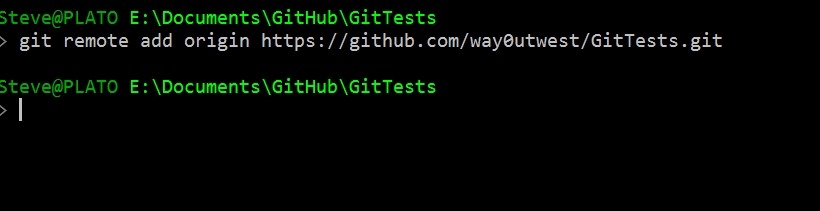
    In my case, I want to push things from an existing repo on my machine. Again, tooling may do this for me, but from the command line, I need to add a “git remote”. I’ll use the “add” option, and I specify a name and URL. These are shown near the bottom of the image. I’ll run these locally.

    2017-04-26 14_35_38-cmd

    Once I do this, my local git repo has a remote repo (called origin) that it can send code to (push) and get code from (pull). Git manages conflicts and versions and all that.

    If I try to just push, what I’ll find is I don’t have enough config.

    2017-04-26 14_38_55-cmd

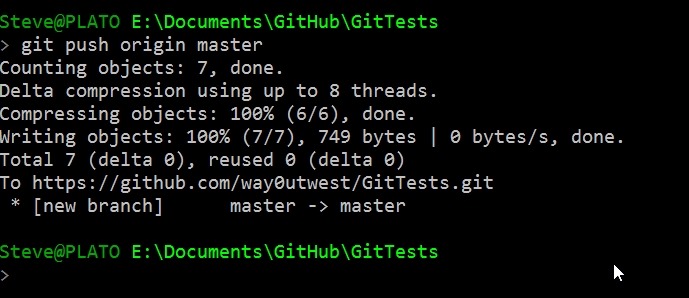
    My push needs to specify the remote and then the branch. Let’s do that.

    2017-04-26 14_39_29-cmd

    Once I do this, 7 objects got pushed, which includes some of the .git stuff. If I go to Github and look at the repo, I see this under Code.

    2017-04-26 14_40_15-way0utwest_GitTests_ Git testing

    I’ve connected my local repo to a remote, and copied my code up. Now I can push/pull as I make changes (or others do) to keep my local copy in sync with the remote.

    I’ll look at other flows in a future post.

    SQLNewBlogger

    This was a fairly quick post, about 10 minutes, as I connected up the local stuff to the remote. I’ve done this before and learned some of this the hard way, but this post allows me to organize my thoughts and be sure I understand what’s going on.

    I did end up spending a few minutes looking at the git docs to be sure I was describing things correctly.

  • DevOps Basics–Creating a local repo and committing files

    Another post for me that is simple and hopefully serves as an example for people trying to get blogging as #SQLNewBloggers. This is also a part of a basic series on git and how to use it.

    A local repo is a repository, and is the version control system you will use locally. In a previous post I looked at cloning a repo. That’s a way to get code from others, but what if I want to start a new project?

    That’s easy. This post will start a new project, save a few files, and show how to commit these to my git VCS.

    Create a Repo

    If you use tooling, there is usually a CREATE function somewhere, but at the command line, you can just do this:

    git init

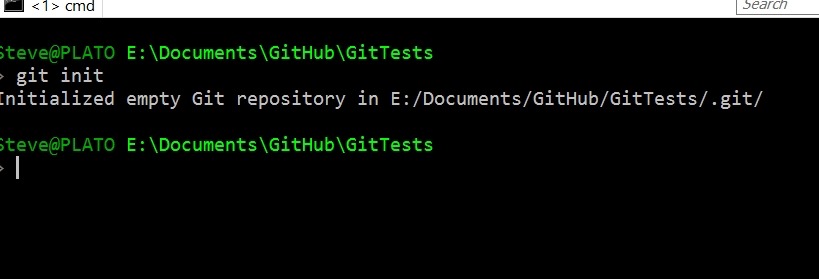
    Assuming you’ve installed git, this will create a repo in your folder, and let you know it exists.

    2017-04-26 14_16_13-cmd

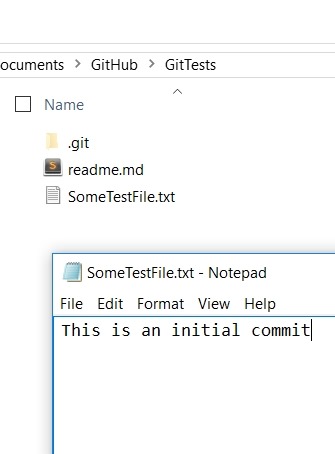
    At this point I have an empty repo, and if I look in my folder, there’s a .git folder.

    2017-04-26 14_16_20-GitTests

    This folder will essentially control how this repo works on my system. Let me start by adding a couple text files. I’ll use a markdown file as a Readme, since I’ll eventually push this to Github and I like to have something there that makes sense. I’ve also got the contents of the text file here, which makes it easy to track what changes are being made and versioned.

    2017-04-26 14_17_30-SomeTestFile.txt - Notepad

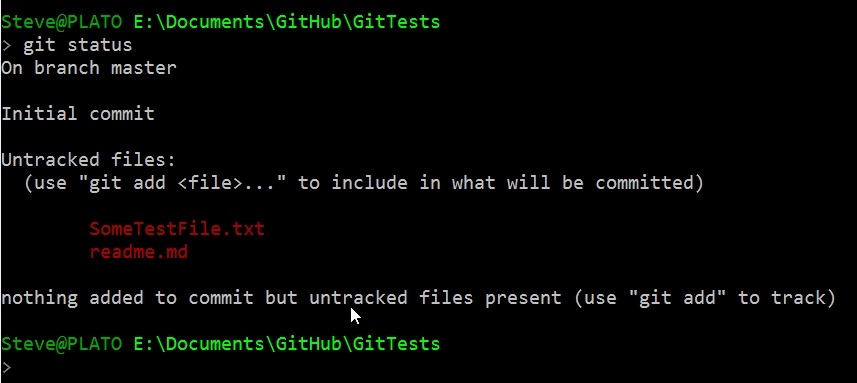
    Let’s now check my status:

    2017-04-26 14_18_01-cmd

    I’ve saved files here, but they aren’t being versioned. There’s not automatic tracking here just because I’ve saved files. This is something I need to do. Some tooling will do this for you, but it’s good to understand how this actually works. I need to tell git to track these files, so let’s do that.

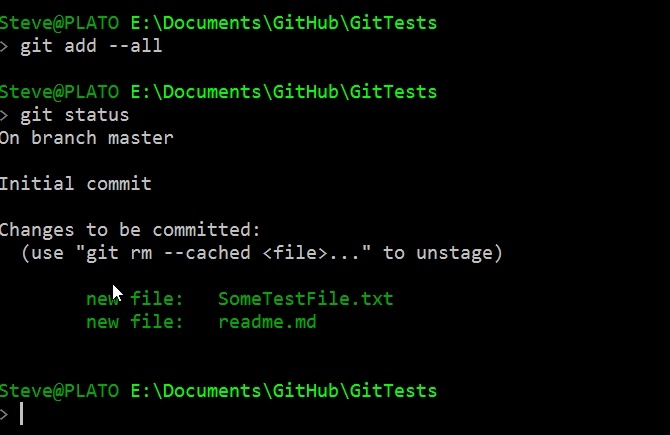
    First, I’ll add the files. I could specify specific files, but for now, I’m adding them all (both of them). Then I’ll check my status.

    2017-04-26 14_19_14-cmd

    Notice the files are in green now. These are being tracked, and they’re “staged” for commit, but they’re not committed. Git sees these are new files, but the changes haven’t been saved.

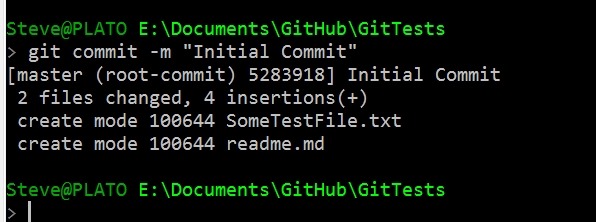
    I’ll now save the files with a git commit. I use the –m option to specify a comment on the command line. In another post I’ll show you what happens when you don’t do this.

    2017-04-26 14_20_41-cmd

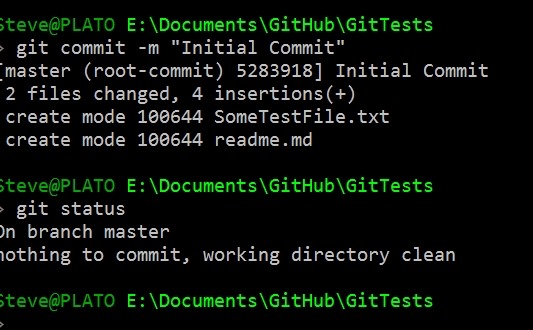
    If I now look at status, I see nothing.

    2017-04-26 14_21_32-cmd

    Why?

    Git is concerned with changes and versioning. If everything is tracked, then git sees a clean directory and no files to commit. The files exist, but the version is not tracked in git.

    Changes

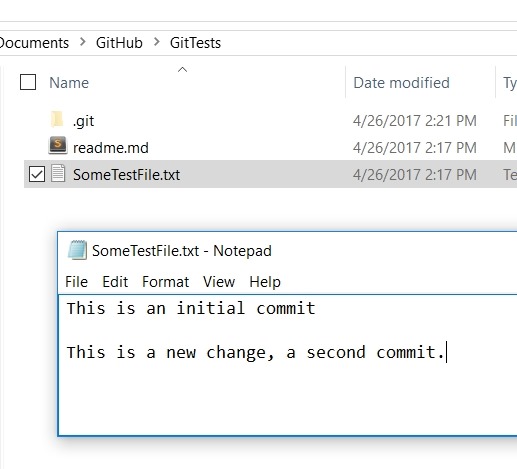
    I’ll make a change to a file and then we can see the effect. Here I’ll add text and save the file.

    2017-04-26 14_23_39-GitTests

    Now let’s check status. Below you’ll see I have a “modified” file, which I’ll then “stage” and add as something I want to commit.

    2017-04-26 14_24_05-cmd

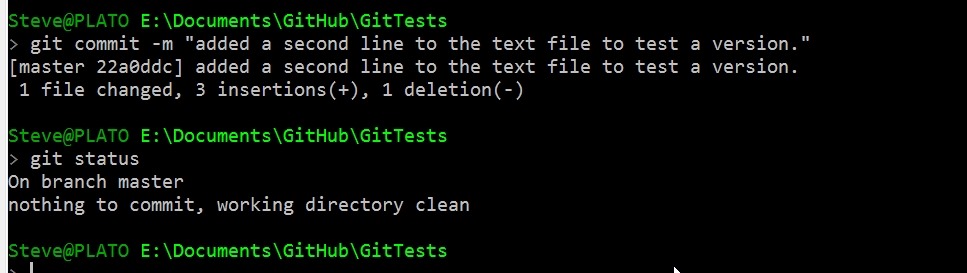
    Let’s now commit this.

    2017-04-26 14_25_21-cmd

    I can see that things are clean again, and my folder looks like I’d expect. The two files, one of which has two lines in it.

    That’s really it for now. If you want to play along, download git, create a repo, and make some changes and commits. In another post, I’ll look at how I see the changes and get back to a previous version.

    SQLNewBlogger

    This was a quick post, about 10 minutes, as I practiced and experimented with things I know about git, trying to ensure I get them straight in my mind. That’s a good way to learn or improve skills in an area.

    The hardest part in this post is trying to focus and stop writing.