Tag: TopTenSkills

  • The Basics of Joins – Skill #4

    This series of blog posts are related to my presentation, The Top Ten Skills You Need, which is scheduled for a few deliveries in 2011.

    Databases are built to store data. That’s the primary purpose, and in SQL Server, we store data in a relational form. That means that often we have data spread across multiple tables. Why we do this is a discussion for another day, but suffice it to say that we often have structures like this:

    personcontact

    Part of the person.contact table in AdventureWorks above and the HumanResource.Employee table below.

    employee

    One typical join task might be to get an employee’s name, or a list of employees and their names. Here we have a birthday in the Employee table, but we don’t have a name. That’s in the Person.Contact table. Essentially we want to match these up using basic, elementary school set theory.

    settheory

    In the diagram above, you can think of each letter as a row in a table. As an example, let’s assume that B in the orange circle represents the row in the employee table with a ContactID value of 4. The B in the pink circle would represent the row in the Contact table with a ContactID value of 4 as well.

    When we join these to get the Employee name and birth date, we get:

    join2

    I used a join in my query to get that:

    SELECT 
      c.firstname
    , c.LastName
    , e.BirthDate
     FROM person.contact c
       INNER JOIN HumanResources.Employee e
         ON c.ContactID = e.ContactID
     WHERE c.ContactID = 4
     

    In this query I’ve included two tables in the FROM clause with the INNER JOIN key phrase between them, which specifies I only choose the matching rows. The match is made in the ON clause.

    I’ve also qualified this to only apply to the row with a ContactID of 4 in the WHERE clause.

    There’s a lot more you can do with joins, and you can include more than two tables, such as this query:

    SELECT 
      c.firstname
    , c.LastName
    , e.BirthDate
    , pa.AddressLine1
    , pa.AddressLine2
     FROM person.contact c
       INNER JOIN HumanResources.Employee e
         ON c.ContactID = e.ContactID
       INNER JOIN HumanResources.EmployeeAddress ea
         ON e.EmployeeID = ea.EmployeeID
       INNER JOIN person.Address pa
         ON ea.AddressID = pa.AddressID
     WHERE c.ContactID = 4
     

    I would recommend that you practice working with basic joins, based on the information that you commonly see queried in your application. Sooner or later someone will ask you for some data that isn’t available in the application and you will want to write a query to extract it for them.

  • Basic Inner Joins – Basic Skill #4

    This post is part of a series based on my presentation The Top Ten Skills You Need for SQL Server. This post is part of Skill #4 – Joins.

    T-SQL Tuesday #23

    This post is also serving as my T-SQL Tuesday post for the month. This month the party is brought to you by Stuart Ainsworth. If you want to know more about what T-SQL Tuesday is about, read Stuart’s post as well as Adam Machanic’s original post and then join in next month.

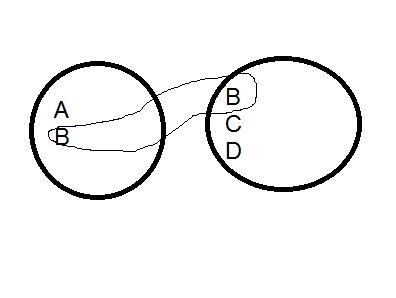
    An inner join is essentially an intersection of two sets. If you go back to grade school, and think about sets, you can have two items like this:

    set1

    If you look at these two sets, you see that there are various elements in each set. If we were to show the intersection, it would be this set: (B). This is shown below (excuse my horrible artwork):

    set2

    In SQL, we deal with tables, but we can model this as follows:

    CREATE TABLE SET1
    ( mychar varchar(1) ) GO CREATE TABLE SET2
    ( mychar varchar(1) ) GO INSERT SET1 SELECT 'A' INSERT SET1 SELECT 'B' GO INSERT SET2 VALUES ('B'), ('C'), ('D') GO SELECT a.mychar
      , b.mychar
     FROM SET1 a
       INNER JOIN set2 b
         ON a.mychar = b.mychar
    mychar mychar
    ------ ------
    B      B

    The results are the matching values in each table. In this case each table is a single column, modeling the images above where there is a single letter in each item of the set. The matching columns are the join columns, and in database work, these would be the data items that we are storing in both tables.

    However to expand this, in a database table, we usually have multiple items, so each letter could be a series of data elements, or could have a series of other fields attached to it. Suppose I change these “sets” a little:

    DROP TABLE set1
    DROP TABLE dbo.SET2
    go CREATE TABLE SET1
    ( mychar varchar(1) , Customer VARCHAR(50) , ActiveDate datetime ) GO CREATE TABLE SET2
    ( mychar varchar(1) , Customer VARCHAR(50) , ActiveDate datetime ) GO INSERT SET1 SELECT 'A', 'Bob', '1/1/2011' INSERT SET1 SELECT 'B', 'Bill', '2/1/2011' GO INSERT SET2 VALUES ('B', 'Steve', '1/2/2011'), ('C', 'Andy', '3/1/2011'), ('D', 'Brian', '3/3/2011') GO SELECT a.mychar
      , b.mychar
     FROM SET1 a
       INNER JOIN set2 b
         ON a.mychar = b.mychar

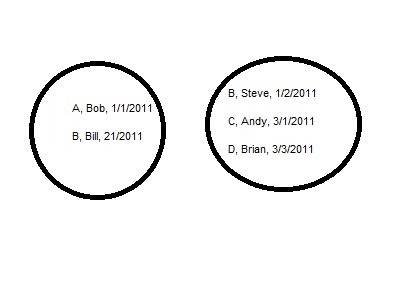
    I still only have one matching row, but there are other data points. If I alter my diagram, they look like this:

    set3

    The matching rows, in this case the rows with a “B” in them, have different data, which seems to be an issue. However suppose set 1 was a list of customers along with their first order date and set 2 was a list of salespeople and the dates they started. Then the join might be on sales, with the letter (A, B, C, D) representing the order.

    That’s the basic of a join. It gets complicated as you look to join three, four, or more tables, but this is the basic idea of an inner join in SQL.

  • Map a Login – Basic Skill #3

    This post is part of a series based on my presentation The Top Ten Skills You Need for SQL Server. This post is part of Skill #3 – Setup Security.

    I wrote about the basic security model for SQL Server, and got a question about mapping users to logins. It actually is done automatically for you in the dialog when you create a login, but I thought I’d cover the basic process here in more detail.

    Logins allow access to an instance of SQL Server. Users are the construct in a database that can be assigned permissions (explicitly or through a role). The mapping between a user and a login is what allows SQL Server to determine which logins get which rights.

    Let’s look at an example. On one of my instance, I have a test login called “JoeLogin”. If I connect to the instance, I enter the credentials of “JoeLogin” and the password to connect.

    loginmap

    Once I connect, however, the first thing the SQL Server database engine does is set my context to either the database I’ve specified, or my default database. This immediately maps me to a user in that database and allows me the connection to run commands, or it returns an error if I don’t have access.

    In this case, I have access to my default database, and I can check on my user credentials with this code:

    SELECT USER_NAME()

    This returns “JoeUser”, which is my user name. You can read about user_name() here, but it is a system function that returns your current database user name.

    My login has essentially been bypassed, and would only be used if I needed to check permissions to execute an instance level function, like setting a configuration value or viewing the error log. However I can check my login by using the SYSTEM_USER function.

    SELECT SYSTEM_USER

    This will return my login name, and it returns “JoeLogin” on my instance. I can easily see this in SSMS, in the right corner of the status bar at the bottom of the window.

    loginmap2

    The Mapping

    We can view the mapping between users and logins in two ways. If you want to see where a user is mapped, you can right click the user and select properties.

    loginmap3

    This will bring up a dialog for the user, and at the top you can see the login mapped to this user:

    loginmap4

    If you want to see where a login is mapped, you can right click the login in the server level Security folder and select properties. This brings up the login dialog, and if you select the “User Mapping” item from the left pane, you will see the list of databases and the user mappings.

    loginmap5

    In this example, my JoeLogin has been mapped to two database. In db1, the default behavior is applied and the login is mapped to a user with the same name. In db4, I have changed the default and mapped to a user called “JoeUser”.

    I haven’t run across a good reason to change the user name from the login name, and I don’t recommend it, but if you think you might have some issues, this is how you check things.

  • Create a Login – Basic Skill #3

    This post is part of a series based on my presentation The Top Ten Skills You Need for SQL Server. This post is part of Skill #3 – Setup Security.

    I wrote about the basic security model for SQL Server, recently and wanted to now expand on the practical aspects of how you setup security. Let’s start with logins and creating them.

    In the current versions of SQL Server, which includes SQL Server 2008 R2 and below, a login is the way in which you connect to an instance of SQL Server. Things may change in SQL Server 11 with contained databases, but I think this will still apply in many situations.

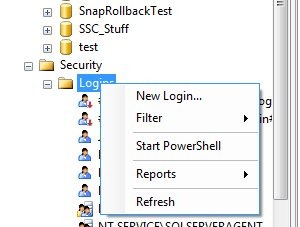
    Logins are defined at the instance level, and in Management Studio, you can right click the Logins folder and select New Login to create one.

    newlogin

    This will create a dialog like this one:

    newlogin2

    There are lots of choices here, but really there are only a few decisions that we make for most logins. You might use the other options, but these are the basics for 80% of the cases, following the 80/20 rule of this series.

    The first thing is the login name. This can be a user or group in Active Directory, and as you can see in the next image, if you don’t know the exact name, there is a search button. This is the standard AD search dialog.

    newlogin3

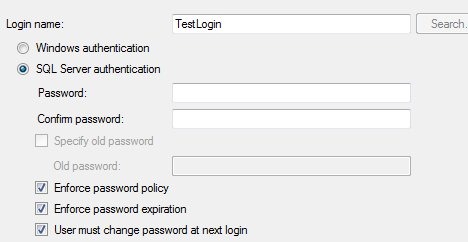
    There is a radio button below the name, which defaults to Windows Authentication. That’s for AD accounts, and is the recommended default. You can also choose SQL authentication, which means that a password is required and the administrator must set it.

    newlogin4

    If you choose SQL authentication, and are on Windows 2003 or later (Vista/XP as well) that allow you to set password policy. As a note, leave these checked unless you have a great reason not to. For most logins you should not know the user’s password and it ought to conform to the policies.

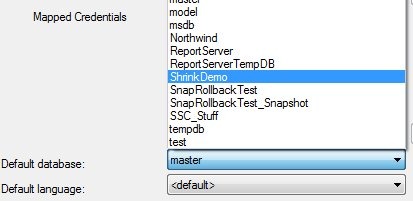
    The rest of this page is advanced stuff that isn’t often needed. The only thing that you should look over is the default database. For normal users, make sure this is a database the person will have access to. For administrators, leave it at master.

    newlogin5

    Next we look at the server roles page:

    newlogin6

    These are roles, or groups, with permissions for the instance. They don’t necessarily give a person access to a database, but many of them could allow someone to gain access, so for most users, leave this blank. For administrators, give them just what they need.

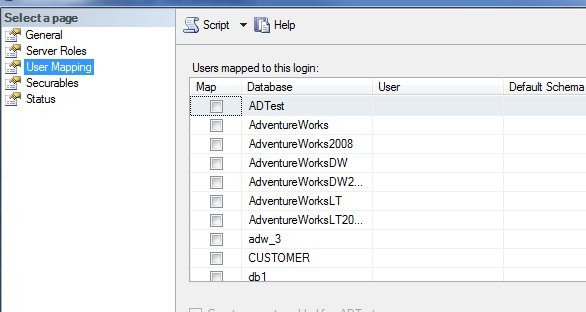
    The user mapping is next, and this is where you can have the dialog create a user in the database and grant access.

    newlogin7

    Most users will need access to a specific database, usually the one you chose as their default database. If you select a database checkbox, the user will be created with the same name as the login by default. Leave this alone, it’s a good policy.

    newlogin8

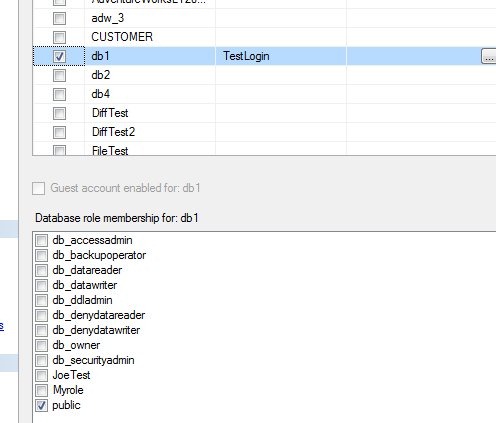
    Once you select the user, you also can add a database role at the bottom. Everyone is a member of public, and you should have a database role you’ve created for permissions that you can assign to them. I dislike giving regular users any of the fixed database roles like db_datareader. They are too global in permissions and have caused me confusion later on.

    Create your own role and assign permissions.

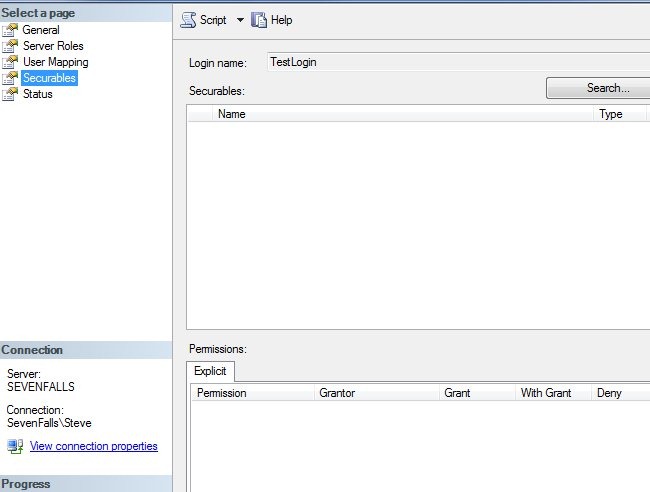
    Next is the explicit securables tab. Don’t use this unless you know what it means. I never use it, and most of the time you shouldn’t. Leave it along until you learn why, and more importantly, why not to use it.

    newlogin9

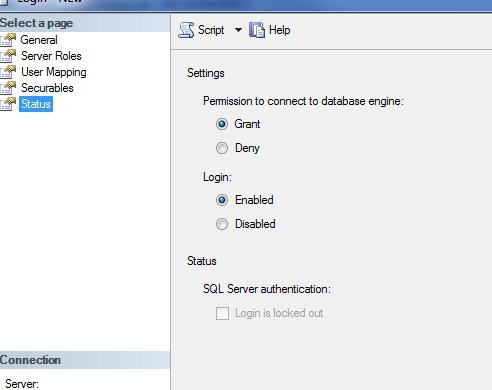
    That last tab isn’t one you normally need, but you might come here if a user has locked themselves out.

    newlogin10

    Leave these defaults alone unless you need to disable the user or prevent them from accessing this database for some reason. You can switch the radio buttons. If the user is locked out, the bottom checkbox will be selected and you can uncheck it.

    That’s the basics of creating a user in SSMS. For the most part, stick with defaults and keep your security simple, and restrictive. Don’t grant more rights than you need to.