Category: Blog

  • Virtual Lab – Adapter Setup

    This is part of a series where I set up a virtual lab for testing and misc. work. The other parts in the series are here: Building a Virtual Lab with Hyper-V.

    Once I had the machine up and running, I knew I needed to get the networking setup. One of the things I’ll do is do some clustering tests, and for that, I need to have static IP addresses. I’m an older, IPv4 guy, so that’s what I’ll use here.

    I decided to put all my machines in the 192.168.1.x space. I’ll use these addresses:

    • DenverDC – 192.168.1.200
    • Broncos – 192.168.1.201
    • Nuggets – 192.168.1.202
    • Rockies – 192.168.1.203
    • Avalanche – 192.168.1.204

    I’ll deal with the client machine when I get there. For now this is what I need to worry about.

    The machines are set up and passwords changed. I now need to start them and get networking configured. I googled and found this TechNet article on using PowerShell to configure a NIC. There’s also the Configure a Core Server. I know you can use sconfig to do this easily, but I wanted to see how hard it is in PoSh. In the Standard edition, it’s easy to use the GUI as well.

    First I needed to know what adapters I have. I ran

    Get-NetAdapter

    This told me my main adapter was “Ethernet 2”. So I ran this:

    $netadapter = Get-NetAdapter -Name “Ethernet 2”

    The first step is to remove DHCP. You’d do this by changing a radio button on the adapter settings. In this case, we do it with PowerShell.

    $netadapter | Set-NetIPInterface -DHCP Disabled

    Next we want to set up our IP address. In my case, I’m going to use the 10.10.10 address space.

    $netadapter | New-NetIPAddress -AddressFamily IPv4 -IPAddress 192.168.1.200 -PrefixLength 24 -Type Unicast -DefaultGateway 192.168.1.1

    Once that is done, we can then look at DNS. In this case, I’m going to point it to my gateway, which doesn’t really resolve to anything (yet).

    Set-DnsClientServerAddress -InterfaceAlias “Ethernet 2” -ServerAddresses 192.168.1.200

    I repeat this for all my servers, getting them all set up with their proper IP addresses. Once I’m done, I have 5 servers running with the IPs above.

    However none of them can ping each other. That’s strange, but not unexpected. The mindset to increase security by default is likely to blame. I don’t know what the exploits that can come through ping (DOS I guess), but I know more and more companies avoid allowing ping responses.

    Turn off the firewall

    I decide that I need to turn off the firewall to check. Since I have 2 Standard installations and 4 Core installations, I go to the Standard ones first and use the GUI to kill the firewall for my networks. It was at this point that I realized that by default my connections saw the network as public connections, not private.

    I turn off the public connection firewall and pings work from one of the Core servers. Then I turn that on and disable the private firewall. Pings fail.

    Now I know what to do. First, I use a security change in the GUI to set my Server with the Local Security Policy app in Windows. Once this is done, I set things to private, disable that firewall and verify pings work. I know this works, and now I’m ready to change the other servers.

    I find a script on MSDN Blogs that shows me how to do this in PoSh. It’s a strange script, and it doesn’t give any results, but it seemed to work.

    $networkListManager = [Activator]::CreateInstance([Type]::GetTypeFromCLSID([Guid]”{DCB00C01-570F-4A9B-8D69-199FDBA5723B}”))
    $connections = $networkListManager.GetNetworkConnections()
    # Set network location to Private for all networks
    $connections | % {$_.GetNetwork().SetCategory(1)}

    Once I ran this, I then needed to turn off the firewall. I found this link and then ran this command.

    netsh advfirewall set private state off

    virtlab_ab

    That worked, and then you can see my ping worked.

    virtlab_ac

    The top image above is from the machine I was working on. The bottom one shows the ping failing from my SQL machine to the DC, and then working once I’d disabled the firewall for the private network.

    Update: I originally wanted to work in the 10.x.x.x space, but I kept confusing myself, so I moved all the machines to the 192.168.1.x network.

    Rinse, repeat for all machines. Eventually I have every machine pinging every other machine and able to connect.

    Networking working.
  • Powershell in a Month – Day 19 – I/O

    This is part of my Powershell Challenge, to learn more about PowerShell (PoSh) using the Learn Windows Powershell 3 in a Month of Lunches book by Don Jones.

    Not the I/O that we think of in T-SQL, but more the I/O that’s a part of many programming languages. This reminds me a bit of C, with the explanation of how the powershell environment interacts with the user. It’ s not standard in and out, but it’s close.

    This chapter also feels like it was written by a different author than some of the previous chapters. The chapter goes into some of the ways in which output commands interact with the shell, and how some do not. For example, the difference between Write-Host and Write-Output. The chapter uses diagrams of the pipeline to explain this. I was surprised that these diagrams weren’t used earlier in the discussion of the pipeline and how objects and data can flow through the pipeline. That’s a big omission from my point of view. I have a good idea of what a pipeline is, but the diagrams would have made it easier for many other people to understand what a pipeline is.

    In any case, this chapter mostly deals with the relationship between the input and output and the PoSh process. There are mentions of the separation and how other editors might deal with the input and output differently, but not good examples. In some ways, I found this chapter a bit lacking. In a few sections, it seems that the prose is devoted to more about what not to do than what to do and how to build I/O interaction with the user.

    The lab wasn’t great and overall, I didn’t like this chapter very much. Felt a little confusing about how I use this information.


  • Powershell in a Month Day 18–Variables

    This is part of my Powershell Challenge, to learn more about PowerShell (PoSh) using the Learn Windows Powershell 3 in a Month of Lunches book by Don Jones.

    I’m slightly behind here after holidays and some travel. Apparently my pop-up reminder for my own studies bears about as much value as quite a few other reminders that appear from people at work.

    I’ve had to deal with variables in any number of languages in my career: BASIC, Pascal, C, C++, Java, C#, VB6, VB.NET, Foxpro, T-SQL, and a few more. I thought this chapter would be simple and it certainly started out that way, but I learned a few things and was pleasantly surprised.

    NOTE: The editor here is substituting left and right quotes, and left and right double quotes as part of formal writing. In executing this code, the normal straight quote and double quotes are needed in PoSh.

    The chapter starts out with the simple stuff, assigning values to variables. Unlike most languages,we don’t need to declare variables. You need one, just use it.

    $domain = ‘SSCLab’

    I’ve done this quite a bit in some of the practice for this series, but also in setting up my virtual lab. However I wasn’t sure why single and double quotes matter. If you’re not sure, this this:

    $computer = ‘Tiny’

    $Phrase = ‘Computer: $computer’

    $phrase

    and then this

    $computer = ‘Tiny’

    $Phrase = “Computer: $computer”

    $phrase

    You’ll see a difference. The first produces

    Computer: $computer

    The second actually does substitution and produces

    Computer: Tiny

    That means that you really need to pay attention to which set of quotes you are using in code. That’s an area I need to be careful. I also learned about the backtick as an escape character, but that’s an easy one as it’s similar in lots of languages to escape things out for newline and other special characters.

    What’s interesting about PoSh variables, and probably one of the more powerful things, is that the variables can contain objects. That’s big. It’s like being able to overload classes into variables easily and quickly. I’m sure the exercises just scratch the surface, but it’s cool.

    The lab was easy, just getting a job running and putting results in a variable. A combination of a few of the last few chapters.

  • Virtual Lab – Setting up a new VM

    This is part of a series where I set up a virtual lab for testing and misc. work. The other parts in the series are here: Building a Virtual Lab with Hyper-V.

    I have my disks set up, now it’s time to create my virtual machines. I’m going to show you how to create one, but all really are done the same way. The names change, but no matter what my purpose is, this is how I set up the VMs. Once this is done, I’ll use other posts to go into the customizations for each machine.

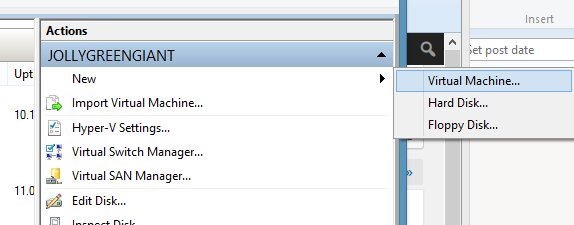
    We’ll start in Hyper-V manager, selecting a new VM.

    virtlab_p

    After the welcome screen, you need to name your VM and choose a location. I’ve got a folder set up for this lab on my machine, so I choose that, and set the name (for this machine) as DenverDC. This will be my domain controller and the first machine I set up.

    virtlab_q

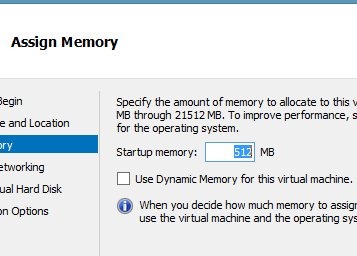
    Next we assign memory. I’ll want more for the SQL Servers, but this is easily changed at a later date, so I’ll leave this alone. One of the advantages of Core is less memory needed, and I could probably get by with less, but since I have 24GB on the host, I can spare half a gig.

    virtlab_r

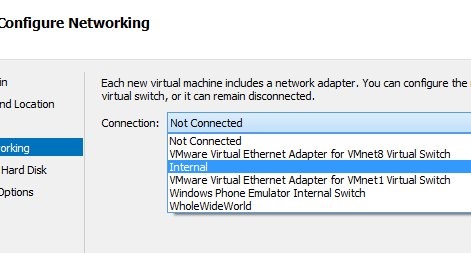
    After memory comes the networking. As you can see, I have a number of choices. The "WholeWideWorld" is the connection some of my VMs use to access the internet. In this case, I’m choosing the Internal network, which is the Internal switch I have set up. This is limited to connections between the VMs and since I want this to be an isolated network, this works fine.

    virtlab_s

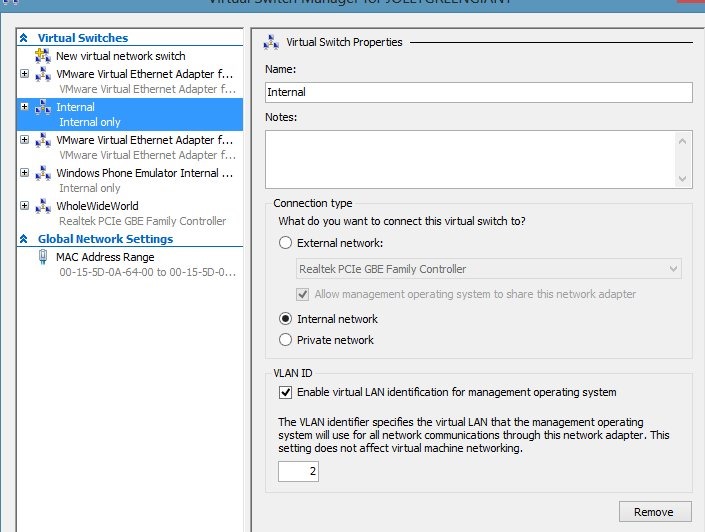
    My internal switch is actually configured as follows:

    virtlab_v

    Now we need to set storage. Since I set up my disks before this and named them in a way that I can understand, I choose the one I need. The default here is a new hard disk, but I’m saving space with differencing disks.

    virtlab_t

    I get a summary. Please check this as you set things up. Note that my differencing disk is set.

    virtlab_u

    I click finish, and I have a VM. I start it up from Hyper-V Manager and connect.

    virtlab_w

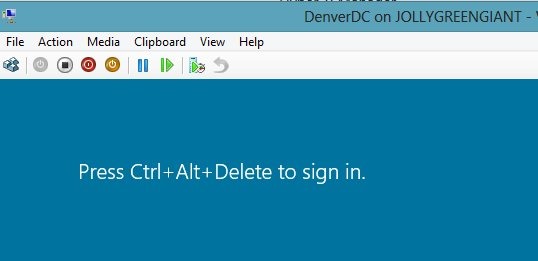
    Inside of Windows, I get the familiar Windows start screen (for Win8/WS2012). I click CTRL+ALT+DEL (leftmost icon on the toolbar) and then get prompted to change my password

    virtlab_x

    I change it,and I’ll use the same admin password on this machine that I use on a number of VMs.

    NOTE: This is NOT the password I use for any other services, including my VMWware VMs. At all. It’s only for Hyper-V VMs, but since I may have a few generations of VMs, I don’t want to forget this password. I also may end up starting up a few random VMs for talks, so I need to be able to get in.

    Once I log in, I get a basic session. Not much in Core.

    virtlab_y

    The only thing I really want to do here is rename the computer. I need to do more, but those will be in other posts. Let’s get the hostname.

    I could start server config (sconfig.exe) and get a basic setup, but I wanted to play with my PowerShell knowledge. So I started PoSh, and Google helped me find the computer name. I also used Google to find out the rename.

    virtlab_z

    The computer name (hostname) comes from

    $env:computername

    It doesn’t make sense, so I rename it with

    Rename-Computer -Newname "DenverDC"

    Once this machine restarts (Restart-Computer), it will have a new name.

    I know that I could use sconfig and it’s fast, or click around on my Standard servers and rename the machine, but once I get used to typing these commands in Powershell, it’s very, very quick.

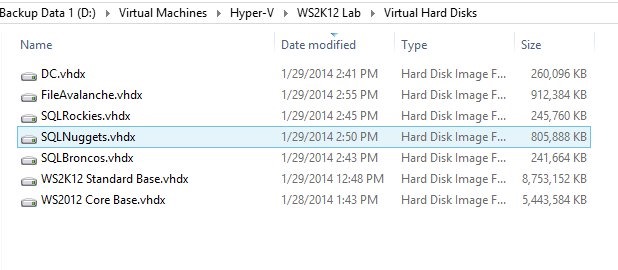
    Note that my disks have been updated with changes. Their sizes have grown from the original 4MB.

    virtlab_aa

    I repeat this process for all the other machines, just to get them set with a password and name. Once they’ve rebooted, they’re ready for the next step.