Tag: Data Modeler

  • Using SQL Compare with Redgate Data Modeler

    Redgate recently released SQL Compare v16, which included a new feature to work with Redgate Data Modeler. I decided to give it a try in this post. I’ll take a model and compare it to a database, and deploy my model.

    There’s a video of this post at the bottom if you’d rather watch me work.

    This is part of a series on Redgate Data Modeler. This is also part of a series of posts on SQL Compare.

    A New Model

    I started a new project, mostly as an experiment to help me practice with some technologies, with the idea that this will become useful at some point in time. In my case, I created a new data model for an event registration system. We could really use one at SQL Saturday/Day of Data and right now everyone that runs an event has to handle that themselves.

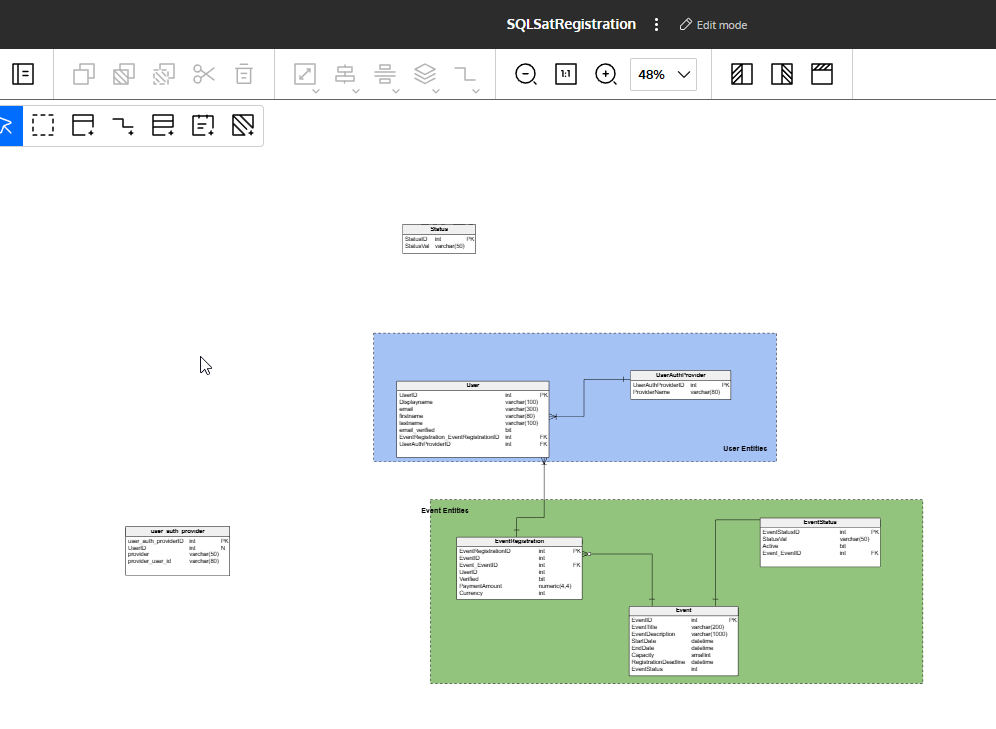
    In any case, here’s my basic starting model. You don’t need to look at the details, just know I started here by creating a model from scratch in Redgate Data Modeler. I have 7 tables that I setup.
    2025-12_0089

    I want to get this model deployed into a database. I could export the SQL, which is fairly easy, but let’s make this easy with SQL Compare 16. I upgraded after the new release, and I want to see how this works.

    Data Modeler Integration

    In SQL Compare we have a new source for connecting to database code. In this case, it is Redgate Data Modeler Integration. That doc pages describes it, but when I open the tool, I can see a new choice in the connection drop down.
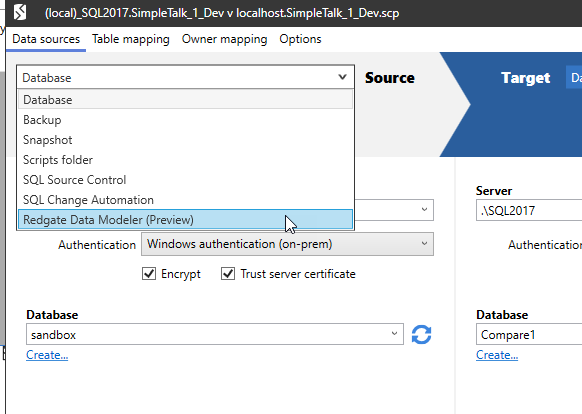
    2025-12_0090

    This is a preview feature for now, but it does work. Once I select this option, I see the settings change. In this case, I need an API to get started.
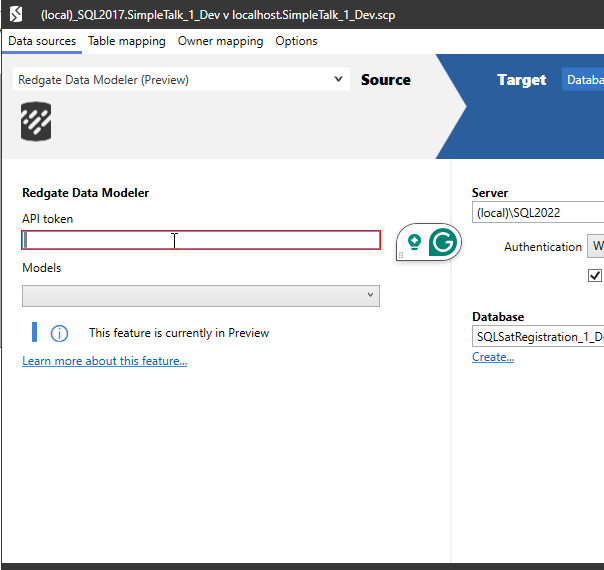
    2025-12_0093

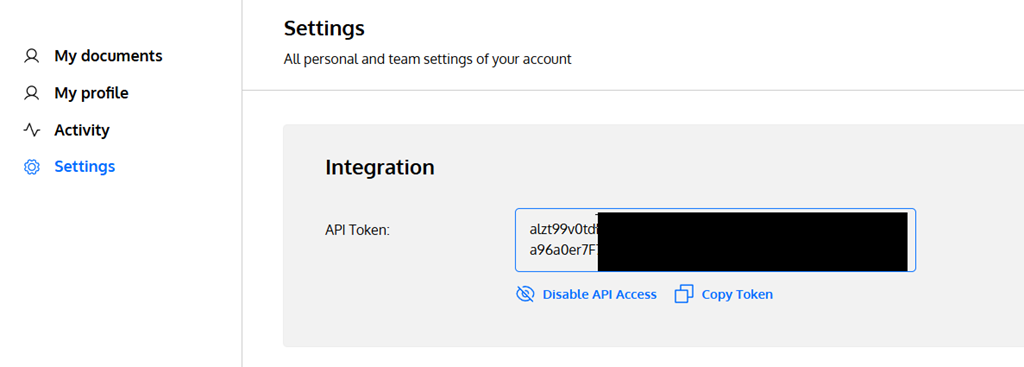
    The documentation says to go to your Settings page in Redgate Data Modeler. When I went there, I got an API section at the top, asking me to enable API access (which I clicked before taking this screenshot) and also a set of Notification Settings below this.

    Once I clicked things, I had the API token listed. I’ve blacked out most of it here, but I clicked the “copy” button to save this to the clipboard.
    2025-12_0092

    I then pasted this into SQL Compare and the model drop down populated. I could see both my models listed.
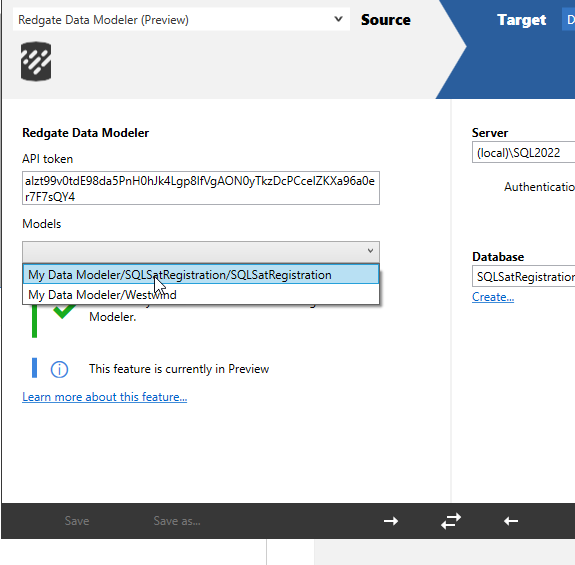
    2025-12_0094

    For the target, I connected to an empty database that I created with this code:

    CREATE DATABASE SQLSatRegistration_1_Dev

    I could see my comparison looked correct, so I was ready to see if I could deploy my model.

    2025-12_0095

    I ran the comparison and as expected, it sees everything as new in the model and nothing in the database. I selected all objects and then clicked Deploy.

    2025-12_0096Since this is the first time I’ve deployed the model, I decided to let SQL Compare do the work.
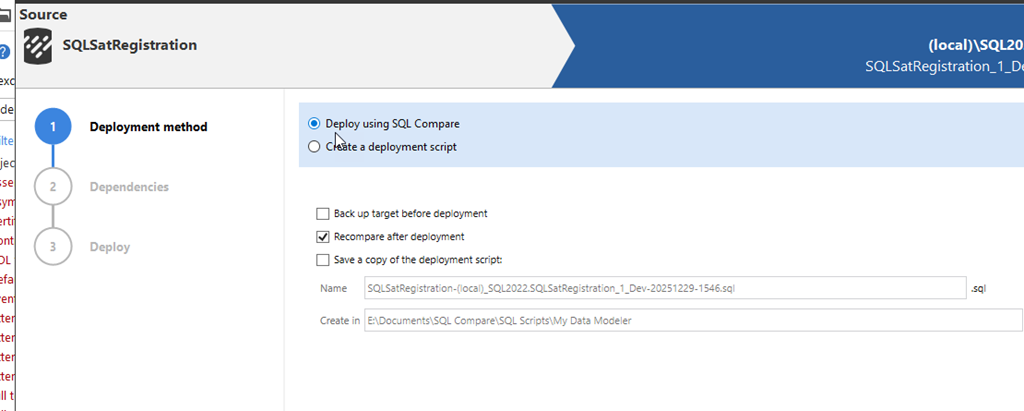
    2025-12_0097

    After looking at the script briefly, I clicked Next and got the final, do you want to deploy, screen. I clicked Deploy here.
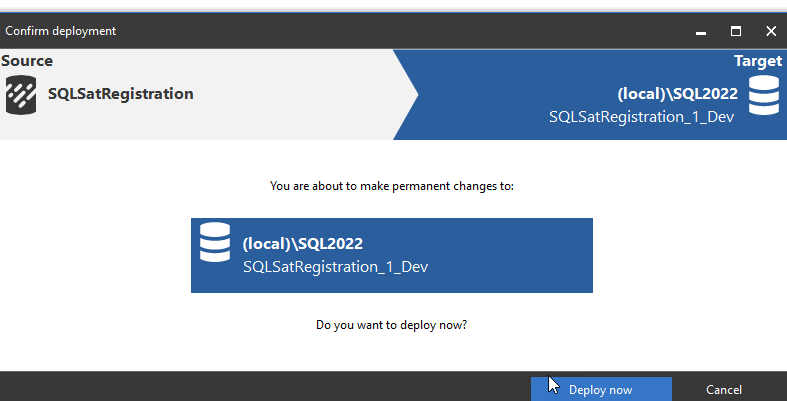
    2025-12_0098

    I had selected the recompare after deployment option, so once this finished, I saw this screen. Everything is the same on both sides of the comparison.
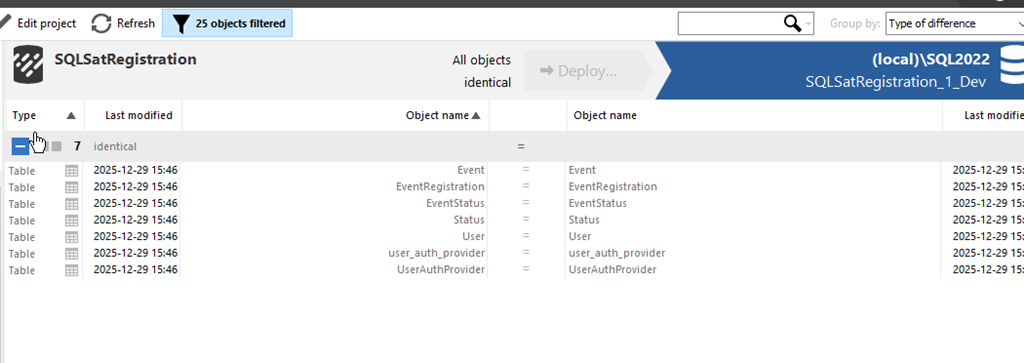
    2025-12_0099

    When I checked my database, I see the objects there.
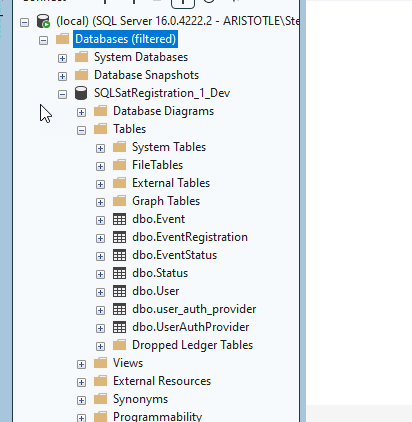
    2025-12_0100

    Summary

    This was a short look at taking a new model I’m working on and deploying it to a database for some actual work. I took a model previously created in Redgate Data Modeler and using SQL Compare, I deployed all the objects to a live database.

    This is a great integration and it’s much smoother than saving a script and then opening that to run it. I like tools working together, and I could see this being handy for architects and modelers that want to quickly test out their changes.

    SQL Compare is an amazing tool that millions of users have enjoyed for 25 years. If you’ve never tried it, give it an eval today and see what you think. Give Redgate Data Modeler a try and see if it helps you and your team get a handle on your database.
    Video Walkthrough

  • Setting PK Names in Redgate Data Modeler

    A customer was testing Redgate Data Modeler and complained that it auto-generated PK names. I had to test and discover if I could make things better, and I could. This post shows how.

    This is part of a series on Redgate Data Modeler.

    Adding a New Entity

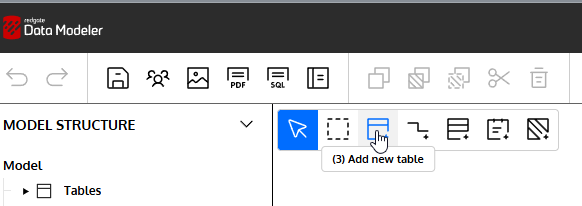
    I can easily add a new Table to my diagram. I’ll click the New Table icon in the menu.

    2025-12_0310

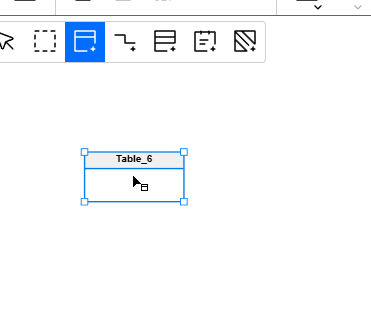
    When I click in the design surface, I get a new table.

    2025-12_0311

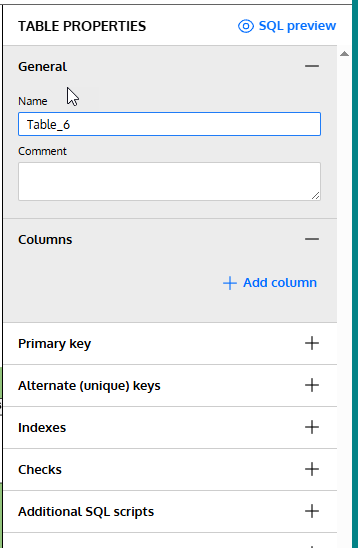
    On the right, I see the table properties. I’ll need to fill these in.

    2025-12_0312

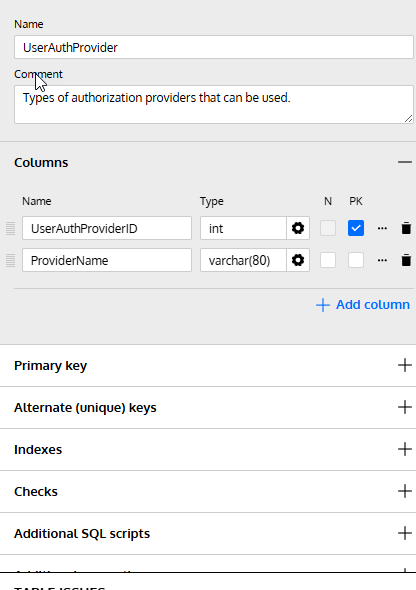
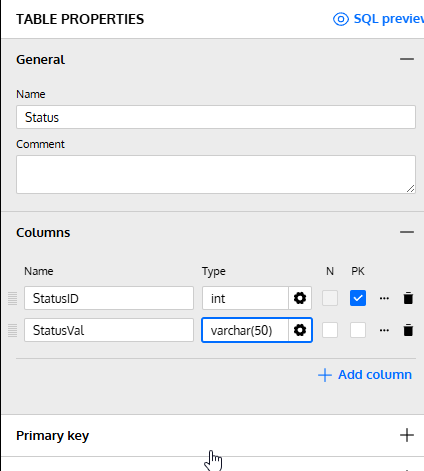
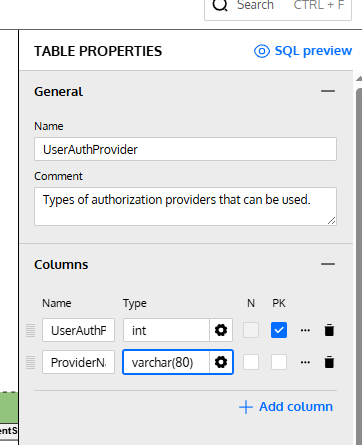
    Let’s change the name and add a few columns to this design. Note that for the first column I checked the PK box. This will be my primary key.

    2025-12_0313

    These are fine for now. Let’s now add adjust the PK.

    Setting the Primary Key Constraint Name

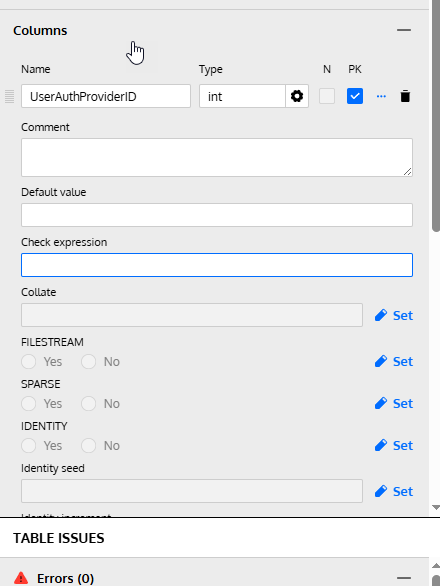
    If I click the three dots next to the PK check, I get a lot of properties for the column, not the PK.

    2025-12_0317

    I need to go below the columns. Notice the sections below the column area. One of these is for the Primary Key.

    2025-12_0318

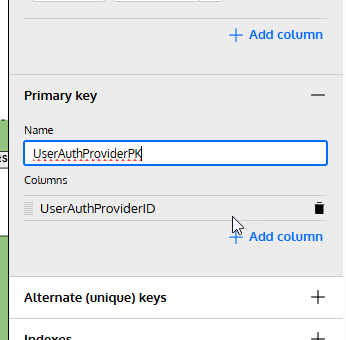
    If I expand this, I can see the name field and columns. This was blank, but I typed in a name that makes sense to me. I could add columns as well here.

    2025-12_0314

    Checking the SQL

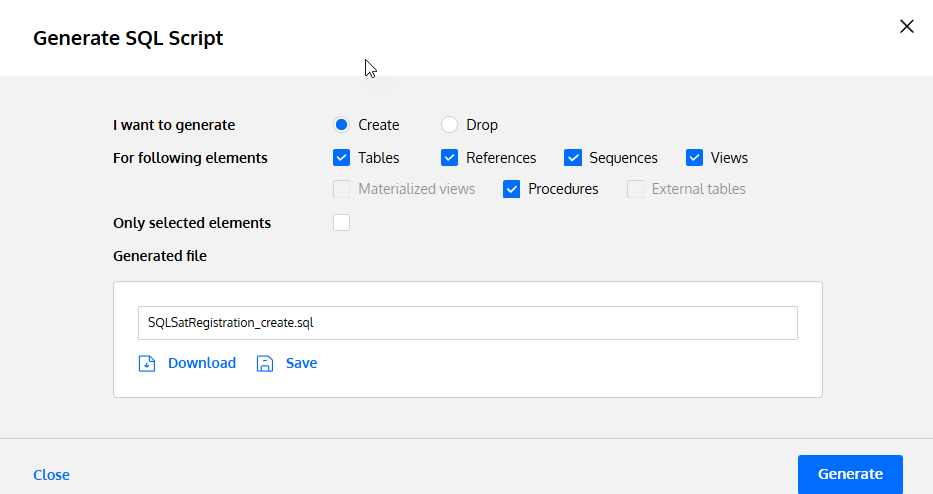
    If I click the Generate SQL button from the top menu, I get a dialog.

    2025-12_0315

    I click the Save button, which will save this to the file specified. I’ve set this in my project before (which is another post), but I am trying to save to a single file for my code that updates.

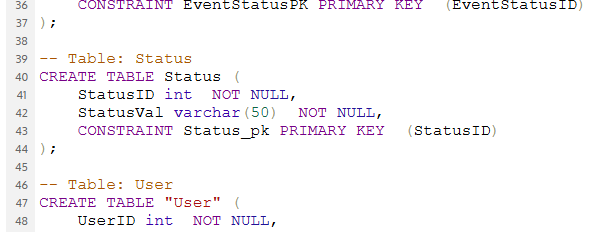
    When I open this code, here is the relevant part of the file. Note that my PK is named appropriately.

    2025-12_0316

    What happens if I don’t do that? I added another table, marked a PK, and this is what I see. First, my table (there is nothing set under the PK tab):

    2025-12_0319

    The SQL code shows a standard similar to mine, but different. I think a lot of people use the underscores, so I’m not surprised this is the setting.

    2025-12_0320

    Not bad, but not what I want.

    Summary

    The Redgate Data Modeler is a basic tool for now, but it does let you set a specific PK name if you want to enforce a standard. This can’t be set as a default, but I’ve submitted a feature request to change this.

    At least I can customize what I want as I build something.

    Give Redgate Data Modeler a try and see if it helps you and your team get a handle on your database.
  • Reverse Engineering a Physical Model Diagram

    I recently wrote about a logical diagram with Redgate Data Modeler. That was interesting, but creating all the objects is a pain. I decided to try creating a physical diagram from an existing database. This post looks at the experience.

    This is part of a series of posts on Redgate Data Modeler.

    Getting Started

    As with the logical model, I right click and choose New document.

    Then I get a list of options. I’ll choose the middle one, Physical Model. This is what I mostly need to work with an existing system. Since I don’t often move models from one platform to the other, a physical diagram can work well for me.

    2025-11_0143

    Once I click next, I get a list of platforms, and I need to enter a name. I’ve done that. Notice that when I select SQL Server, I can alter the drop down for different versions of SQL Server.

    2025-11_0145

    Below this, I see a source box, and a file picker.

    2025-11_0146

    I need a file.

    I’ll go to SSMS and right click my database. I’ll find the Generate Scripts task, as shown below.

    2025-11_0147

    I go through the wizard and mostly pick defaults.

    2025-11_0183

    I do script to one file, not separate ones. I choose all objects.

    2025-11_0184

    Back to Data Modeler with the file. I select this and upload it and see…an error.

    2025-11_0185

    When I open the script, I see lots of non-database stuff.

    2025-11_0186

    I’ll delete this stuff and also a bit at the bottom. I rename this to Westwind.sql, which is what I am importing. Then I was able to import the file and when I clicked “Start modeling”, I ended up with this:

    2025-11_0215

    Redgate Data Modeler (RDM) has detected quite a few relationships. You can see them in the diagram for the explicit ones defined. If I click one, such as the Order to Order Details item, I can see on the right that this is for OrderID in both tables..

    2025-11_0216

    One thing that threw me slightly was two Employees tables. I was wondering what was going on here, but when I clicked the lower one and looked through properties, I can see that this is for a different schema. I wish this were more visible, but it did get detected.

    2025-11_0217

    Cleaning up the Design

    One of the things I like is that I can set areas in the model. This lets me organize things and even convey information to developers and others that work with the database.

    At the top left, I have a series of icons. The last one on the right is the New Area icon. I’ll click this.

    2025-11_0218

    I can now draw an “area” somewhere. Notice the right when I do this. I have properties for this area.

    2025-11_0219

    I’ll add a name and change the color, which gives me way to easily see this area in my diagram. I’ll also drag in the Auditing.Employees table, as this is what I want people to know.

    2025-11_0220

    I can select this and move it (look at the video) and then I see this as a part of my diagram, but clearly separate from other parts. Developers can learn the light red is the auditing schema, which is separate from the rest of the diagram.

    2025-11_0221

    I can add other areas, not just for schemas, but for separating out parts of my database. Often I have a series of entities that I care about, or want to cluster together, and having areas with colors lets me separate these out.

    2025-11_0222

    I might run out of colors in a large database, but I could use lots of pale blues or grays to separate out areas, each of which has a name. That can be helpful to reduce the complexity of the model.

    Adding a New Table

    I can also add a new table if I want. One of the icons at the top is for new tables.

    2025-11_0224

    When I click in the model, a new table appears. The right opens up the properties with a default name (table14). I can change this and add the columns I need.

    2025-11_0225

    Once I’ve finished, I can add a relationship. There is an icon for this.

    2025-11_0227

    I’ll click this and then click and drag from Products to Discount. This gives me a new column in Discount by default, called Products_ProductID. Not a bad name, but in general I want a cleaner name. I’ll edit the relationship to use ProductID in both tables and delete the other column from the model.

    2025-11_0226

    Modeling with an image is a good way to start to visualize how things are setup and where you might be normalizing, or denormalizing data. I also want to know just how many things are in here and what is related to what.

    Moving Forward

    There are more things that can be done with tools like that to help ensure our databases are well designed and perform well. I’ve submitted feedback to the team and asked for some enhancements.

    One of the things I might want to do from here is update my dev db from the model. I’ll show that in a future post.

    For now, I like the idea of getting a model started from my SQL script, though clearly I need a clean script. I’ll do more testing with other scripts for both forward and reverse engineering.

    Give Redgate Data Modeler a try and see if it helps you and your team get a handle on your database.
  • A Quick Look at Redgate Data Modeler

    Redgate acquired a data modeling tool from Vertabelo recently and I wanted to explore how it works. This is a short look at this tool and how it might be useful in working with databases.

    This is part of a series on Redgate Data Modeler.

    A Simple Layout

    The tool is a cloud tool, designed to work in a browser. This negates the need to install anything, but this also means you need to be connected to the Internet to use it. Once you get past the licensing (I won’t show this), you have a basic screen that looks like this:

    2025-11_0169

    There isn’t much to see and this doesn’t feel that intuitive to me, but that’s because I’m not familiar with it. Most tools have some sort of modeling surface to start, but here we have a list of models, of which I have none. That is because this is designed to be used by multiple people across multiple platforms with shared designs. Ideally that’s what many of us want, not a set of project files we have to share, version, copy, etc.

    The icons at the top have two “new” ones at the left, some greyed out ones since I don’t have models, and then some layout ones on the right that control the left, top, and right panes/blades.

    If I right click in the middle, I see two options, which correspond to the two icons on the left: new folder or new document.

    2025-11_0170

    A folder makes sense, as these are for organization. The documents make less sense, as I expected just a modeling diagram. Instead, if I pick this I get three choices: logical model, physical model, and sql script. I’ll choose logical model and go from there.

    2025-11_0206

    Logical Models

    A logical database model is a kind of an outline of your entities and the domain of data you want to capture. When I click this button, I first get asked for a name, which makes sense.

    2025-11_0207

    Then I get a blank canvas that looks like the one below. I have my entities on the left, properties on the write and a canvas with some icons. There’s also a toolbar.

    2025-11_0208

    The icons above the canvas are where you can add entities. You can’t import anything here, which I don’t like, but that was never built. I get that most of us might go from Logical to Physical to SQL, but if I want to get a handle on existing databases, I have to add everything myself.

    Let me start with a new entity. I’ll click this icon.

    2025-11_0209

    Once I do this, I get nothing. The icon is selected, and I need to click on the canvas, and I’ll see an entity. Note that the left shows this as an item with errors, which are reflected on the right in Entity Issues.

    2025-11_0211

    The error is I need an attribute. I can also see the name above on the right, where I can set the name, a comment, and add attributes. I’ll start with a few items that matter for SQL Server Central.

    When I add a title,  want to pick a type. In the attribute table, I can select a gear icon (cog). This is next to the datatype field.

    2025-11_line0002

    This brings up a list of types I can choose. When I choose varchar, I get a box at the top for the length.

    2025-11_line0001

    Once I have filled out what I need, I can see my canvas image is updated with the attributes. Notice that I’ve marked the three attritibutes as required (the M column) and the ArticleID as the PK (the PI column).

    2025-11_line0004

    I’ll add a second entity, that I want to relate. Once I’ve added it, I see the icon at the top for a 1 to many relationship.

    2025-11_0085

    If I click this, I can then click on article and drag to ArticleSchedule. That gives me a visual linkage between the two items.

    2025-11_0086

    If I continue and add a few more entities, I can start to see a nice relationship for my model. I’ve added some many-many relationships, which you can see are different than the one-many.

    2025-11_0087

    Saving the Image

    Once I want, I can save this as an image. There is also the option to share with others in my org, or export a PDF.

    2025-11_0089

    Once I click this, I choose the type and if I’m doing part of the model or the whole thing.

    2025-11_0090

    I click Generate and get a link to download my image.

    2025-11_0091

    When I download it and open it, I see this. An image of just my entities.

    2025-11_0092

    I can also generate documentation. When I click this icon, I get a choice of formats.

    2025-11_0093

    When I generate that, then I open it and see a document. It’s here if you want to look at it, but here’s an image of one page.

    2025-11_0094

    If I click on the Data Modeler icon in the upper left, I go back to the main screen with my model listed in the middle. I can see this is a logical model based on the icon.

    Not a bad little tool to start modeling, though likely for most of the things I do, I’d live in a Physical model with the ability to import from a SQL Script. I’ll look at those features in another post, but this has shown you a quick look at getting started and creating a logical model.

    Give Redgate Data Modeler a try and see if it helps you and your team get a handle on your database.