Tag: Redgate

  • Adding ApplicationIntent=readonly to SQL Data Compare

    Recently someone asked a good question about SQL Data Compare. How can they add applicationintent to the connection?

    If you are using Data Compare, and you are reading from production systems, load is a concern. With Availability Groups (AG), we can point SQL Data Compare to the secondary replicas and limit the load on the writable primary. How can we do that? Well, it’s actually easy.

    We have a doc page for encrypted connections, and we can use the same type of action to work with AGs.

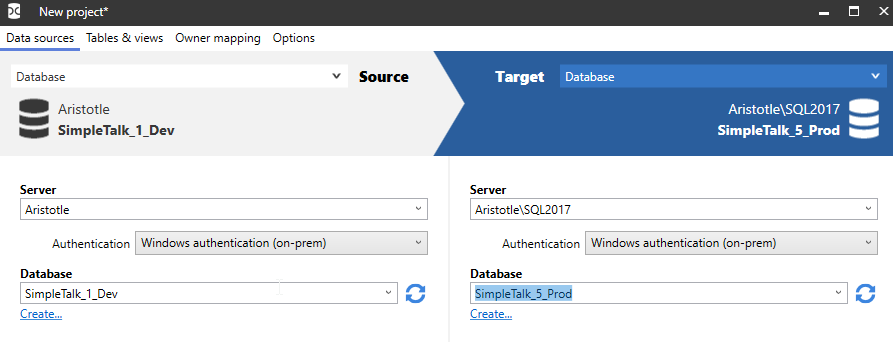
    In a new project, I typically see something like this:

    2020-09-04 12_04_43-New project_

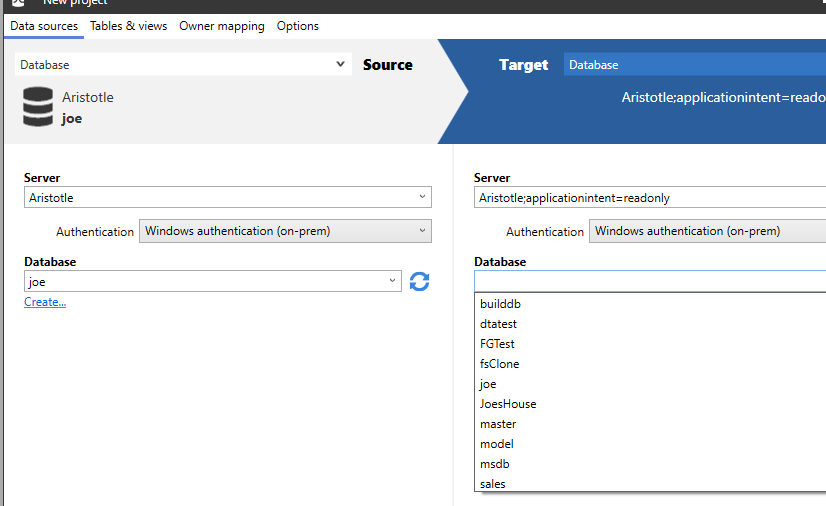
    What I can do is edit the server connection on the right. Just click in there, and then add this:

    Aristotle\SQL2017;applicationintent=readonly

    This will add the option in the connection string.

    2020-09-04 11_51_37-New project_

    If I open the project file, I will see the XML, where I can also edit these connections if desired.

    2020-09-04 12_09_42-E__Documents_SQL Data Compare_SharedProjects_(local)_SQL2017.SimpleTalk_1_Dev v

    I can do this for any of the options I need for connection strings.

  • Exchanging Schemas with SQL Compare Snapshots

    Recently I was working with a customer and they asked if they could somehow package up their schema without the data and send this to a colleague. Absolutely, and that’s one reason we have SQL Compare snapshots.

    Here’s a quick example of this working, where I’ll move a database from my desktop to a laptop. Separate SQL Compare machines and licenses.

    First, I start with a database on my local instance. This is a copy of the ContosoRetailDW that I got from Microsoft. It’s set up, and I want to get the schema to another machine without doing a backup.

    2020-07-28 11_29_28-SQLQuery2.sql - ARISTOTLE_SQL2017.master (ARISTOTLE_Steve (59)) - Microsoft SQL

    I could script this into one big file with SSMS/SMO, but I’d lose some of the flexibility I have with SQL Compare, where I could filter things, set options, etc.

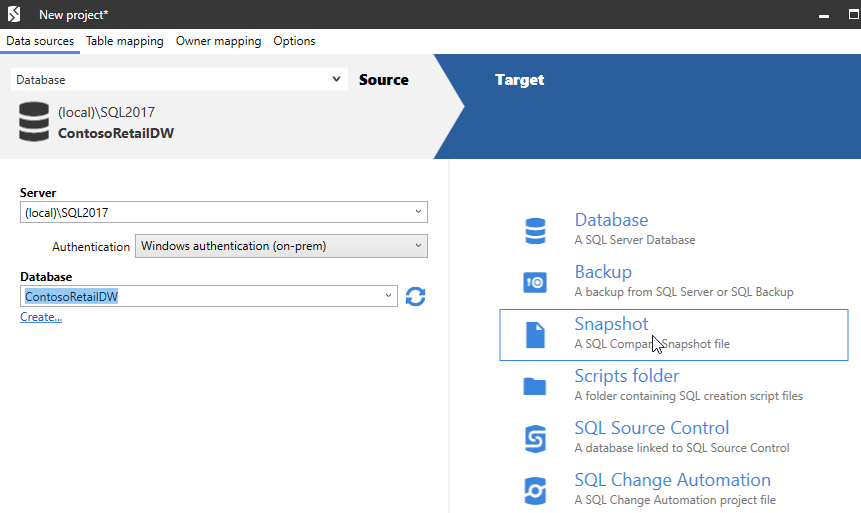
    Let’s start SQL Compare. When this opens, I have the basic dialog asking for source and target. I’ll set the source to my database. For the target, I have many options, the third of which is Snapshot (in SQL Compare 14).

    2020-07-28 11_56_04-New project_

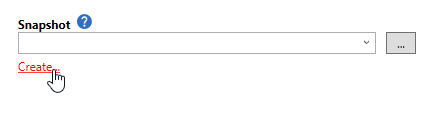
    When I click this, I see a simple dialog. This is because SQL Compare is looking for me to pick a snapshot to compare my database to. I don’t want to make a comparison. What I want to do is create a snapshot, so I’ll click Create.

    2020-07-28 11_56_20-New project_

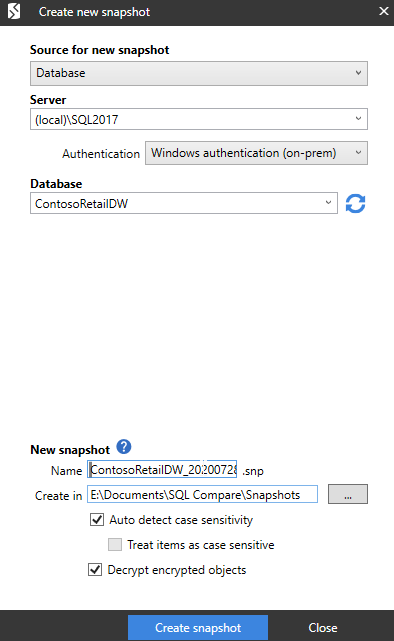
    This gives me a different dialog. Here I connect to a server and database and Compare will create a snapshot. I pick a few options for where to store this and whether to decrypt things and use case sensitivity.

    2020-07-28 11_56_42-Create new snapshot

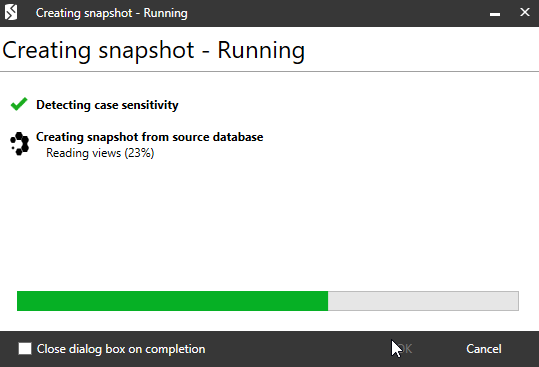
    This runs and Compare lets me know what’s happening at each stage.

    2020-07-28 11_56_49-Creating snapshot - Running

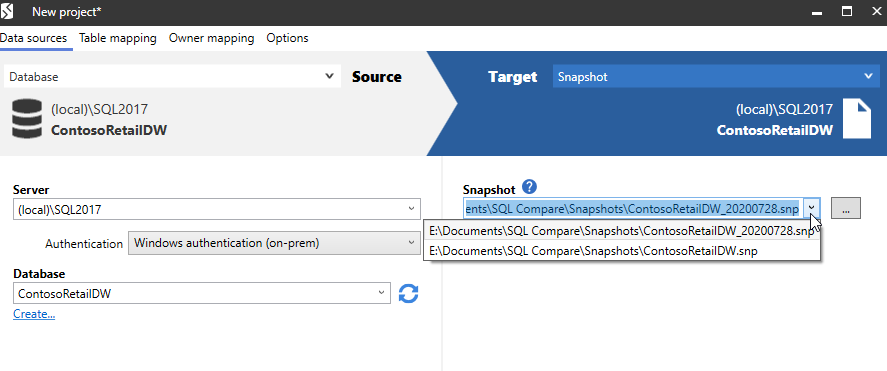
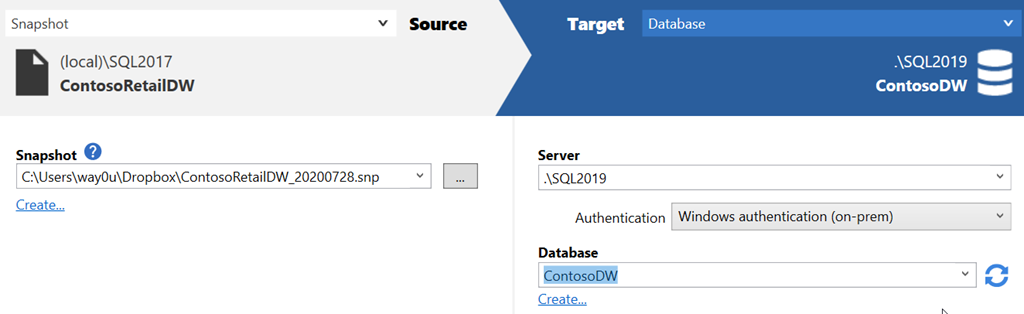
    When this is done, I’m back to the project dialog. Here I can select my snapshot from those in my local folder. Since I’m not going to do anything here, I’ll cancel out of this and close SQL Compare. Then I’ll transfer the file to a laptop.

    2020-07-28 12_04_17-New project_

    Restoring the Snapshot

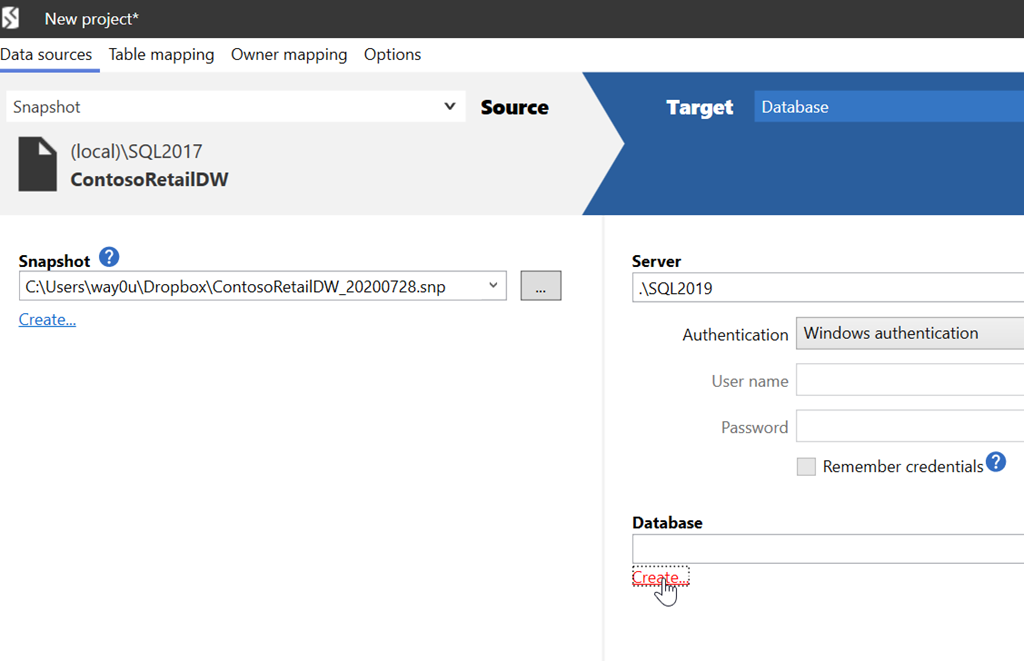
    I can email myself this file and save it on another machine. I’ll do that in the same SQL Compare\Snapshots folder. Now I can open SQL Compare on this machine. When I do, I’ll select the snapshot as my source.

    2020-08-20 08_22_41-New project_

    The target is a database, but in this case, it’s a new one. I’ll create one from the SQL Compare dialog.

    2020-08-20 08_22_55-Create new database

    Once this is created, I can run the comparison.

    2020-08-20 10_01_20-New project_

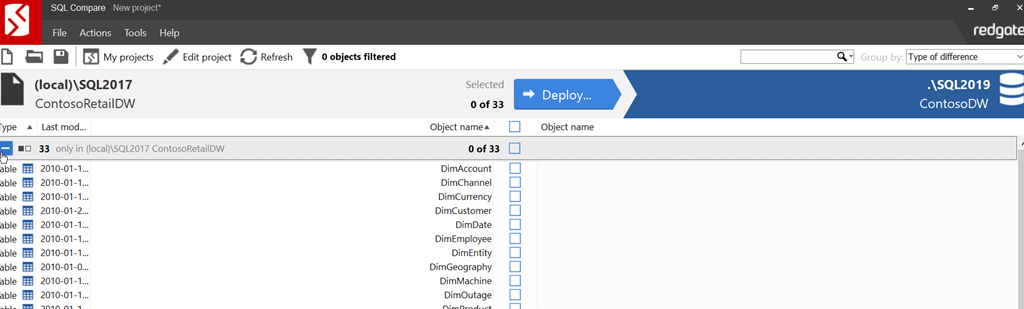
    When this completes, I have the system objects as identical, but I can see there are a number of use objects that don’t exist.

    2020-08-20 10_01_55-SQL Compare - New project_

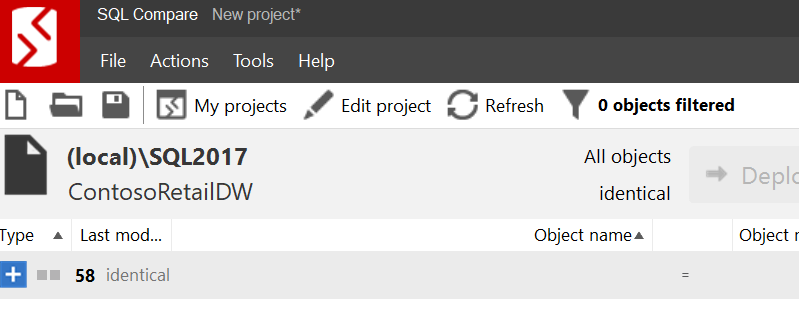
    I can click Deploy and walk through that process. There are a number of confirmations to approve, but I am not showing those. At the end, a new comparison shows things are matching.

    2020-08-20 10_03_07-SQL Compare - New project_

    Note this doesn’t move data, just schema objects. This is primarily for development purposes, though if I needed data, I’d just use SQL Server backup and restore. Or SQL Data Compare if I needed limited data from tables.

    SQL Compare is one of the most popular products from Redgate. If you’ve never used it, give it a try today with an eval. If you have the SQL Toolbelt, make sure you are using Compare to check and move schema changes around in an ad hoc manner.

  • A Quick SQL Change Automation Build

    I was going through a few of the Redgate products with a customer recently and they wanted to perform some validation of the build and release process with SQL Change Automation without setting up Azure DevOps or Jenkins or any server. Not a  bad idea, and a good way to actually learn how to do things.

    Working with PoSh is a little funny, since many of the Redgate cmdlets require objects, not strings, so this is a quick post on how to get a build working and output a nuget package with your database code.

    Prerequisites

    The things you need to do before we get started:

    • Have a SQL Server instance you are a sysadmin of (or at lease create/own dbs)
    • Install SQL Change Automation
    • Set up a SQL Change Automation Project
    • Create a folder for storing build artifacts

    The Script

    I’m going to show the script first, and then I’ll describe how a few things work, since I expect some people want to just get a build working.

    # Build script for SCA projects
    param( $OverrideVersion="3.2")
    # Instance variables
    #    BuildInstance - SQL Server instance name for building 
    $BuildInstance = "Aristotle"
    
    # Database Variables
    #    BuildDB - existing database used for build connection. Won't be altered
    $BuildDB = "builddb"
    
    # Package Variables
    #    PackageID - Set the nuget package name to be used
    #    PackageVersion - suffix on nuget package id.
    $PackageID = "SimpleTalkDB"
    $PackageVersion = $OverrideVersion
    
    # Path variables
    #   ProjectFile - full local path to the SCA project file (.sqlproj)
    #   BuildArtifactPath - Path where the Nuget package is stored
    $ProjectFile = "E:\Documents\git\SimpleTalkDemo\SimpleTalkDB\SimpleTalkDB.sqlproj"
    $BuildArtifactPath = "E:\buildartifacts"
    
    # Debug
    # Use Continue to get more output
    $DebugPreference = "SilentlyContinue"
    
    # Setup database connections using variables from above to the build instance
    $BuildConnection = New-DatabaseConnection -ServerInstance $BuildInstance -Database $BuildDB
    
    # Build the database with a validate
    $ValidProject = Invoke-DatabaseBuild $ProjectFile -TemporaryDatabaseServer $BuildConnection 
    
    # Get the artifact and write to disk. Note the name comes from the package vars above.
    $buildArtifact = New-DatabaseBuildArtifact $ValidProject -packageId $PackageID -PackageVersion $Version
    
    Export-DatabaseBuildArtifact $buildArtifact -Path $BuildArtifactPath

    This is a basic script that validates a SQL Change Automation project and packages up a particular version of your project.

    The way this works is as follows. First variables. For the build I need to change these:

    • BuildInstance – where will I run the build
    • BuildDB – I just need an existing database for the build. We actually won’t use this.
    • PackageID – Name for the nuget package
    • PackageVersion – What version. This can be passed into the script as a parameter
    • ProjectPath – Where is the sqlproj file from SQL Change Automation
    • BuildArtifactPath – Where am I storing the artifacts.

    The flow of the script is:

    • Set variables
    • Create a connection to a SQL Server (New-DatabaseConnection)
    • Build, which is to perform a project validation on a SQL Server (Invoke-DatabaseBuild)
    • Create the artifact in memory (New-DatabaseBuildArtifact)
    • Write the nuget package to disk (Export-DatabaseBuildArtifact)

    From here, I’d use the Nuget package as the start of a release process, another post for another day.

    I can override the package version with a parameter, so I can enter this on the cmd line:

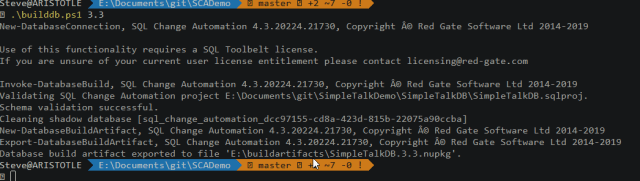
    .\builddb.ps1 3.3

    That gives me a build that works on my system.Successful build from PoSh

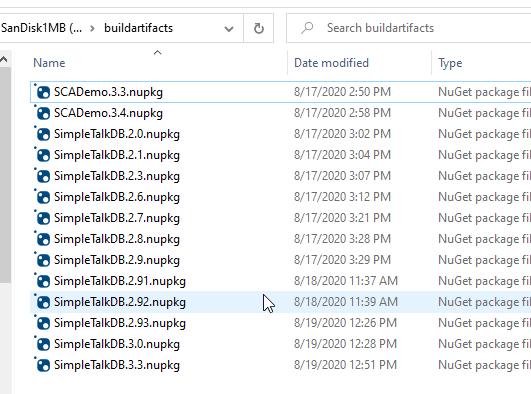
    In my folder for BuildArtifacts, I see the new package.

    List of nuget packages in folder

    Give it a try, and let me know if this works for you.

  • Installing FlywayDB

    I’ve been working on a demo for a customer. Part of the demo uses a new Redgate product, but Flyway is a part of that. In testing a couple things, I realized that I didn’t have FlywayDB installed on  this new machine, so I did a quick walkthrough.

    Installation

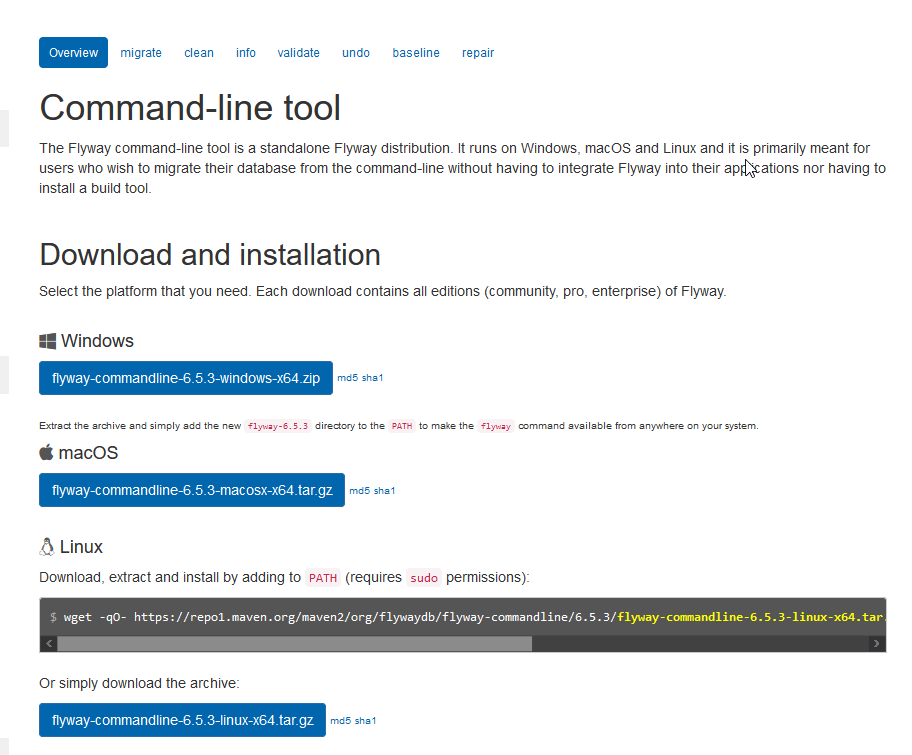
    This is actually simple, or fairly simple. First, download the .zip file from Flyway.
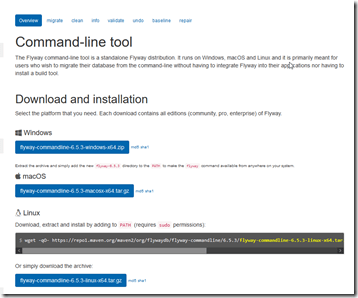
    2020-08-06 10_41_58-Command-line - Command-line tool - Flyway by Redgate • Database Migrations Made

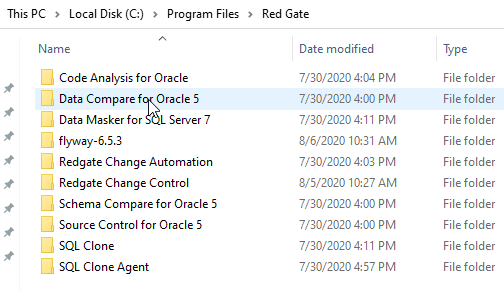
    Next, put this somewhere. For me, I wanted to be organized, so I put this in C:\Program Files\Red Gate. This did require some UAC approval to unzip the download into this spot.
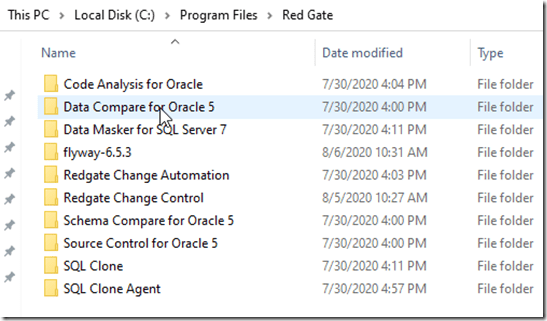
    2020-08-07 16_38_20-Red Gate 

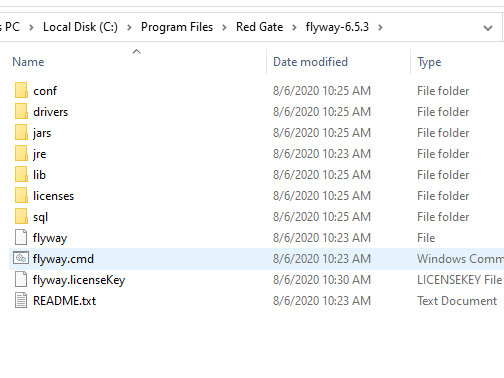
    Once I did this, I saw the flyway.cmd file in the subfolder. The instructions note I need to add this to my path.
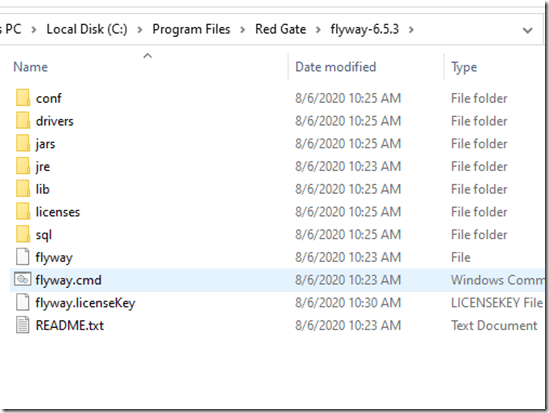
    2020-08-07 16_38_48-flyway-6.5.3

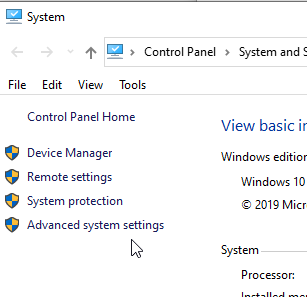
    There are different ways to add things to the path, but the quickest for me on Windows 10, is to get to the properties of “This PC”. There is an advanced system settings here.
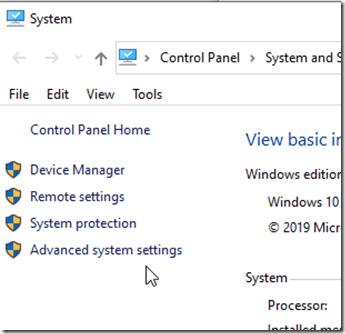
    2020-08-07 16_39_24-System

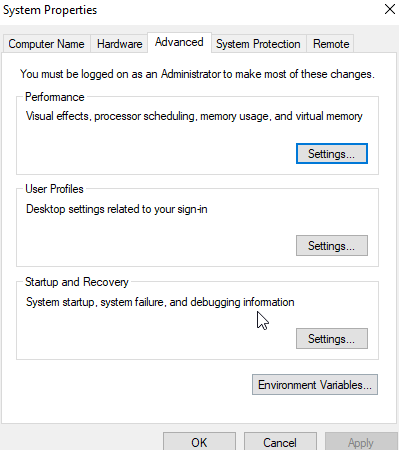
    This let’s me see properties, including the “Environment Variables” at the bottom.
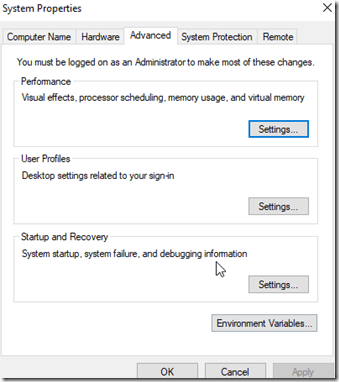
    2020-08-07 16_39_30-System Properties

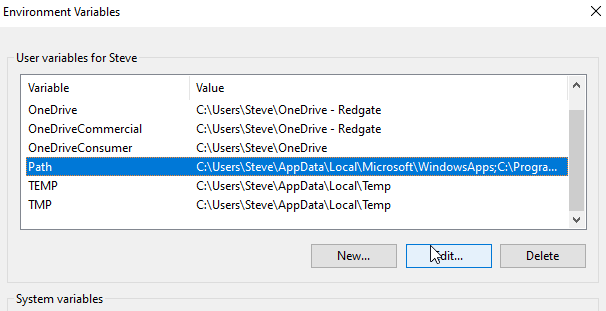
    Clicking this shows me the various system variables, including the PATH.
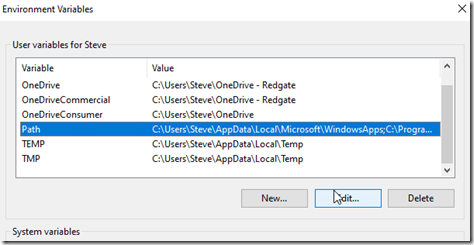
    2020-08-07 16_39_41-Environment Variables

    If I edit this, I get a standard dialog where I can add the Flyway folder.

    Once done, I can test this with “flyway info” at a command prompt.


    One note, if I have a command prompt open, I need to restart it to get the new path.

    Licensing Flyway

    This is an interesting item. I didn’t directly find an answer in the quick start. Most people probably use the Community edition, so they don’t need a key. I, however, wanted to play with the Enterprise version. I got a key from Redgate, and then set the environment variable. As you can see below, this isn’t enough. I got an error that I didn’t have a license.

    2020-08-06 10_37_08-cmd

    I wasn’t sure if flyway.licenseKey is a file or a setting. I looked around a bit, and on the download and install page, I found an item doe the Configuration. This mentions that the first place Flyway looks is the install folder/conf/flyway.conf. Aha!

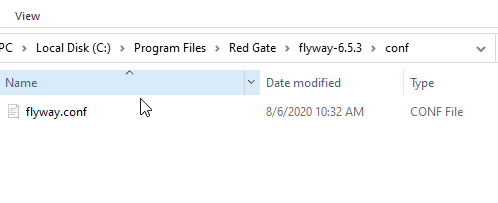
    I looked in the conf folder under my Flyway install. Under here is the flyway.conf file, which is a key-value configuration file. It reminds me of the old  Windows 3.1 .ini files.
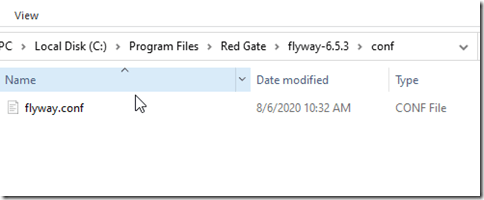
    2020-08-06 10_34_25-conf

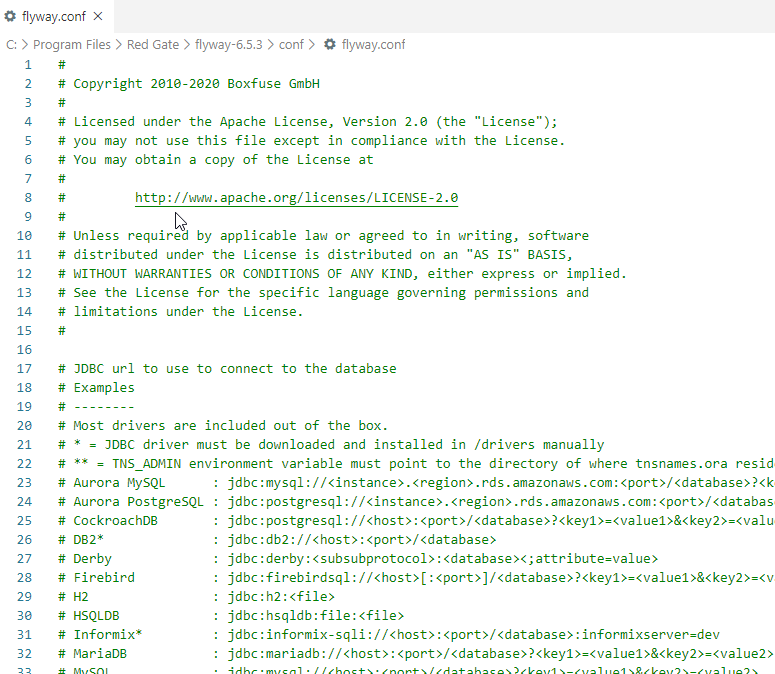
    When I open this, I see a lot of values. These are mostly commented out with a #. If you need to enable a value, remove the comment at the start of the line.
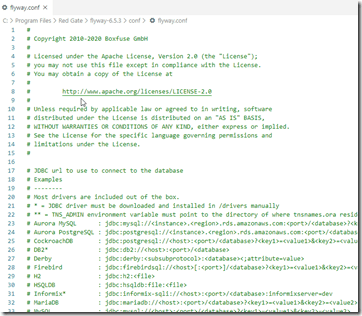
    2020-08-06 10_35_55-flyway.conf - Visual Studio Code

    Scrolling to the bottom shows me that the last entry is for the license key. I removed the comment character (# ) and then pasted in my key.
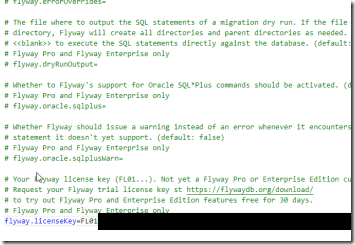
    2020-08-06 10_39_08-flyway.conf - Visual Studio Code

    The next time I ran flyway info I see this:

    2020-08-12 14_06_29-cmd

    No license message, though obviously I haven’t set up the connections yet.

    That gets me started, and I know things are installed. Now I need to start using it, which is something for another post.