Tag: syndicated

  • Virtual Lab – Design and Setup

    This is part of a series where I set up a virtual lab for testing and misc work. The other parts in the series are here: Building a Virtual Lab with Hyper-V.

    I haven’t had a good lab set up since I moved from VMWare to Hyper-V on my systems. Since then I’ve had a number of random VMs set up, but none connected in any meaningful way as a domain. They were all standalones, but that needs to change.

    I wanted to do some additional testing with a few Windows and SQL features that needed a domain. So I decided to set one up with Hyper-V.

    I googled around and found a few references:

    I decided to try to do some of this myself, using these as guides, but also incorporating some of my new Powershell knowledge along the way. I won’t claim this is the best way to build a virtual lab, but this is the way I did it by cobbling together various piece of information.

    With that in mind, here’s what I’m looking to do. I want to create a domain with a few servers and a client for testing. I plan on making this setup on a separate network, using the 10.10.10.x address space as I don’t expect to run into networks with that one at home, or work.

    The machines I’m looking for are as follows. The role, OS, and then names are listed below:

    • DC (WS2K12 R2 Core) – DenverDC
    • SQL Server instances (WS2K12 R2 Core and Standard) – Broncos, Nuggets, and Rockies
    • File Server (WS2K12 R2 Standard) – Avalanche
    • Client (Win 8) – Keystone

    I’ll be running through the process and trying to document this for myself, and others.

    First Steps

    The first steps here are easy. I have Hyper-V setup, but if you don’t, it’s an easy confg item you can see at the beginning of this article.

    Next, download software. I didn’t have Windows Server on this machine, so I accessed MSDN and downloaded Windows Server 2012 R2. I have an MSDN license, so I get a few licenses. As this was downloading, I made not of the product keys.

    I’ve had a space on my machine setup. Since I used to use VMWare and Hyper-V, I have a space on my spare drive where I separate Hyper-V and VMWare. Inside the Hyper-V folder are my VMs for quick copying to my external drives and laptop as backups. In this case, I’m setting up a “WS2K12 Lab” folder.

    virtlab_g

    The Parent

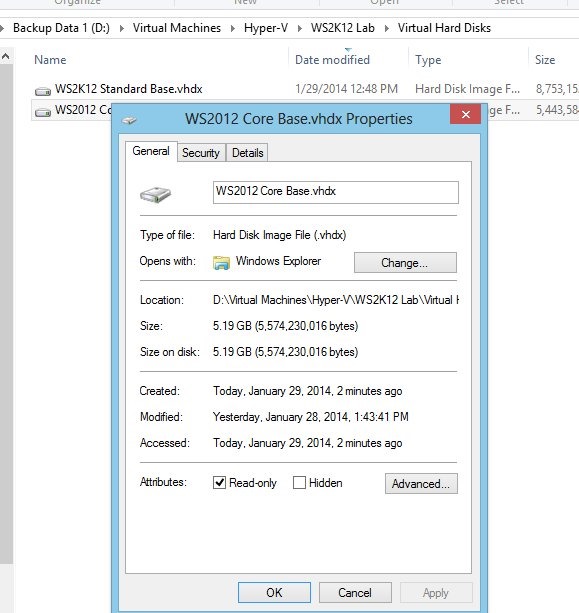
    This is a standard setup I’ve seen in all the tutorials. Create a VM, create a new hard disk (I used defaults), install Windows Server, and run “sysprep” on the VM. I did this with both Core and Standard Server. This gave me two hard disks that had images of the server systems on them.
    virtlab_h

    I first set these disks to “read only” and then deleted the parent VMs. This gets me the base systems on which I will build things. I’ll deal with the Win 8 client later.

    That’s all I’m talking about here. I’ll move into the rest of the steps in future posts.
  • SQL Deep Dives at Intersection in April

    SQL_SP14_300x250_v2

    SQL Intersection is coming to Orlando in April, along with the rest of the Dev Intersection events the week of the 13-16th. I’ll be there speaking, along with an amazing lineup of other SQL Server experts. The SQLskills crew is headline and organizing the event and I’m looking forward to going.

    This is a smaller conference, and it’s located at an amazing facility in Orlando. It will be warm, relaxing, and a great environment to learn a ton about SQL Server.

    If you’re looking to jumpstart your SQL Server skills and get excited about the platform, consider joining me in Florida this April.

  • Powershell in a Month Day 15 – Jobs

    This is part of my Powershell Challenge, to learn more about PowerShell (PoSh) using the Learn Windows Powershell 3 in a Month of Lunches book by Don Jones.

    Jobs are important, mostly because running stuff interactively, and manually, is a pain. The real power of PoSh administration, in my mind, is that not only can I run things across lots of servers, but I can also have some jobs run automatically. The Windows Scheduler isn’t always a part of this, though I’m not sure the PoSh system is better after reading this chapter.

    It’s a short one, but one that I did like. I’ve always liked scheduling jobs and having them do work for me. I can see this being handy, but the processing of results is something that will be important. That means saving this stuff off and practicing formatting.

    It’s an interesting approach here. The chapter has you create some jobs and then it explains how they work. Getting results, stopping jobs, checking them, etc. all occur as you have jobs running. All good admin things. I have the feeling I’ll refer back here as I build jobs.

    The scheduling comes after there’s an explanation of jobs themselves. We learn briefly how to schedule, but not in detail. To be fair, there isn’t a lot to worry about here.

    The lab was fairly easy. Most of the items were things I know how to do from the past, or I learned here. The recursing into subdirectories was a little tricky since I’ve used “/s” forever, but I needed to understand in PoSH that -recurse and -filter were needed here.

    I’ll be looking to play with some scheduled jobs that might clear out old files on my machine, especially backups. This would be some good practice for a job. I certainly should create a job to trim out IIS log files since that’s something I’ve seen needed on every web server I’ve encountered.

  • Powershell in a Month Day 14 – WMI

    This is part of my Powershell Challenge, to learn more about PowerShell (PoSh) using the Learn Windows Powershell 3 in a Month of Lunches book by Don Jones.

    Day 14 introduces us to Windows Management Instrumentation (WMI). Since many people might not be familiar with WMI, the chapter spends a little time trying to help you understand what WMI is.

    I know what it is, I hate it, and I agree, it’s a PIA. It’s a mess, it’s inconsistent, and I’m not surprised the Powershell barely integrates with it. As with the cmdlets, this shows that there are the WMI cmdlets and the newer CIM cmdlets. The old ones like

    Get-WMIObject

    are somewhat deprecated. They work, but no development is being done. Instead, we need to use

    Get-CIMInstance

    That makes sense to me and I understand it. With no legacy work, I don’t think I have any issue with using Get-CIMInstance, though I do hate the idea of querying the WMI spaces. They’re a mess and nothing is intuitive.

    gwmi -class win32_bios -computer localhost,JollyGreenGiant | format-table @(l=’Host’;e={$_.__SERVER}

    There’s more to the table, but that’s all I typed in to test. I did a few more queries, with this and Get-CIMInstance to practice, but most of this chapter is really just understanding how WMI is organized to look for things and then formatting the results. Easy enough to do, a little boring, but good practice with expressions.

    The lab was annoying, mostly because it’s asking you to figure out which WMI classes to query. I googled around for some, and found them, but mostly this is annoying. I can certainly see where it’s handy to understand how WMI queries work, but like most people, I prefer to avoid them.

    Short chapter, easy, and good practice formatting things.