Tag: windows

  • Virtual Lab – New Domain User

    This is part of my series on building a virtual lab for use with SQL Server and Windows. You can see the entire series here: Building a Virtual Lab with Hyper-V.

    After the domain was up, I needed to add users. Specifically, I didn’t want to use administrator for all actions, since that bothers me. It just seems like a poor practice. I also needed service accounts. The accounts I needed:

    • sjones
    • Broncos SQL – for this SQL Server
    • Nuggets SQL – for this SQL Server
    • Rockies SQL – for this SQL Server
    • Joe – my test SQL account, without sa rights.

    I’ll probably need more, but these are good for now.

    Domain Users

    I used the script in this post, in a variation, at the command line. I didn’t need all the fields, so this is what I used.

    New-AdUser -SamAccountName "BroncosSQL" -Name "Broncos SQL" -Enabled $true -ChangePasswordAtLogon $false -PasswordNeverExpires $true -AccountPassword (ConvertTo-SecureString "MyPassword" -AsPlainText -Force)

    Note: That wasn’t the password I used. I used a complex, 12 character, upper/lower case, numbers, etc. password.

    I repeated this for all the users.

    Domain Groups

    For the most part, I don’t need, or want, to assign extra rights for these accounts. The SQL Server setup will assign local rights, and I’ll modify if needed. However I do need to grant domain admin rights to my main account to log on and run the domain at times.

    I went back to basics, with TechNet documentation. I need the Add-ADGroupMember cmdlet to add someone. However, I also need the groups. I searched, and Spiceworks shows up again. I ran this:

    Get-ADGroup -filter * -properties GroupCategory | ft name,groupcategory

    and got this list:

    groups1

    I want to add sjones to the Domain Admins group. Using the Add-ADGroupMember, I ran this:

    Add-ADGroupMember "Domain Admins" sjones

    And it worked. I could easily log on and administer other machines with this account.

  • Virtual Lab – The Domain

    This is part of my series on building a virtual lab for use with SQL Server and Windows. You can see the entire series here: Building a Virtual Lab with Hyper-V.

    The big thing in setting up a domain is to enable you to connect multiple machines together, experiment with things like Powershell Remoting, AlwaysOn, etc.

    There are a couple things you need to do here. The first is to install a domain controller on one of the VMs, and then you need to join the remaining computers to the domain. This isn’t that hard, and I’ll show you two ways to do this: the GUI and PoSh.

    Create a Domain Controller

    I followed instructions to build a domain from TheSQLPro, since that was the first, and simplest instruction I had. I connected to my ServerCore installation named DenverDC and ran this:

    Install-windowsfeature -name AD-Domain-Services

    Then

    Install-ADDSForest –DomainName “SSCLAB.LOCAL” -DomainMode Win2012 -DomainNetbiosName “SSCLAB” -ForestMode Win2012

    I entered both of these from Powershell and restarted the VM.  I then ran a

    Get-ADDomain

    and as you can see, I have a domain set up on this machine.

    ad

    Joining the Domain from the GUI

    The first step is to be sure that you have connectivity between your machine and the DC. I had to ensure I could ping back and forth, both by IP and computer name. I also made sure to set my DNS to the domain controller. In my case, this was the DenverDC at 192.168.1.200.

    Once I was fairly sure I had networking down, I went to the control panel on one of the machines. I went to the computer properties and clicked the "Change Settings" link.

    virtlab_af

    From there, I had the basic properties. As you can see below, I was in a workgroup. The first thing to do is click the "change" button.

    virtlab_ag

    Once that’s done, you have the workgroup/domain set of radio buttons. I clicked the domain item and entered the name of my domain.

    virtlab_ah

    You get a credential box where you need to enter credentials. I believe these are the DC level credentials. For this lab, I have the domain and local administrators all using the same user/password (Administrator/mypassword) and entered that.

    virtlab_ai

    If networking is working, it should take a minute and then you’ll get this:

    virtlab_aj

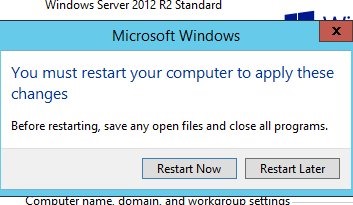
    As soon as you click OK, you’ll get told this requires a reboot. It does, so restart.

    virtlab_ak

    Once you restart, if you go back, you should see that you are in the domain in the computer properties.

    virtlab_al

    Joining from Powershell

    I found this cmdlet that worked for me.

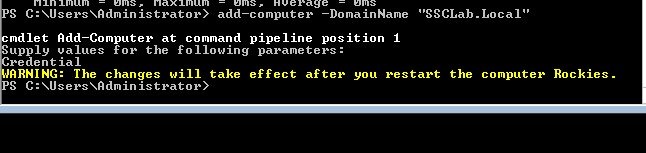
    Add-Computer -DomainName "SSCLab.Local"

    Once I typed this in, I got a dialog box asking me to enter the administrator credentials. I did that and it worked. I had to reboot with a restart-computer.

    virtlab_an

    And we’re working

    virtlab_ao

    Errors

    I did get an error on one of my VMs. It was error 0x21C4 on a Server Core installation. When I looked that up, I got a duplicate SID error. I had sysprep’d the machines, but perhaps I broke something. In any case, I re-ran sysprep, reset the network config, renamed the computer, and then joined the domain as noted above.

  • Virtual Lab – Adapter Setup

    This is part of a series where I set up a virtual lab for testing and misc. work. The other parts in the series are here: Building a Virtual Lab with Hyper-V.

    Once I had the machine up and running, I knew I needed to get the networking setup. One of the things I’ll do is do some clustering tests, and for that, I need to have static IP addresses. I’m an older, IPv4 guy, so that’s what I’ll use here.

    I decided to put all my machines in the 192.168.1.x space. I’ll use these addresses:

    • DenverDC – 192.168.1.200
    • Broncos – 192.168.1.201
    • Nuggets – 192.168.1.202
    • Rockies – 192.168.1.203
    • Avalanche – 192.168.1.204

    I’ll deal with the client machine when I get there. For now this is what I need to worry about.

    The machines are set up and passwords changed. I now need to start them and get networking configured. I googled and found this TechNet article on using PowerShell to configure a NIC. There’s also the Configure a Core Server. I know you can use sconfig to do this easily, but I wanted to see how hard it is in PoSh. In the Standard edition, it’s easy to use the GUI as well.

    First I needed to know what adapters I have. I ran

    Get-NetAdapter

    This told me my main adapter was “Ethernet 2”. So I ran this:

    $netadapter = Get-NetAdapter -Name “Ethernet 2”

    The first step is to remove DHCP. You’d do this by changing a radio button on the adapter settings. In this case, we do it with PowerShell.

    $netadapter | Set-NetIPInterface -DHCP Disabled

    Next we want to set up our IP address. In my case, I’m going to use the 10.10.10 address space.

    $netadapter | New-NetIPAddress -AddressFamily IPv4 -IPAddress 192.168.1.200 -PrefixLength 24 -Type Unicast -DefaultGateway 192.168.1.1

    Once that is done, we can then look at DNS. In this case, I’m going to point it to my gateway, which doesn’t really resolve to anything (yet).

    Set-DnsClientServerAddress -InterfaceAlias “Ethernet 2” -ServerAddresses 192.168.1.200

    I repeat this for all my servers, getting them all set up with their proper IP addresses. Once I’m done, I have 5 servers running with the IPs above.

    However none of them can ping each other. That’s strange, but not unexpected. The mindset to increase security by default is likely to blame. I don’t know what the exploits that can come through ping (DOS I guess), but I know more and more companies avoid allowing ping responses.

    Turn off the firewall

    I decide that I need to turn off the firewall to check. Since I have 2 Standard installations and 4 Core installations, I go to the Standard ones first and use the GUI to kill the firewall for my networks. It was at this point that I realized that by default my connections saw the network as public connections, not private.

    I turn off the public connection firewall and pings work from one of the Core servers. Then I turn that on and disable the private firewall. Pings fail.

    Now I know what to do. First, I use a security change in the GUI to set my Server with the Local Security Policy app in Windows. Once this is done, I set things to private, disable that firewall and verify pings work. I know this works, and now I’m ready to change the other servers.

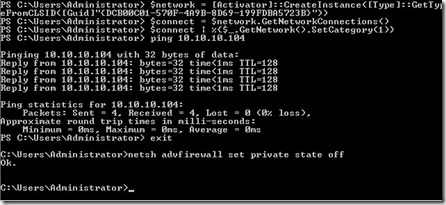
    I find a script on MSDN Blogs that shows me how to do this in PoSh. It’s a strange script, and it doesn’t give any results, but it seemed to work.

    $networkListManager = [Activator]::CreateInstance([Type]::GetTypeFromCLSID([Guid]”{DCB00C01-570F-4A9B-8D69-199FDBA5723B}”))
    $connections = $networkListManager.GetNetworkConnections()
    # Set network location to Private for all networks
    $connections | % {$_.GetNetwork().SetCategory(1)}

    Once I ran this, I then needed to turn off the firewall. I found this link and then ran this command.

    netsh advfirewall set private state off
    virtlab_ab

    That worked, and then you can see my ping worked.
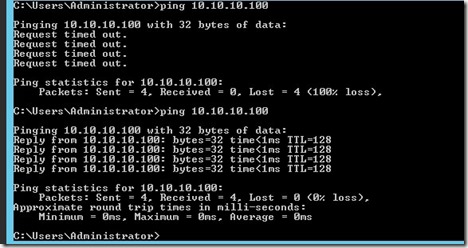
    virtlab_ac

    The top image above is from the machine I was working on. The bottom one shows the ping failing from my SQL machine to the DC, and then working once I’d disabled the firewall for the private network.

    Update: I originally wanted to work in the 10.x.x.x space, but I kept confusing myself, so I moved all the machines to the 192.168.1.x network.

    Rinse, repeat for all machines. Eventually I have every machine pinging every other machine and able to connect.

    Networking working.

  • Virtual Lab – Setting up a new VM

    This is part of a series where I set up a virtual lab for testing and misc. work. The other parts in the series are here: Building a Virtual Lab with Hyper-V.

    I have my disks set up, now it’s time to create my virtual machines. I’m going to show you how to create one, but all really are done the same way. The names change, but no matter what my purpose is, this is how I set up the VMs. Once this is done, I’ll use other posts to go into the customizations for each machine.

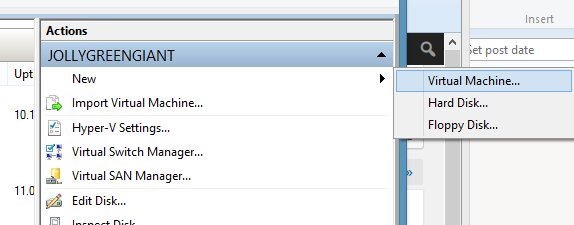
    We’ll start in Hyper-V manager, selecting a new VM.

    virtlab_p

    After the welcome screen, you need to name your VM and choose a location. I’ve got a folder set up for this lab on my machine, so I choose that, and set the name (for this machine) as DenverDC. This will be my domain controller and the first machine I set up.

    virtlab_q

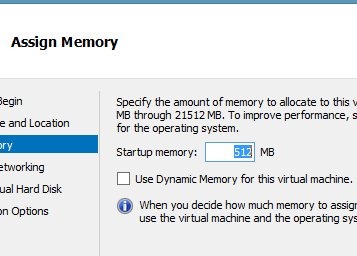
    Next we assign memory. I’ll want more for the SQL Servers, but this is easily changed at a later date, so I’ll leave this alone. One of the advantages of Core is less memory needed, and I could probably get by with less, but since I have 24GB on the host, I can spare half a gig.

    virtlab_r

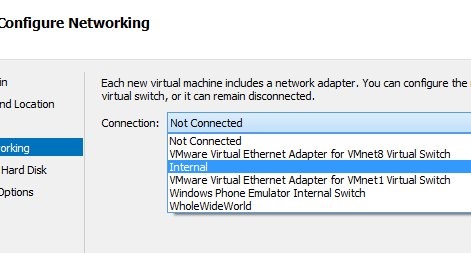
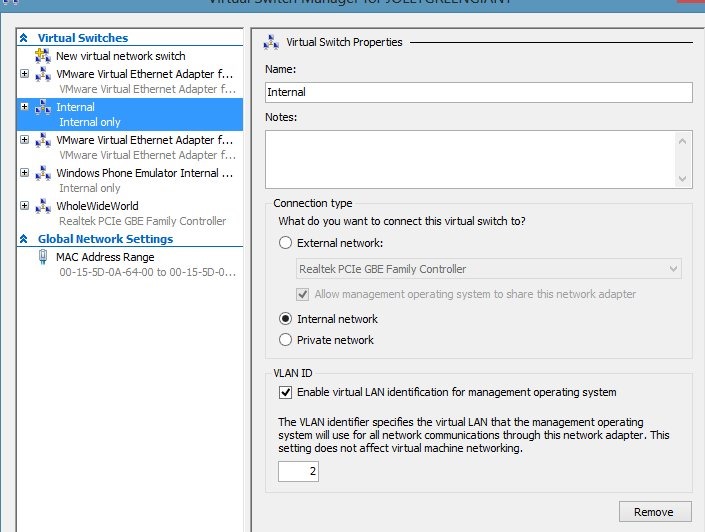
    After memory comes the networking. As you can see, I have a number of choices. The "WholeWideWorld" is the connection some of my VMs use to access the internet. In this case, I’m choosing the Internal network, which is the Internal switch I have set up. This is limited to connections between the VMs and since I want this to be an isolated network, this works fine.

    virtlab_s

    My internal switch is actually configured as follows:

    virtlab_v

    Now we need to set storage. Since I set up my disks before this and named them in a way that I can understand, I choose the one I need. The default here is a new hard disk, but I’m saving space with differencing disks.

    virtlab_t

    I get a summary. Please check this as you set things up. Note that my differencing disk is set.

    virtlab_u

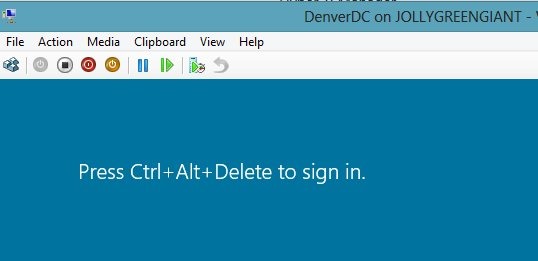
    I click finish, and I have a VM. I start it up from Hyper-V Manager and connect.

    virtlab_w

    Inside of Windows, I get the familiar Windows start screen (for Win8/WS2012). I click CTRL+ALT+DEL (leftmost icon on the toolbar) and then get prompted to change my password

    virtlab_x

    I change it,and I’ll use the same admin password on this machine that I use on a number of VMs.

    NOTE: This is NOT the password I use for any other services, including my VMWware VMs. At all. It’s only for Hyper-V VMs, but since I may have a few generations of VMs, I don’t want to forget this password. I also may end up starting up a few random VMs for talks, so I need to be able to get in.

    Once I log in, I get a basic session. Not much in Core.

    virtlab_y

    The only thing I really want to do here is rename the computer. I need to do more, but those will be in other posts. Let’s get the hostname.

    I could start server config (sconfig.exe) and get a basic setup, but I wanted to play with my PowerShell knowledge. So I started PoSh, and Google helped me find the computer name. I also used Google to find out the rename.

    virtlab_z

    The computer name (hostname) comes from

    $env:computername

    It doesn’t make sense, so I rename it with

    Rename-Computer -Newname "DenverDC"

    Once this machine restarts (Restart-Computer), it will have a new name.

    I know that I could use sconfig and it’s fast, or click around on my Standard servers and rename the machine, but once I get used to typing these commands in Powershell, it’s very, very quick.

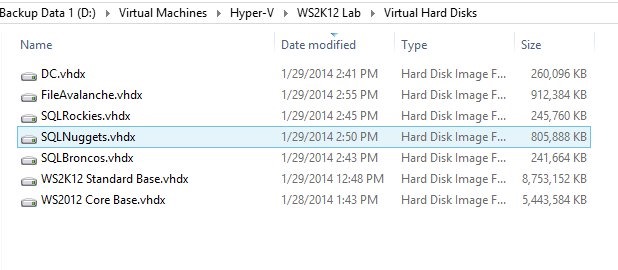
    Note that my disks have been updated with changes. Their sizes have grown from the original 4MB.

    virtlab_aa

    I repeat this process for all the other machines, just to get them set with a password and name. Once they’ve rebooted, they’re ready for the next step.