Tag: administration

  • Restoring a Striped Backup–#SQLNewBlogger

    Another post for me that is simple and hopefully serves as an example for people trying to get blogging as #SQLNewBloggers.

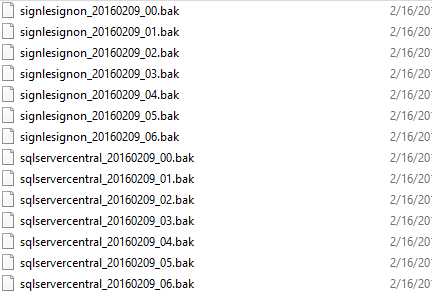
    Recently I uncompressed some SQL Backup Pro files. Since multiple threads were used to make the backup, I ended up with multiple files in my file system, as shown here:

    2016-02-16 11_58_57-Backup

    Each of these is part of a striped backup, a piece of a backup file. To restore the backup, I need all the files to reassemble the backup. This is fairly simple, but you should be aware of how this works and how to perform a restore.

    In my case, you can see I have 7 files for each database. They are the same name with an _0x at the end, with x being the number of the file.

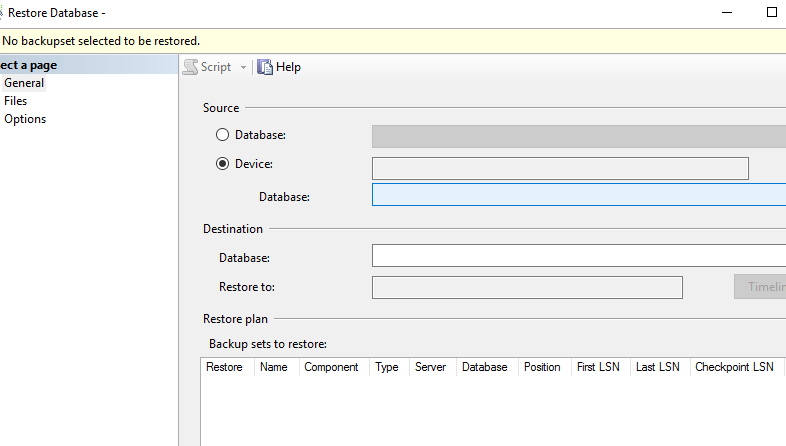
    To restore these, I go to SSMS and click the restore choice. That gives me my restore database dialog, where I can select that I’m restoring from devices. As you can see below, no devices (files) are selected.

    2016-02-16 12_00_56-Restore Database -

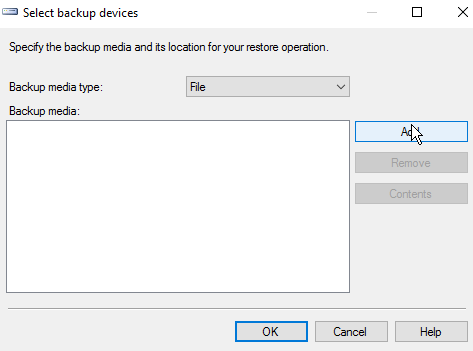
    I then click the ellipsis to get a dialog allowing me to add files.

    2016-02-16 12_01_03-Select backup devices

    Hopefully you’ve done this before, and you can click “add” to add files. You need to naviate to the location of your backup files if it isn’t the default.

    2016-02-16 12_02_02-Locate Backup File - JOLLYGREENGIANT_SQL2014

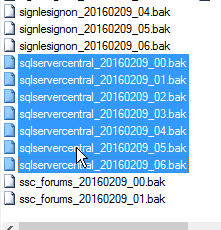
    Next you can select the files. Holding down CTRL, I can multi-select files.

    2016-02-16 12_02_12-Locate Backup File - JOLLYGREENGIANT_SQL2014

    Once I pick them, I click OK and then I see them all in the device dialog.

    2016-02-16 12_02_19-Select backup devices

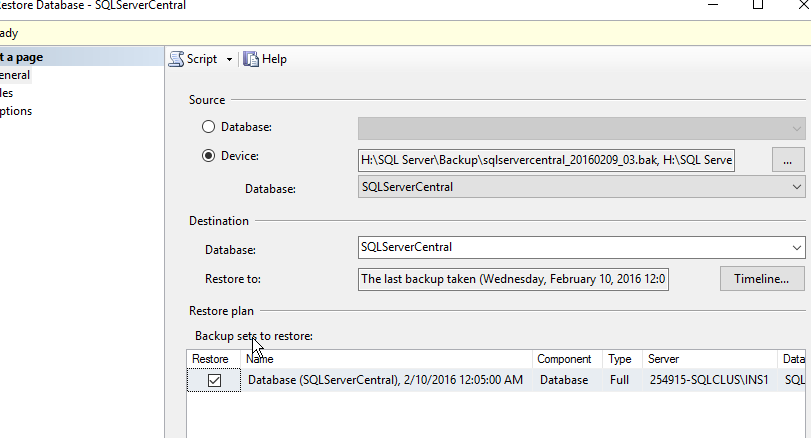
    Now I click OK and SQL Server reads the headers, and I end up with a single database to be restore, as shown below.

    2016-02-16 12_04_24-Restore Database - SQLServerCentral

    Now, I can click OK, and often do in development areas. HOWEVER, if you are doing this in production, please, please, please, click the Script button instead. You’ll get a new query window, and you can cancel out of this dialog to see the code.

    2016-02-16 12_16_07-SQLQuery7.sql - JOLLYGREENGIANT_SQL2014.master (JOLLYGREENGIANT_sjones (59))_ -

    From here, you should click “Save” and save this, then execute it.

    As you can see above, the statement is simple. List each disk file, separated by a comma. Then the rest of the RESTORE statement is a standard restore.

    SQLNewBlogger

    This is a fairly simple task, one I’ve done dozens of times, but it’s worth practicing. If you want to write about it, what happens if you’re missing a file? What if you change the order of files? This was a 10 minute blog, and it’s a good chance to play and practice your restore skills, which are as important as anything you do as a DBA.

  • Creating a Database Snapshot

    Another post for me that is simple and hopefully serves as an example for people trying to get blogging as #SQLNewBloggers.

    I’ve rarely dealt with database snapshots, outside of lab experimentation. They didn’t exist when I did most of my DBA work, and since then we haven’t seen the need for them at SQLServerCentral, though, I may suggest we add them to our deployment process since we can quickly roll back if something breaks.

    However, I created one recently for a test and realized that I’d forgotten the syntax. Unlike the quick "create database xx" syntax I often use, with a snapshot I need to be more specific.

    The big item that I must specify is the location of the snapshot file. This is the file that gets written to with the copy-on-write process that ensures the original state of the pages when the snapshot is created are still available.

    You do need to give the database a logical name as well, which can be anything, but the reference below has suggestions. I’d say that this is bad:

    CREATE DATABASE sandbox_snapshot
    ON (NAME = MySnap
    , FILENAME = ‘h:\SQL Server\MySnap.ss’
    )
    AS SNAPSHOT OF Sandbox

    But this is better

    CREATE DATABASE sandbox_snapshot_20150122_1345
    ON (NAME = SandBox_Snap_20150122
    , FILENAME = ‘h:\SQL Server\MySnap.ss’
    )
    AS SNAPSHOT OF Sandbox

    Because the snapshot is based on an existing database, at a particular point in time, it’s useful to specify the time when the snapshot was created, if possible. While you can get this from metadata, if you have people that look to multiple snapshots for information, it can be handy to know when each is from.

    However if you are providing this on a schedule, like daily, for people to report from, you might need to have the same name every day. Think about this, as you cannot rename a snapshot once it’s created.

    SQLNewBlogger

    When I realized I had to lookup the syntax, I took a few notes and captured code, which meant I combined this writing (< 10 minutes) with other work I was doing.

    You should do the same. When you tackle something new, take screenshots, save code, and drop it in a OneNote/EverNote/etc notebook for your weekly blog writing.

    Reference

    The references I used:

  • Disabling SQL Server Network Protocols

    Another post for me that is simple and hopefully serves as an example for people trying to get blogging as #SQLNewBloggers.

    I ran across a question on network protocols recently, which is something I rarely deal with. Often the default setup for SQL Server is fine, but there are certainly times you should add or remove network connectivity according to your environment.

    Here’s a short post on turning off (or on) a network protocol for SQL Sever.

    What’s Enabled?

    The easiest way to verify what’s enabled is to use the SQL Server Configuration Manager. You’ll need administrative permissions on the host to run this, but it’s easy to find.

    2016-01-13 14_59_40-Start

    Once you open it, typically you’ll have a list of the items that can be configured.

    2016-01-13 15_02_09-Photos

    We want the SQL Server Network Configuration, which is the server level configuration for this host. The Client configurations are for the host being used a client to connect to a SQL Server.

    2016-01-13 15_02_31-Photos

    As you can see here, I have Shared Memory and TCP/IP enabled for this instance, but Named Pipes disabled.

    Disabling a Protocol

    As you might expect, this is easy. I right click on a protocol, and I can change the status. In this case, I’ll disable Shared Memory

    2016-01-13 15_03_50-Photos

    Once I do that, the protocol is disabled. However not on the instance. I’ll get this message.

    2016-01-13 15_04_56-Photos

    I need to restart the server. Once that’s done, no one will be able to use Shared Memory on the host.

    I can fix this

    2016-01-13 15_04_49-Photos

    Of course, I need to restart my instance again.

    Checking the Log

    When SQL Server starts, quite a bit of configuration information is written into the log. This is useful for troubleshooting in many cases. One of the things you’ll find is the network listeners, as shown here.

    2016-01-13 15_08_14-Log File Viewer - JollyGreenGiant_SQL2016

    This is usually after the database startup information, so if you look, you can see I have some local pipes and some TCP/IP settings here.

    SQLNewBlogger

    After reading a question, this was less than 10 minutes to write, with making screenshots. However I’ve done this before. If this was your first time, then it might take you longer to research and write, but I bet most DBAs could do this in 30-45 minutes.

  • Tracking Logins with Extended Events

    Another post for me that is simple and hopefully serves as an example for people trying to get blogging as#SQLNewBloggers.

    I was building a question the other day on Extended Events and needed to build a new session. One of the easier sessions to build is with the logins, so I decided to use that, and then wrote this post on how to build the session.

    The first thing is to to to the Management tab in SSMS and then the Extended Events folder. I right click the Sessions folder and select New Session.

    2015-11-18 10_40_06-Cortana

    This gives you a dialog. Like many in SSMS, we start with a name. You could select run at server startup, which I’d do in the case of this being a production system.

    2015-11-18 10_40_55-Photos

    When I click next, I get to the "Events" tab, which lists all events. I’ll scroll down to login and select that. I need to click the arrow to the right.

    2015-11-18 10_41_12-Photos

    Once I do that, my event is in the session.

    2015-11-18 10_41_19-Photos

    After I pick the events, I choose the fields I’m going to capture. There is a "Configure" button in the upper right that you click. This scrolls the dialog over.

    2015-11-18 10_41_38-Photos

    I can select any number of fields for capture. You can see I’ve picked the client_hostname. I would also add the NT_Username and Username from the list. You could add more, but in this case, I’m more concerned with seeing who’s logged in.

    I could add filters, but I choose not to. I click on Data Storage to determine where to store this data.

    2015-11-18 10_45_59-Photos

    For auditing, I might want a file. In this case, for testing, I’ll use the ring buffer, in memory storage.

    2015-11-18 10_46_15-Photos

    That’s it for getting the session set up. However it’s not started. To do that, I need to right click the session and select Start.

    2015-11-18 10_47_34-Start

    This will allow the server to start collecting data. Is it working? Let’s see. We’ll watch the data. Right click the session again and select Watch Live Data

    2015-11-18 10_47_43-Cortana

    This pops open a window. I usually make this a separate vertical tab group. Once that’s open, I’ll click "New Query" in SSMS, which will log me in again

    2015-11-18 10_48_05-Photos

    As you can see, a few events popped up here. I am capturing data. Don’t forget to stop the session after this if you don’t need it.

    SQLNewBlogger

    This post came out of work I was doing, and which I’d likely do as a DBA. However as soon as I got things working and tested, I knew this was a good post. In fact, I got a couple posts from the process. The setup and testing took about 20 minutes, including a little research. However the writing for this was about 10 minutes.

    References

    A few things I used.