Tag: DevOps

  • The Baseline for Flyway

    In my previous post, I set up the Flyway Desktop projects for SQL Server and PostgreSQL. I also added a table to each platform for development. In this post, I’ll look at how I let Flyway know what already exists in my system with a baseline.

    This is part of a series of working through Flyway and Flyway desktop to demo database changes. Disclosure: I work for Redgate Software

    Baseline v Flyway Baseline

    I find these terms to be slightly confusing, especially when I look at Flyway vs. Flyway Desktop. In Flyway, there is a “baseline” verb, which you can run at the CLI. This will mark the state of your database at a level and adds the flyway_schema_history table to the schema in which you are working. This baseline causes Flyway to ignore all migrations up to the baseline level.

    In my testing, when I run this on my database, it defaults to V1 for the first migration script. That’s usually fine, but as I wrote, this can cause issues.

    There is also the concept of a baseline migration, which is a Bxx script, and this contains the definitions of all the objects that already exist in your target databases. This ensures that as FW and FWD track and deploy changes, they don’t try to redeploy those migrations that are at a level lower than the baseline numbering (the xx).

    Creating a Baseline

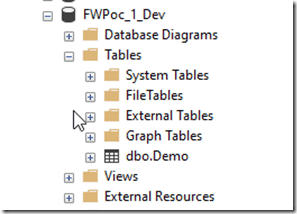
    My development database for SQL Server looks like this:
    2023-01-25 14_27_21-Window

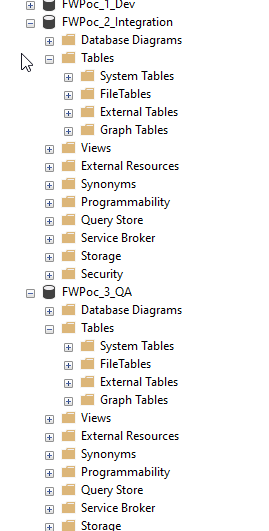
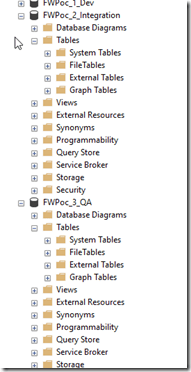
    There is an object in here, but it’s not in any other environment. Both Integration and QA (and the others) have no objects.
    2023-01-25 14_27_43-Window

    In this case, I don’t need a baseline script, because I want this table to deploy to the downstream databases.

    I do, however, need a baseline. I need the baseline marker in my databases to note that we have a base version. This will give me a starting point, but also ensure that FWD creates migrations that are numbered higher than my baseline.

    I’ll add this in two ways. One with Flyway Desktop and one with the Flyway CLI.

    The Flyway Baseline

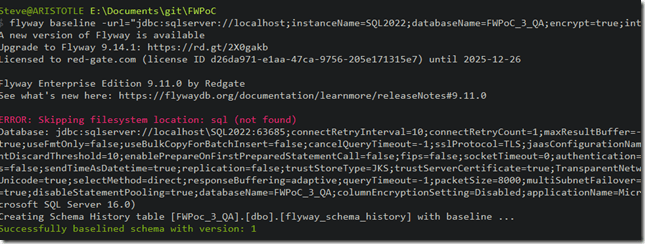
    For SQL Server, I don’t need to worry about any objects in downstream databases, so I’m just going to run the Flyway CLI. From a command line, I’ll run this code:

    flyway baseline -url="jdbc:sqlserver://localhost;instanceName=SQL2022;databaseName=FWPoC_1_Dev;encrypt=true;integratedSecurity=true;trustServerCertificate=true"

    This is run from my project location, though I’m passing in the connection string from Flyway Desktop as I don’t have a flyway.conf file configured for this project. Things work from the FWD gui, but not the CLI.

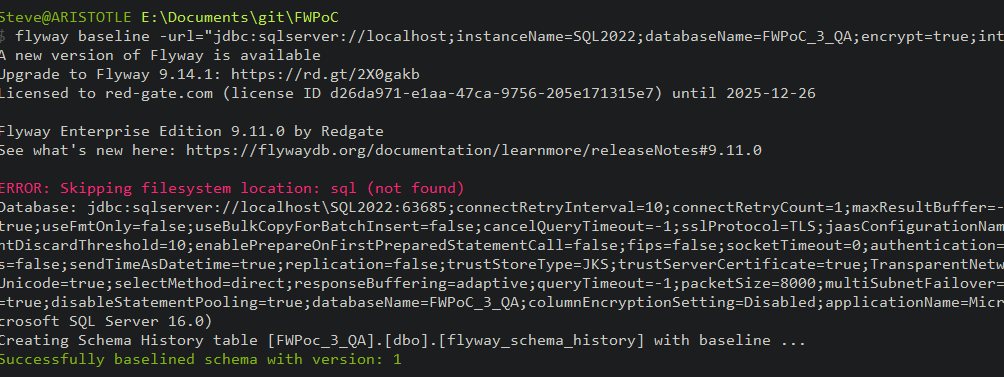
    This works, and I see these results. Note the flyway schema history table is created at the bottom, and the version of the database is set to 1.
    2023-02-08 08_55_37-cmd

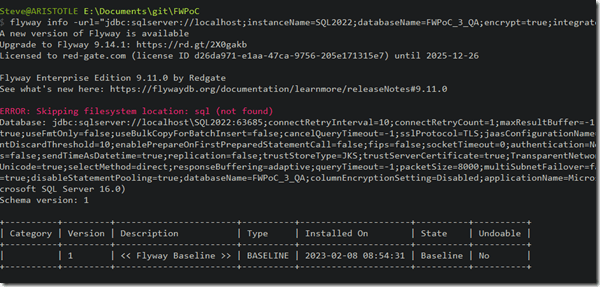
    Now when I run Flyway info with that URL, I get this. There is an entry in the version tracking for this table:
    2023-02-08 08_56_03-cmd

    I can also see this table in my Object Explorer:

    2023-02-08 08_54_54-SQLQuery9.sql - ARISTOTLE_SQL2022.FWPoc_3_QA (ARISTOTLE_Steve (88)) - Microsoft

    Flyway Desktop and PostgreSQL

    I’m going to use FWD for my PostgreSQL project. This will do some of the work for me and give me the option for a baseline script.

    Note: I set up a shadow database first.

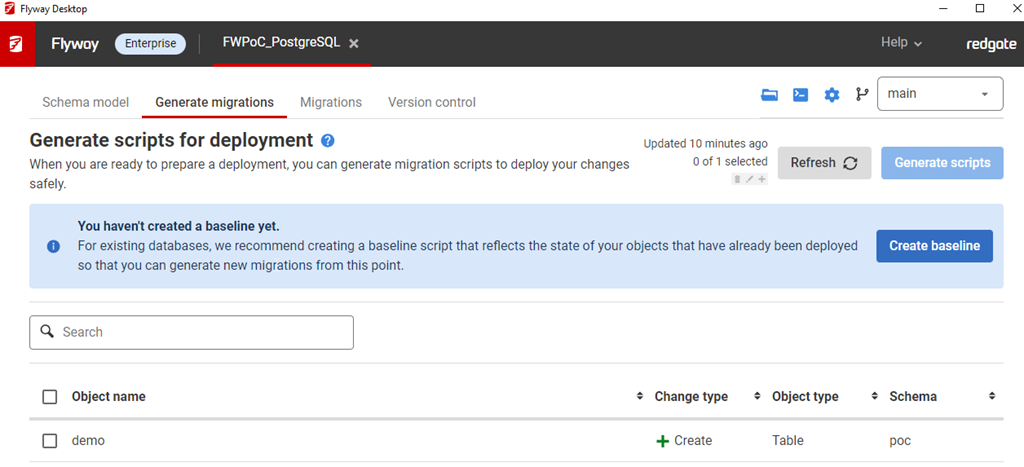
    2023-01-25 14_45_24-Window

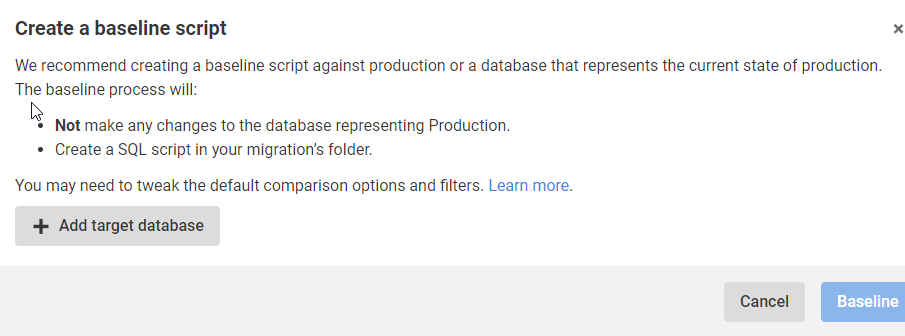
    I click “Create baseline” and this asks me for a target. After all, I’m trying to ensure I don’t deploy anything to prod that’s already there.
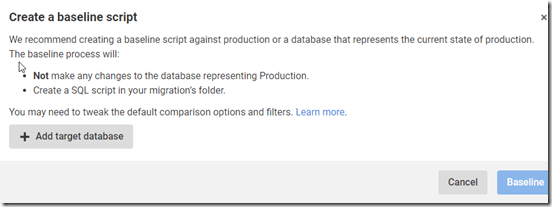
    2023-01-25 14_45_34-Window

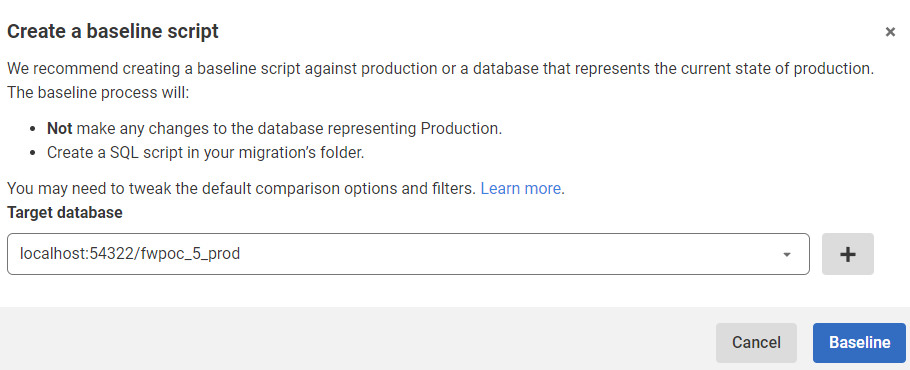
    When I click Add target database, I get a connection dialog. I fill this in with the credentials for prod. This returns me to this screen below, where I see my prod database, which is at this port with this name.
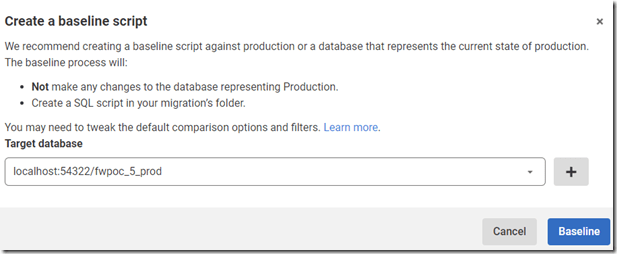
    2023-01-25 14_48_12-Window

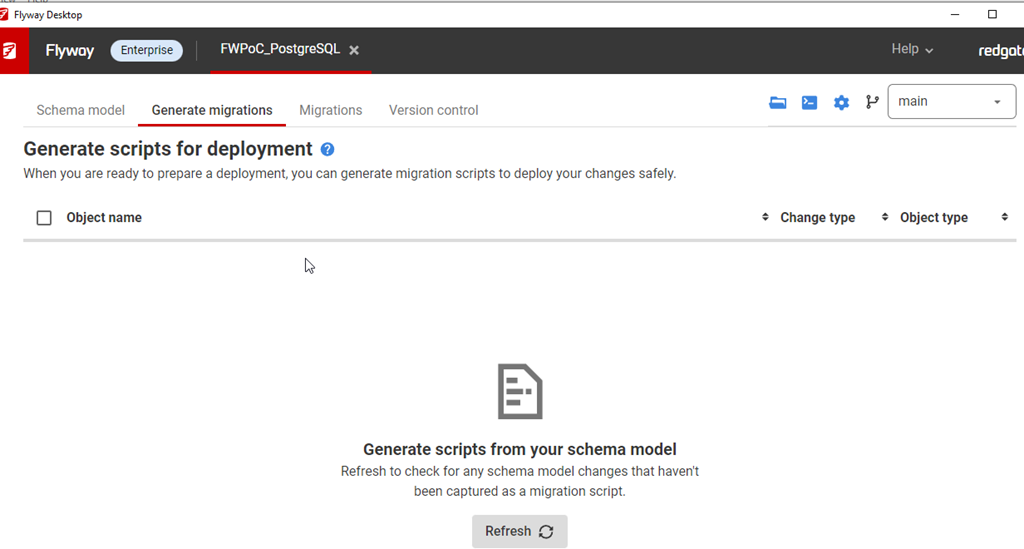
    I click Baseline and it goes to work. There’s nothing there, so this returns back to the blank, Generate Migrations tab.
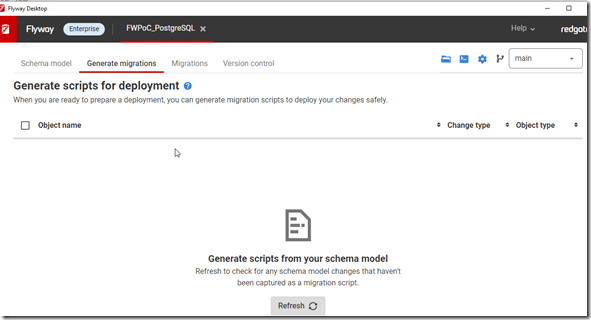
    2023-01-25 14_49_02-Window

    However, there is no baseline or schema tracking table. I didn’t have a poc schema, so perhaps that’s an issue, but that’s OK. We can fix this.

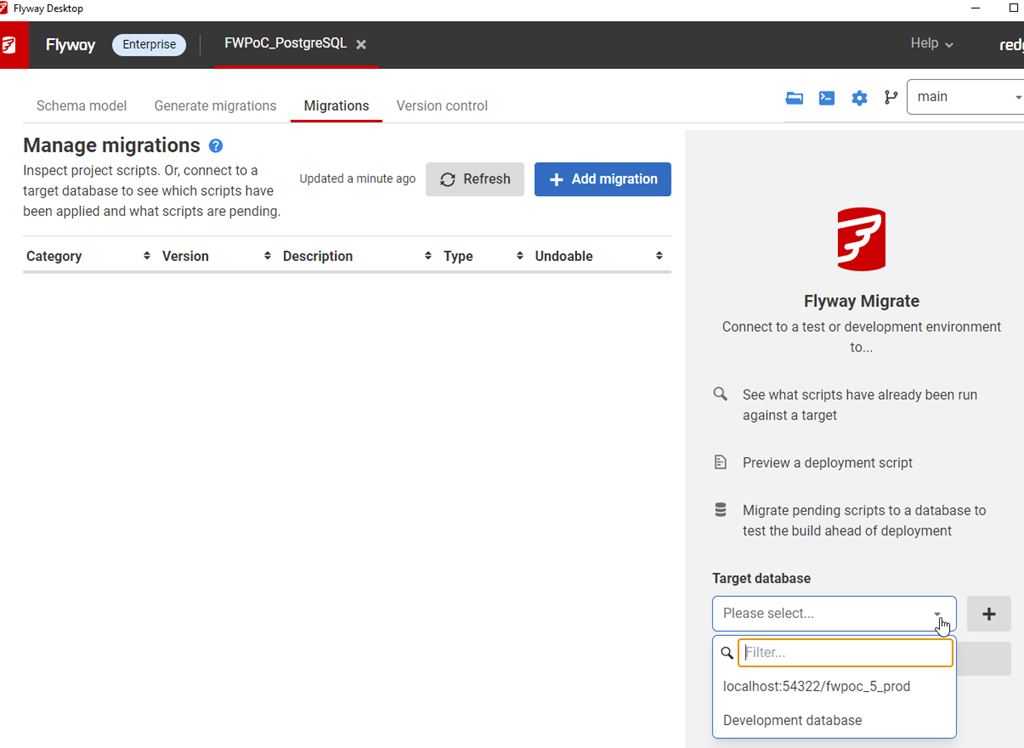
    In the Migrations tab, I see this:
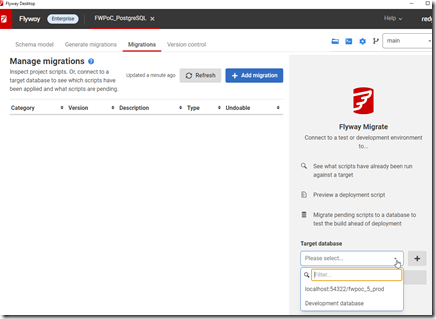
    2023-01-25 15_10_52-Window

    That configures this tab to look at (and work with) this database.
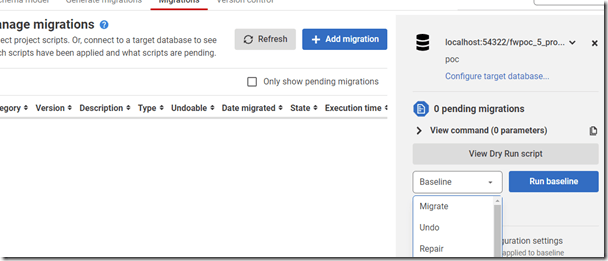
    2023-01-25 15_10_44-Window

    In general, I know we won’t be able to see production, but this is a PoC. However, this is something that I, in general, don’t want to do. I want to work with dev/test environments, so let’s do that.

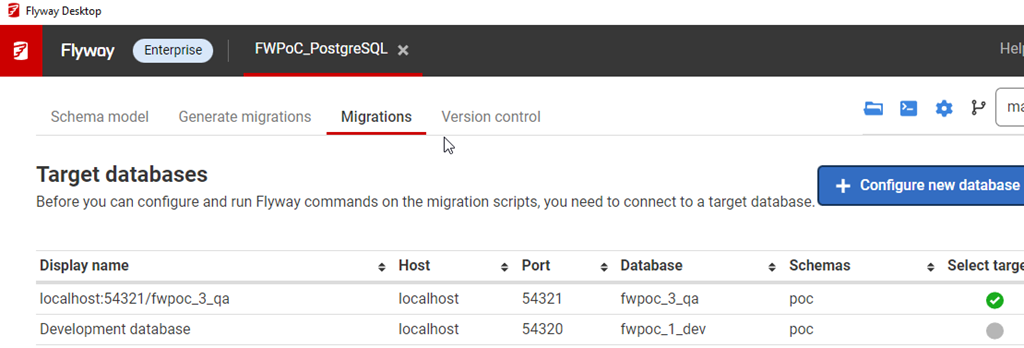
    I’ll configure my QA environment. I click “configure target database” and I get this screen. These are all the databases for my project. Here I’m going to click “delete” for production and then I’m going to click the Add and configure my QA database. Once I do that, I’ll see this:
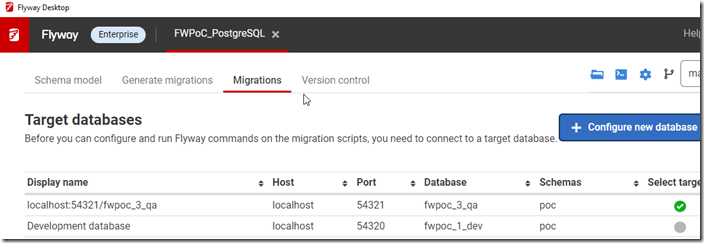
    2023-01-25 15_14_52-Window

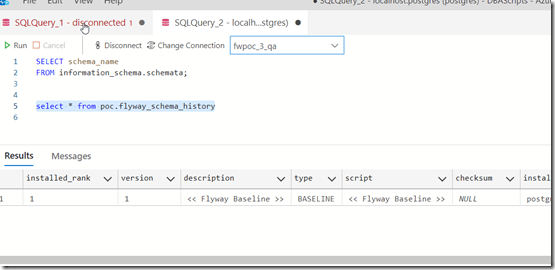
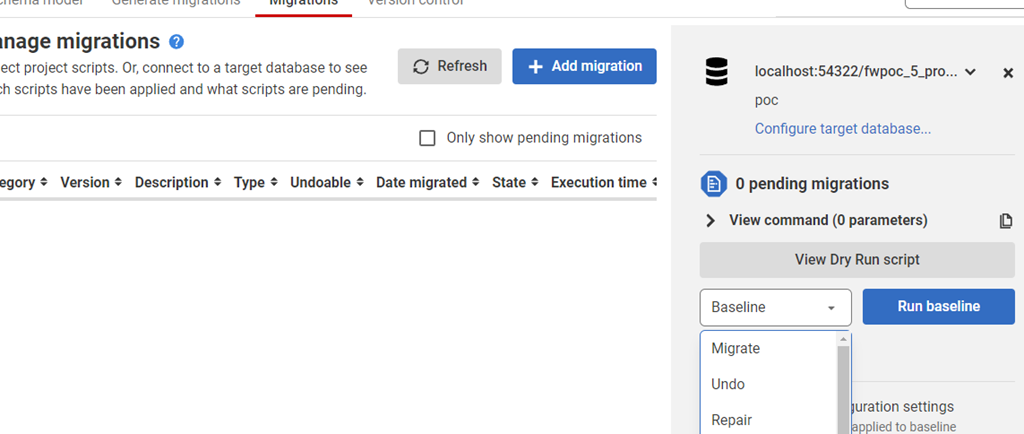
    Baseline added for PostgreSQL.

    2023-02-08 08_54_02-● SQLQuery_2 - localhost.postgres (postgres) - DBAScripts - Azure Data Studio

    Success.

  • Creating a Flyway Desktop Shadow Database in PostgreSQL

    In order to generate migrations, we need to configure Flyway to use a shadow database. This post looks at that process.

    This is part of a series of working through Flyway and Flyway desktop to demo database changes. Disclosure: I work for Redgate Software.

    Configuring the Shadow

    This is an empty database where we run the migration scripts to verify them. Since a user might edit or create their scripts, we want to ensure there are no problems with the syntax or execution with other scripts. This is also a place where we keep the “previous state” of your development database and use this to detect the changes you’ve made.

    This database gets cleaned, meaning objects get dropped, regularly, so you configure a space for this. It can be a separate database, or just a schema (more Oracle focused).

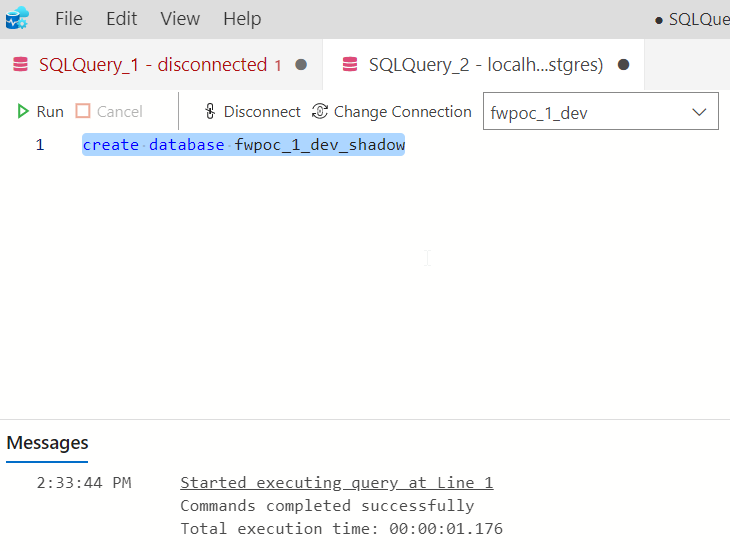
    For me. I’m going to create a new database in postgreSQL to support this. As you can see below, I use the simple CREATE DATABASE syntax.

    2023-01-25 14_33_46-Window

    Once I do this, I go back to FWD and click the “Generate Migrations” tab. The first time I do this (and only the first time), it asks me to configure a Shadow database.

    2023-01-25 14_33_27-Window

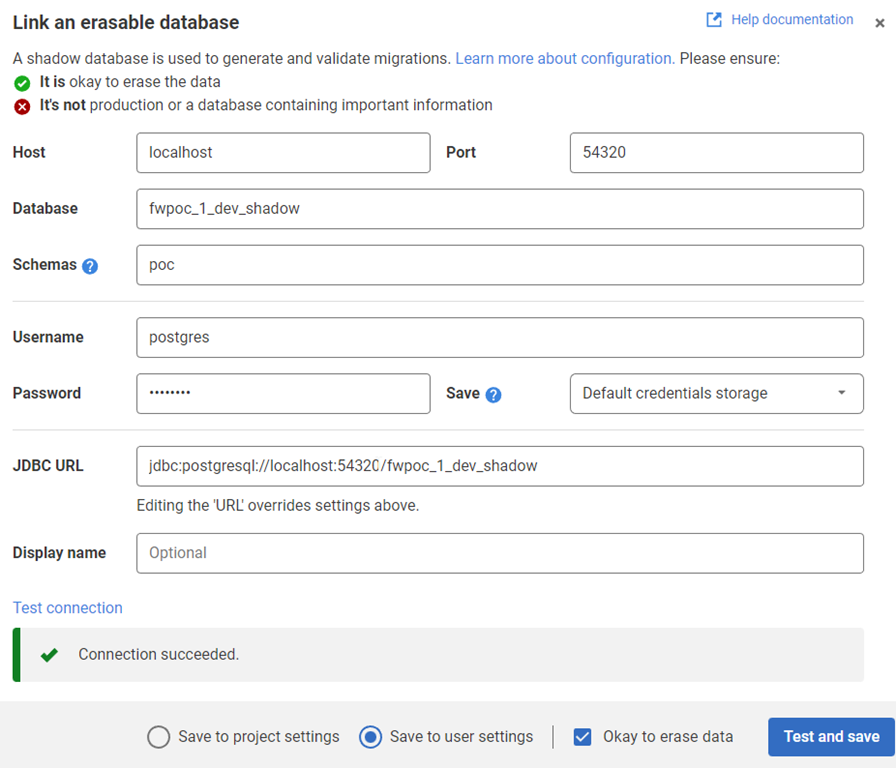
    I click this and get a connection dialog, similar to what I have for my development database. In here I enter the credentials for my shadow database, which are similar to my development ones. I test the connection and verify I can connect.

    2023-01-25 14_35_03-Window

    That’s it. Now I’m configured for a Shadow.

    The process is similar for other platforms, just with different credentials. If you need to learn more, you can read about this in the documentation.

  • Flyway Desktop Projects for My PoC

    In a previous post, I set up the basic databases for the PoC project I’m working on. In this next post, we’ll get the Flyway Desktop projects set up for the PoC.

    This is part of a series of working through Flyway and Flyway desktop to demo database changes. Disclosure: I work for Redgate Software.

    Flyway Desktop

    Flyway Desktop (FWD) is the GUI that Redgate built on top of Flyway for managing your database project. This replaces the SQL Source Control and SQL Change Automation products that we used to try and integrate into IDEs.

    I like Flyway Desktop, which is standalone app for capturing code and committing it to Git. It is a project based app, so you set up a project in a folder for a particular database (and possibly schema). In my case, I’m going to set up two projects to start for my PoC.

    Version Control

    We work with Git, which has become the de facto VCS for most people.

    On GitHub, I set up a public project where I’m putting this repository. It is located at: https://github.com/way0utwest/FWPoC

    This is on my local machine as a copy at e:\Documents\Git\FWPoC

    MSSQL

    The first project I’m setting up is my SQL Server project, in a folder called MSSQL under the root of the git repo. This is a project folder just for Flyway Desktop. Once I create the folder, I’m going to create a new project in FWD.

    2022-12-28 17_05_51-Flyway Desktop

    I get a form after clicking New project. I’ll set the name as MSSQL, choose the root folder, and since I created the folder, I uncheck the checkbox. While I appreciate it’s good to put things in a subfolder, at times I’ve had FWD make a subfolder under the folder I choose, so I’m wary of this box. Mostly because I make mistakes.

    2022-12-28 17_05_33-Flyway Desktop

    Once this is created, I start in the Schema Model tab. I hate this nomenclature, as it’s weird. This is the list of objects whose code I’m capturing. There’s nothing here, because I need to link this to my development database.

    2022-12-28 17_07_44-Flyway Desktop

    If I click the “Link” button at the bottom, I get a dialog for the JDBC connection string. Don’t worry, you don’t need to know Java. Just fill in the boxes.

    2022-12-28 17_09_47-Flyway Desktop

    Two things in the dialog above.

    One: Click Trust Server Certificate. Most new installations of SQL and driver upgrades require this. I don’t know why we don’t have this checked by default.

    Two: Click “test connection” in the lower left, so if you have issues, this gets found quickly.

    Once this is done, I go back to the Schema model and I see this:

    2022-12-28 17_11_44-Flyway Desktop

    I’ll select this object and save this to the project. This puts the file in the file system for this object, but doesn’t commit this to version control. We can see this in Visual Studio Code below. This is just a git repo, so if I open it in VSCode, I can see the file, the contents, and a note there are changes to be committed in the left icon.

    2023-01-03 12_31_22-dbo.Demo.sql - FWPoC - Visual Studio Code

    One project complete.

    PostgreSQL

    My second project is for PostgreSQL. Same git repo, similar process. I’ll create a new project, but say this is a PostgreSQL project.

    2023-01-03 12_33_16-Flyway Desktop

    The process is the same. I’ll link this to a dev database. I need to specify the port and database I’m using. I also specify the schema here, as it’s not the default.

    2022-12-27 17_36_50-Flyway Desktop

    Once I get the project connected, I see the same as I did above for SQL Server. I save it, and I get a slightly different structure in the project. I see a schema below the schema-model folder. In here, I see my table, but it’s not the code, but a description.

    2023-01-03 12_37_14-demo.rgm - FWPoC - Visual Studio Code

    From here, I just commit and push this stuff up to the repo. Note that commits and pushes, can push everything from both projects as they are in one repo. I did this on purpose to keep everything organized for me. However, if this were a team, I’d likely separate SQL Server and PostgreSQL into separate repos so individual developers don’t get confused.

    The next step here is to get a second database to where I can deploy changes for each project. I’ve got these set up, and in the next post, we’ll work on an initial deployment.

  • Starting the Flyway PoC–Environment

    I’ve had a goal to redo my demo environments and get them set up to work for a variety of customers in different places. I decided to do this in a way that uses new Redgate technology, with the integration of Flyway with Flyway Desktop.

    This first article looks at the environment I’ve set up for my system.

    This is part of a series of working through Flyway and Flyway desktop to demo database changes.

    Overview

    I wanted to demonstrate DevOps, as I would recommend most customers set up to get started in their environment. It doesn’t matter if they’re SQL Server or another RDBMS, the approach at a high level is the same. Obviously the setup for each technology would be different in the details.

    I DO NOT recommend starting with a live database or project. This is a Proof of Concept (PoC), so use something that can fail.

    For this start, I’m working with SQL Server and PostgreSQL.

    SQL Server

    I work with SQL Server all the time. That’s the majority of my customers, so we’ll start with a new SQL Server instance. I’ll run this code, but this is to simulate multiple environments:

    CREATE DATABASE FWPoc_1_Dev
    CREATE DATABASE FWPoc_2_Integration
    CREATE DATABASE FWPoc_3_QA
    CREATE DATABASE FWPoc_4_Staging
    CREATE DATABASE FWPoc_5_Prod
    GO

    These environments are set up to be this model:

    • 1_Dev – the place I make code changes. This should be the only place I actually touch code.
    • 2_Integration – this is a place where we mix up code from multiple developers. all code ought to get pulled to each dev db at some point, but for many environments. I recommend getting some deployment here for devs to see all code.
    • 3_QA – standard test environment
    • 4_Staging – This is a DBA test environment, and this ought to get refreshed from production, either schema-only or full refresh, to validate the deployment
    • 5_Prod – live database.

    I’ll then run this code:

    USE FWPoc_1_Dev
    GO
    CREATE TABLE dbo.Demo (DemoID INT )
    GO

    The idea is we get that table to the other 4 DBs without actually connecting to them directly and running this code.

    PostgreSQL

    My setup for PostgreSQL will be similar, but smaller. I’m experimenting here, and one large 5 environment demo is enough. Here I’ll use 3:

    • fwpoc_1_dev – development environment
    • fwpoc_3_qa – test environment
    • fwpoc_5_prod – live environment

    Again, the goal is only write code in 1 and get it to 3 and 5. I’m keeping the numbering to try and keep everything simple and similar.

    I want to run PostgreSQL, but I want to use containers. I have enough server services running, so I’m starting with a container. First step, update the container:

    2022-12-26 13_16_43-cmd - docker image pull postgres_latest

    Next, I need to run the container. I’ll do that with this command. This names my container pgdev and gives me a password to connect for the “postgres” user. I also will use a volume on my local drive.

    docker run --name pgdev -e POSTGRES_PASSWORD=demo1234!@# -d -p 54320:5432 -v C:\Docker\postgresql-1-dev:/var/lib/postgresql/data postgres


    Before I run this, I’m create folders on my local C: drive for the docker data to safe. This is the folder I’ll map in my containers.

    2022-12-26 13_38_14-Documents

    I’ll connect with Azure Data Studio (ADS) as I have the PostgreSQL extension. Once connected, I’ll query the information schema tables.

    2022-12-26 16_14_55-● SQLQuery_1 - localhost.postgres (postgres) - DBAScripts - Azure Data Studio

    This works. Now, let’s set up a dev environment similar to SQL Server. First, we create a database with the CREATE DATABASE command.

    create database fwpoc_1_dev

    Once I run that, I’ll select it in the ADS connection drop down. Now I run this to create a schema and table.

    create schema poc;

    create table poc.Demo ( DemoID int);

    insert into poc.Demo (DemoID) values (1), (2)

    select * from poc.demo


    This works and gets me a development environment. I’ll start another container for qa and prod, but I won’t do that now. Instead, I’m just getting the base environments set up.

    Summary

    That’s it. This post was about getting an environment set up and ready for development on a PoC. This is the first step, and it’s already a lot.

    Future posts will look at the Flyway and Flyway Desktop settings, a repository, and a MySQL set of environments.

    Follow the entire series on my blog.