Tag: SQLNewBlogger

  • Why Does My Log Grow–SQLNewBlogger

    Another post for me that is simple and hopefully serves as an example for people trying to get blogging as #SQLNewBloggers.

    This is a great topic, and really, every DBA or admin should blog this and be sure they understand the issue.

    I saw a posting from someone that said this: they kept running low on disk space where the transaction log was kept. They would shrink the log, and they had 3 log backups per day, but the log kept growing, and this was an issue. What can they do?

    Let’s examine what happens: first, assume you have a trans‌‌action log that gets 2 transactions an hour. You have enough log space for 4 transactions in your log file. You back up 3 times a day (every 8 hours). Here’s your log size in transactions:

    1:00am - 2 transactions
    2:00am - 4 transactions‌‌‌
    3:00am - 6 transactions (log grows)
    4:00am - 8 transactions (log grows) 
    ‌5:00am‌‌ - 10 transactions (log grows)
    ‌5:00am‌‌ - 12 transactions (log grows)
    ‌5:00am‌‌ - 14 transactions (log grows)
    8:00am‌‌ - log backup with 14 transactions. Log is large enough for 14 transactions
    ‌9:00am - 2 transactions
    10:00am - 4 transactions‌‌‌
    11:00am - 6 transactions 
    12:00pm - 8 transactions 
    1:00pm‌‌ - 10 transactions 
    ‌2:00pm‌‌ - 12 transactions 
    ‌3:00pm‌‌ - 14 transactions 
    4:00pm‌‌ - log backup with 14 transactions. Log is large enough for 14 transactions
    ‌4:30 - you shrink the log back to 4 transaction size
    5:00pm - 2 transactions
    6:00pm - 4 transactions‌‌‌
    7:00pm - 6 transactions (log grows)
    8:00pm - 8 transactions (log grows) 
    9:00pm‌‌ - 10 transactions (log grows)
    ‌10:00pm‌‌ - 12 transactions (log grows)
    11:00pm‌‌ - 14 transactions (log grows)
    12:00am‌‌ - log backup with 14 transactions. Log is large enough for 14 transactions
    ‌

    Repeat this every day.

    Now, how does this change if we run log backups more often? Let’s say we decide to run log backups every hour. Now I get:

    1:00am - 2 transactions‌‌‌, log backup runs
    2:00am - 2 transactions‌‌‌, log backup runs
    3:00am -2 transactions‌‌‌, log backup runs
    4:00am - 2 transactions‌‌‌, log backup runs
    ‌5:00am‌‌ - 2 transactions‌‌‌, log backup runs
    ‌5:00am‌‌ - 2 transactions‌‌‌, log backup runs
    ‌5:00am‌‌ - 2 transactions‌‌‌, log backup runs
    8:00am‌‌ - 2 transactions‌‌‌, log backup runs
    ‌9:00am - 2 transactions, log backup runs
    10:00am - 2 transactions‌‌‌, log backup runs
    11:00am - 2 transactions‌‌‌, log backup runs
    12:00pm - 2 transactions‌‌‌, log backup runs
    1:00pm‌‌ - 2 transactions‌‌‌, log backup runs
    ‌2:00pm‌‌ - 2 transactions‌‌‌, log backup runs
    ‌3:00pm‌‌ - 2 transactions‌‌‌, log backup runs
    4:00pm‌‌ - 2 transactions‌‌‌, log backup runs
    5:00pm - 2 transactions‌‌‌, log backup runs
    6:00pm - 2 transactions‌‌‌, log backup runs
    7:00pm - 2 transactions‌‌‌, log backup runs
    8:00pm - 2 transactions‌‌‌, log backup runs
    9:00pm‌‌ - 2 transactions‌‌‌, log backup runs
    ‌10:00pm‌‌ - 2 transactions‌‌‌, log backup runs
    11:00pm‌‌ - 2 transactions‌‌‌, log backup runs
    12:00am‌‌ - 2 transactions‌‌‌, log backup runs

    In both scenarios, the total log transaction load across the day is the same. The total log backup size is the same across the day. However, a log backup allows me to reuse the log, so I never run out of space and get growths in the second scenario.

    If you aren’t sure how things work, or want to write your own blog, I would also recommend you read this:  http://www.sqlservercentral.com/articles/Administration/64582/


    ‌‌

  • Restore a BACPAC–#SQLNewBlogger

    Another post for me that is simple and hopefully serves as an example for people trying to get blogging as #SQLNewBloggers.

    I needed to get the WideWorldImporters sample database for a project and noticed that there was a BACPAC available. I downloaded it and needed to restore this as a database. At least, that’s what many people would think.

    However, if you go to the restore dialog, and select Device and then pick your location, there’s no filter for a .bacpac. In fact, if you choose one, it won’t restore. You’ll get the “no backupset selected” error.

    2017-05-30 08_51_40-Locate Backup File - PLATO_SQL2016

    How do you restore a .bacpac? Well, you import it. If you right click the databases folder in SSMS, you’ll see this:

    2017-05-30 08_54_40-SQLQuery16.sql - (local)_SQL2016.model (PLATO_Steve (60))_ - Microsoft SQL Serve

    The BACPAC is a DACPAC with data, in other words, a data-tier application with the data included. Once we click this, we get a wizard. Of course, there’s a introduction screen.

    2017-05-30 08_57_17-Import Data-tier Application

    Then we get to choose the file, or import one from Windows Azure storage. I’ll limit the image here to the relevant parts. You can see below I’ve selected the file I downloaded.

    2017-05-30 08_57_33-Import Data-tier Application

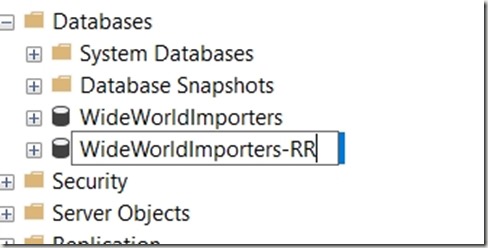
    Once I do that, the next screen allows me to set the database name and the paths. I shot this screen, and then changed the name, but forgot to reshoot. However, this is where you’d set the paths for files and change the name of the database.

    2017-05-30 08_58_30-Import Data-tier Application

    You get to verify your settings. I know many people blow by this screen, but make sure you double check this is what you want. Notice I moved the data, but not the log. I went back and fixed things, again, forgetting to reshoot the image.

    2017-05-30 08_59_25-Import Data-tier Application

    Once you click Finish, the import begins. This can take time, depending on the system you use.

    2017-05-30 08_59_31-Import Data-tier Application

    However, you get detailed progress. As you can see, I get a lot of details on what happened. There’s plenty more below this.

    2017-05-30 09_06_28-Import Data-tier Application

    But it worked, and I have my data.

    2017-05-30 09_07_28-SQLQuery1.sql - (local)_SQL2016.WideWorldImporters (PLATO_Steve (59))_ - Microso

    You should practice this. It’s simple, but know how to import a BACPAC. You never know when you might get one and someone is at your desk. Having to google to import a simple database is a little embarrassing.

    SQLNewBlogger

    This is a simple post, one that took longer to write than setup and perform, but a good skill to showcase. If you’re looking for something to blog, create a bacpac on another instance and import it into your local SQL Server.

  • Restore to a point in time–#SQLNewBlogger

    Another post for me that is simple and hopefully serves as an example for people trying to get blogging as #SQLNewBloggers. This is also a part of a basic series on git and how to use it.

    One of the things I had to show recently was a restore to a point in time, and I needed to actually lookup syntax. That’s a good excuse for a #SQLNewBlogger post, so here we go.

    When you restore, the default is to restore to the end of the backup file, whether full, diff, or log. In the latter, you have the option to stop early, and only restore part of the log. In doing this, you have two choices:

    • restore to a time
    • restore to a marked transaction

    Relatively few of us use marked transactions, but they can be useful. However, this post looks at time.

    Let’s do a few things and show how this works.

    Setup

    The first thing I need to do is get a database, with some data. I’ll create a database, add a table with a row, and then back up the database.

    CREATE DATABASE RestoreTime;
    GO
    USE RestoreTime
    GO
    CREATE TABLE BackupLog
    ( logdate DATETIME2 DEFAULT SYSDATETIME()
    , logmessage VARCHAR(200)
    )
    -- add a message
    INSERT dbo.BackupLog
            ( logdate, logmessage )
        VALUES ( SYSDATETIME(), '1st Log, before a backup' )
    GO
    BACKUP DATABASE RestoreTime TO disk = 'RestoreTime.bak'
    GO

    Next we want to add some data to the table and get some log records. In this case, I’ll use a simple loop to add a new row to the table every second. This gives me some points in time to look for and use to show I  am restoring to a point in time.

    DECLARE @seconds INT = 10,
            @starttime DATETIME2 = SYSDATETIME();
    
    WHILE (SYSDATETIME() < DATEADD( SECOND, @seconds, @starttime))
     BEGIN
      INSERT dbo.BackupLog
            ( logdate, logmessage )
        VALUES ( SYSDATETIME(), 'Log record entered at ' + CAST(SYSDATETIME() AS VARCHAR(30)) )
      WAITFOR DELAY '00:00:01'
     END
    
    GO
    BACKUP LOG RestoreTime TO DISK = 'RestoreTime.trn'
    GO

    I’ve added data, and my table looks like this:

    2017-05-23 15_23_12-SQLQuery8.sql - (local)_SQL2016.RestoreTime (PLATO_Steve (57))_ - Microsoft SQL

    My log backup contains all these records. If I restore the full backup and log now, by default I’ll end up in this state, with all these rows in my table. However, what if I want to only get the first 5?

    I can use the STOPAT syntax in my restore. I start by restoring the full with NORECOVERY and then the log. However, in the log, I’ll choose a time that is after row 5, but before 6. In this case, that’s 2017-05-23T15:22:57. Here’s the code:

    USE master
    GO
    RESTORE DATABASE RestoreTime FROM DISK = 'RestoreTime.bak' WITH NORECOVERY, replace
    GO
    RESTORE LOG RestoreTime FROM DISK = 'RestoreTime.trn' WITH RECOVERY, STOPAT = '2017-05-23T15:22:57'
    GO
    USE RestoreTime
    GO
    SELECT 
     *
     FROM dbo.BackupLog

    I have my results below

    2017-05-23 15_31_10-SQLQuery8.sql - (local)_SQL2016.RestoreTime (PLATO_Steve (57))_ - Microsoft SQL

    Only the log activity before this time is restored.

    SQLNewBlogger

    After I’d looked up the syntax, I spent only about 10 minutes setting up the demo and getting this ready. Practice skills and write about it. Show your next employer you are always learning and working.

  • DevOps Basics – Connecting to a Git Remote

    Another post for me that is simple and hopefully serves as an example for people trying to get blogging as #SQLNewBloggers. This is also a part of a basic series on git and how to use it.

    As I work more and more with Git, I find myself learning little tips and tricks that are helpful. One of those tricks is adding a remote to my local repo so that I can sync with it, and start collaborating with others. In many cases, I find myself pulling from a remote repo and pushing back, and much of the work is done for me. However, if I create a local repo, how do I get this to a remote service?

    Certainly some tools like VS or GitHub for Windows/OSX/etc help, but I like to understand the process myself, so I spent a few minutes practicing.

    First, I create a new repo with some documents. This is basic git stuff that you should understand, but if not, I’ve written a few posts on git basics. Here’s the first steps I took in another post.

    2017-04-26 14_01_08-cmd

    Create a Remote

    The next step is to have a remote git repo, which is really a remote git init spot. For this post, I’ll make on at Github, but the process is similar anywhere. In my repositories list, there is a new button.

    2017-04-26 14_32_08-Your Repositories

    I click that and get a form. In my case, I’ll name this to match the repo on my local machine. Life is easier if you match names, but you don’t have to.

    2017-04-26 14_33_51-Create a New Repository

    Once I do that, Github guides me along. I get a page with quick setup.

    2017-04-26 14_34_24-way0utwest_GitTests

    In my case, I want to push things from an existing repo on my machine. Again, tooling may do this for me, but from the command line, I need to add a “git remote”. I’ll use the “add” option, and I specify a name and URL. These are shown near the bottom of the image. I’ll run these locally.

    2017-04-26 14_35_38-cmd

    Once I do this, my local git repo has a remote repo (called origin) that it can send code to (push) and get code from (pull). Git manages conflicts and versions and all that.

    If I try to just push, what I’ll find is I don’t have enough config.

    2017-04-26 14_38_55-cmd

    My push needs to specify the remote and then the branch. Let’s do that.

    2017-04-26 14_39_29-cmd

    Once I do this, 7 objects got pushed, which includes some of the .git stuff. If I go to Github and look at the repo, I see this under Code.

    2017-04-26 14_40_15-way0utwest_GitTests_ Git testing

    I’ve connected my local repo to a remote, and copied my code up. Now I can push/pull as I make changes (or others do) to keep my local copy in sync with the remote.

    I’ll look at other flows in a future post.

    SQLNewBlogger

    This was a fairly quick post, about 10 minutes, as I connected up the local stuff to the remote. I’ve done this before and learned some of this the hard way, but this post allows me to organize my thoughts and be sure I understand what’s going on.

    I did end up spending a few minutes looking at the git docs to be sure I was describing things correctly.