Tag: SQLNewBlogger

  • Creating an SQL Databases – New Portal

    Another post for me that is simple and hopefully serves as an example for people trying to get blogging as #SQLNewBloggers.

    I was looking to do some testing recently, but needed a v12 SQL Azure database. The test system that I have in Azure is v11, and I needed an upgrade. I clicked the upgrade button, and it was really slow to change from v11 to v12.  It’s easier now because I think all new databases you create are v12.

    I was impatient, and ended up creating a new one. I decided to do a quick walkthrough of the process.

    Getting Started

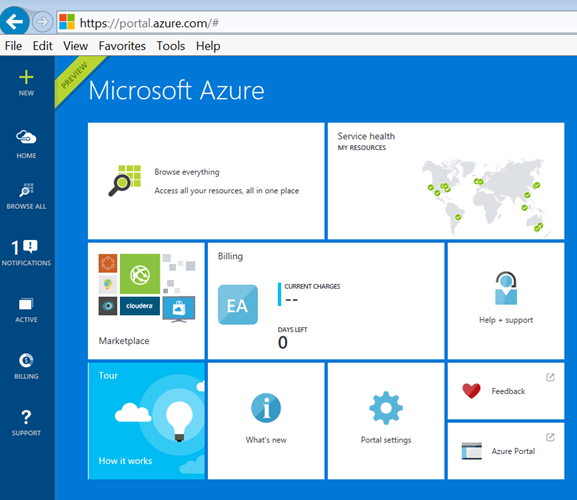
    I connected to Azure and went into the new (Preview) Portal. I couldn’t find anything in the old portal, so keep tat in mind. Since “old” and “new” are very relative terms in Azure, and I hate them, I’ve included lots of screenshots. Here’s the portal I used:

    paas_a

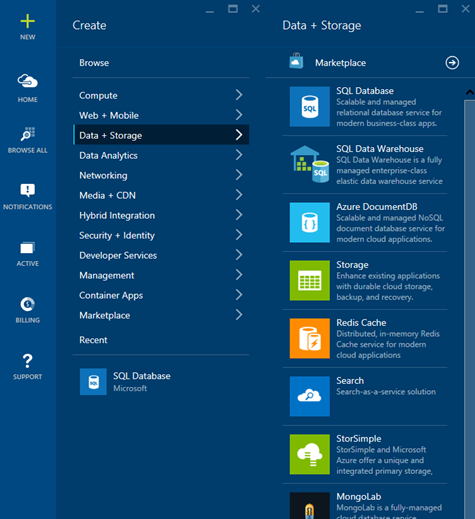
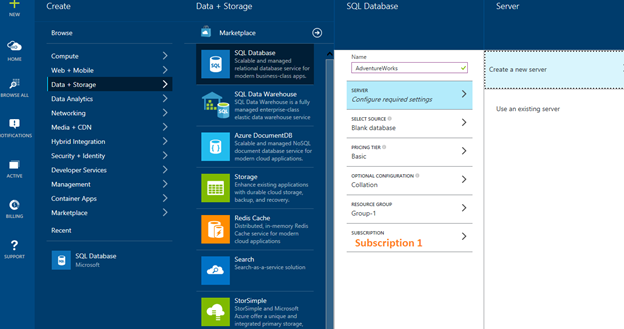
    My first step was to go to the “Create” item and select Data + Storage. As you can see, there are all sorts of options. For this post, let’s create a new database.
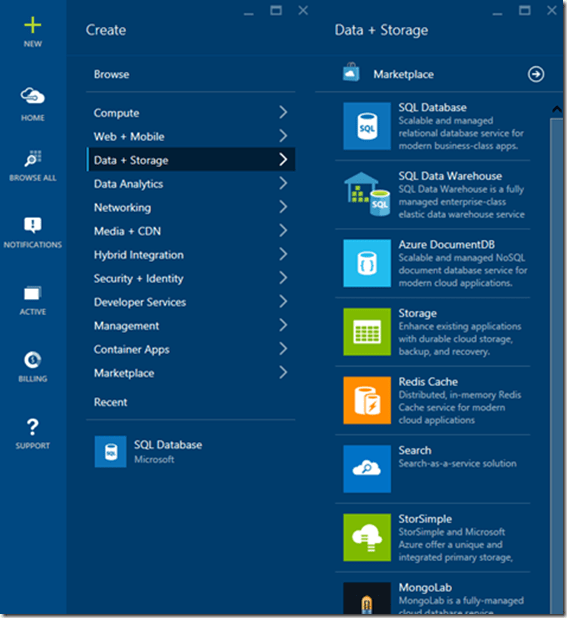
    paas_b

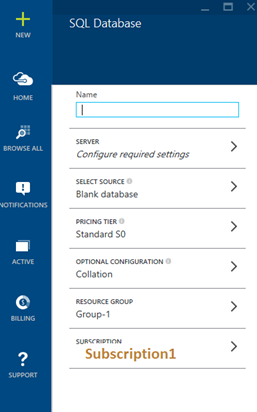
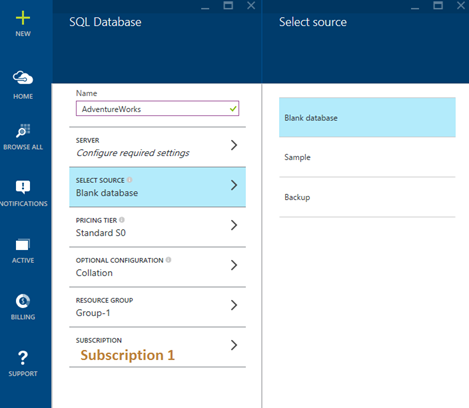
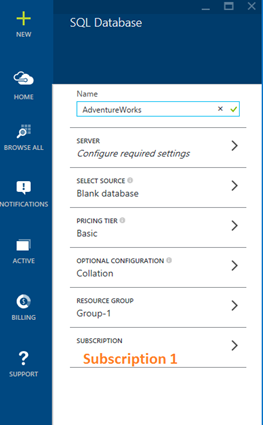
    Selecting “New SQL Database” gives me this set of options. The name is the big item here.
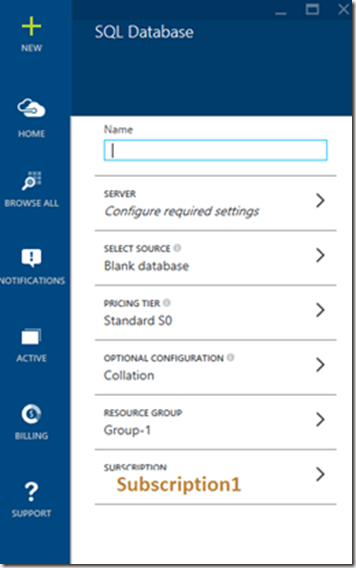
    paas_c

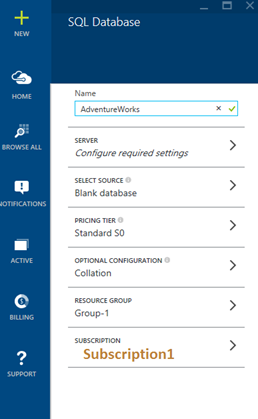
    Obviously I wasn’t very creative with the name:
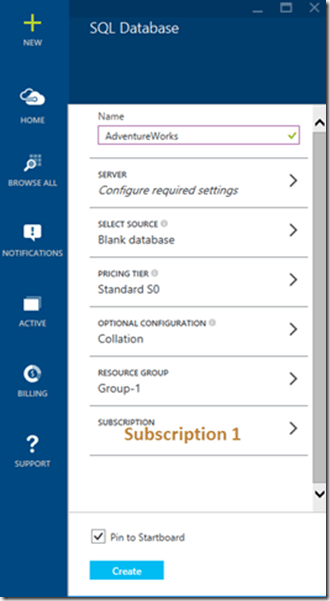
    paas_d

    Next I decided to make this one blank. I wanted to do some testing, so I selected that. It’s nice to be able to create a database from a backup, especially if you are recovering from a “Whoops” mistake.
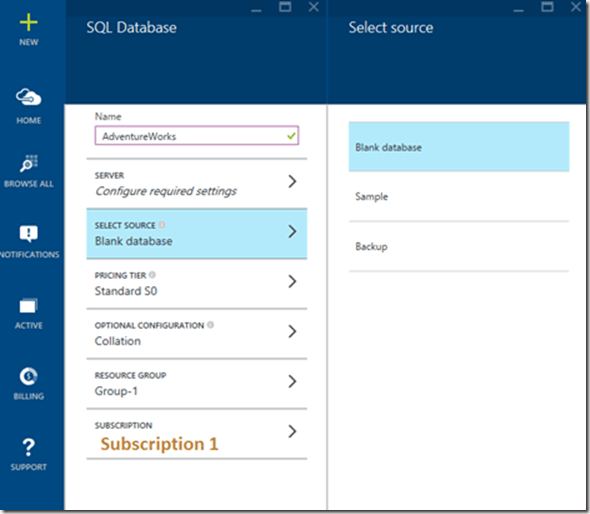
    paas_e

    With that selected, I had this:

    paas_f

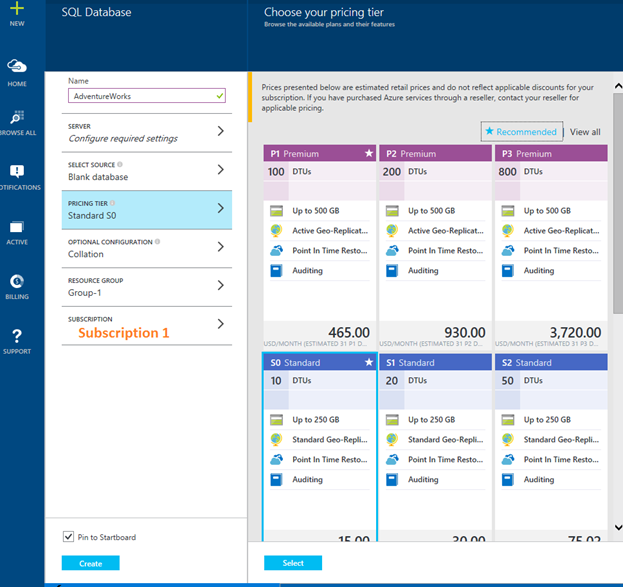
    Now on to the pricing tier. You can go crazy here.
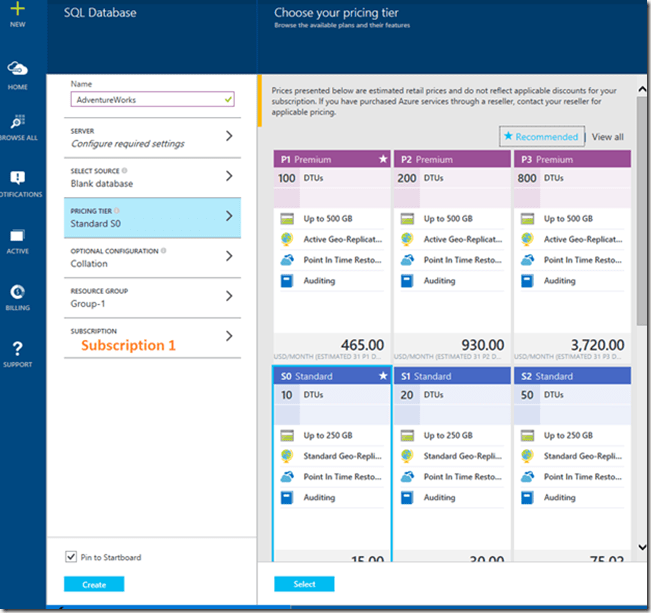
    paas_g

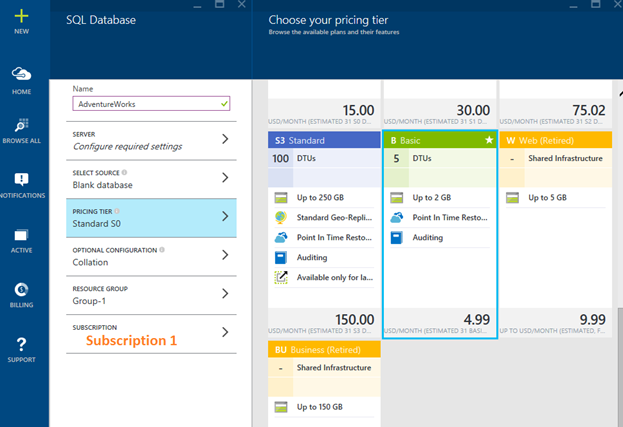
    I went down to a Basic level, since that’s what I really need. A basic, small database for testing. It’s $5/month, but I have credits from my MSDN subscription, so to date, I haven’t paid for any of my testing on the low tier systems.

    paas_h

    At each stage, I can see what I’ve selected. This is a good way to get started, but if you needed to do these are any scale or repeatability, learn to do it through PoSh.

    paas_i

    My next step is to decide where this database lives. I need a server, which is strange to me. I want a database as a platform, but I think this is legacy for connection purposes, so I’ll make a new one.
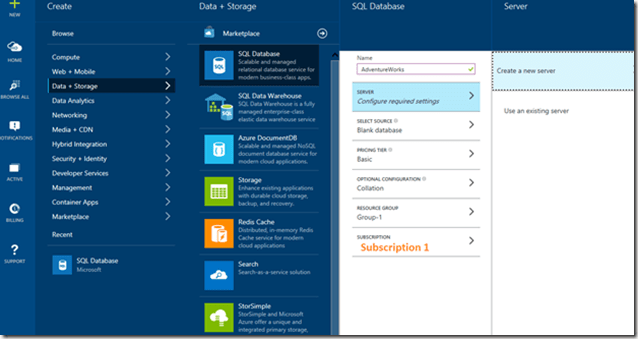
    paas_j

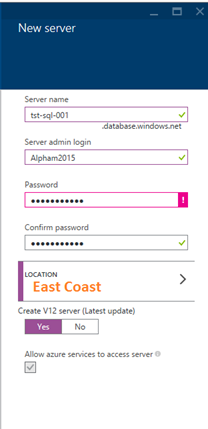
    I decided to make up some generic, boring name. I wasn’t feeling very creative today. I entered a password, but like with any password, I generated this in PasswordSafe first, then entered it here.

    <securityrant> Please use a password manager, use strong passwords, and use separate ones for services. Using the same one for all your Azure stuff and other accounts is a bad idea. </securityrant>
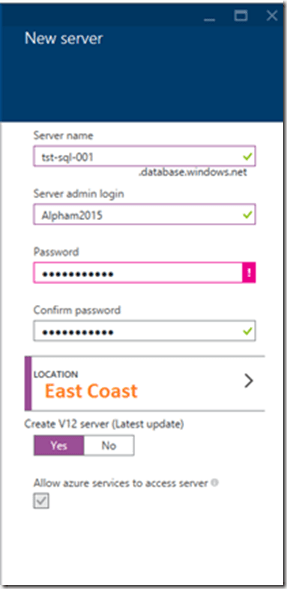
    paas_m

    Once I complete this, it’s listed under my SQL Database as the location for my data.
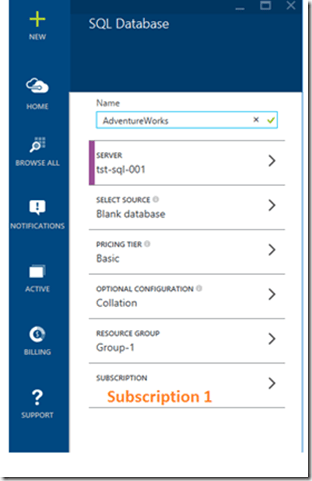
    paas_n

    Change your collation if you like, but since I’m a unilingual American, this is what I choose.
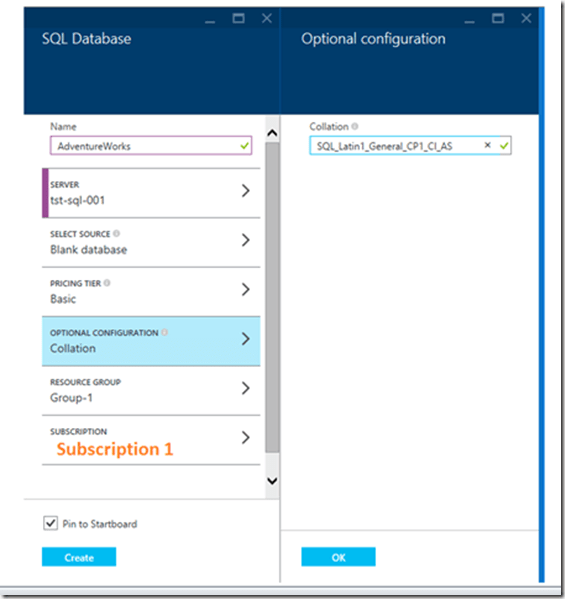
    paas_o

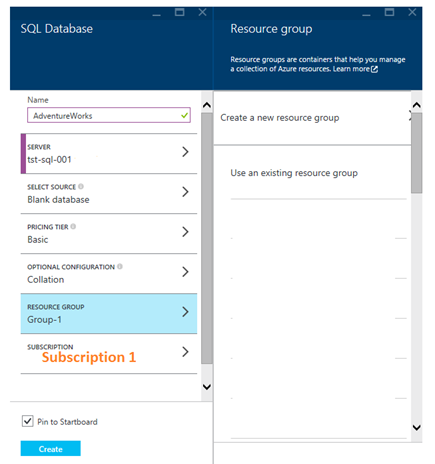
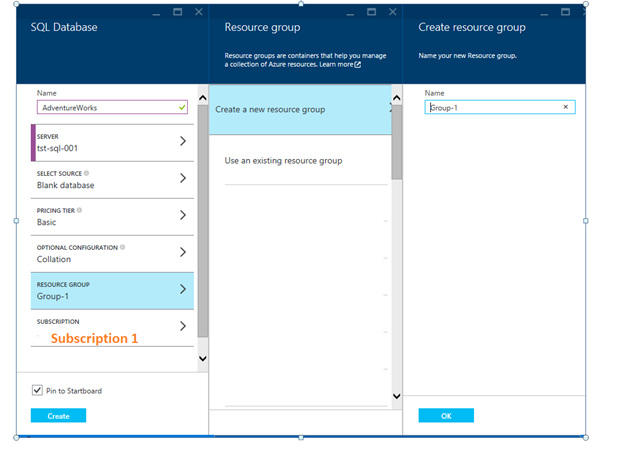
    I also need a resource group. I don’t have any, so I’ll need a new one.

    paas_p

    Again, not creative. If you are doing this for something more than fooling around, spend 2 minutes thinking of some way you’ll classify stuff and use a name that makes sense.

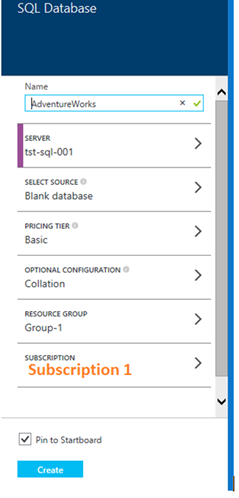
    paas_q

    I think we’re ready to go. Click “Create”.
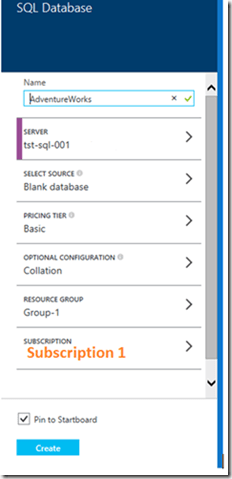
    paas_r

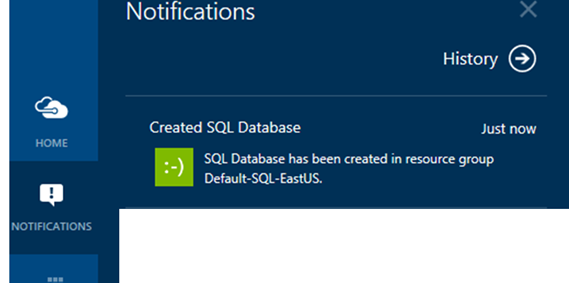
    Once it’s done, you’ll get a notification in the main portal. I do like that the notifications come up at the bottom, but they’re also annoying when they stack up. I’ll sometimes close them because I’m doing something else and not pay attention. However, that’s a “me” problem.paas_s
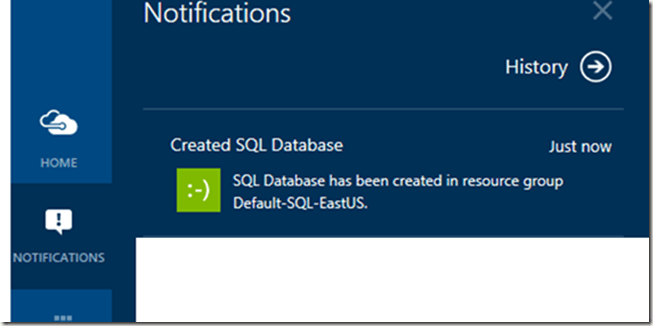
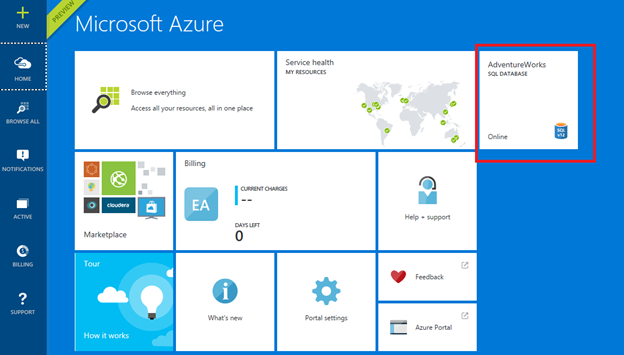
    I allowed this to create a pin for me, and I can easily see my database here. If you have lots of stuff, you won’t want pins for most of them.
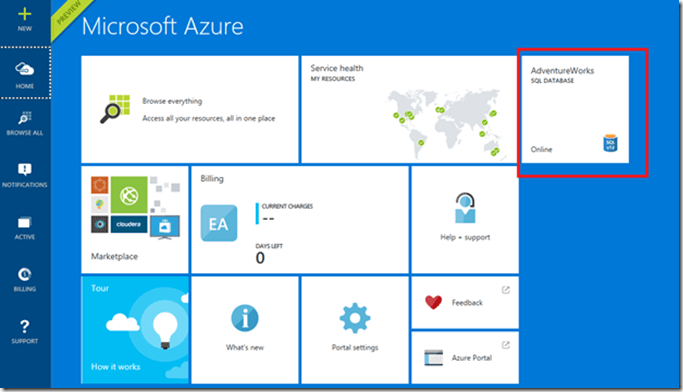
    paas_t

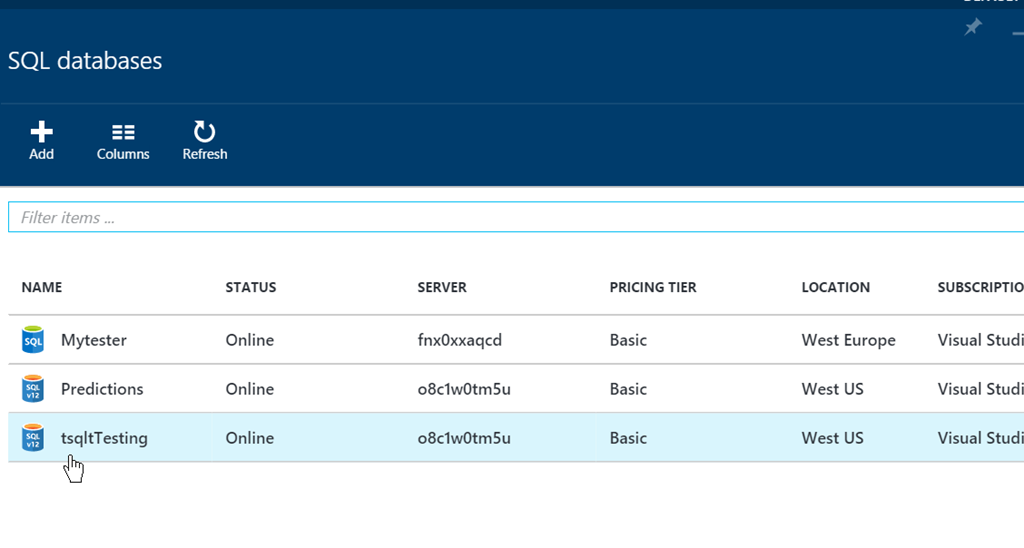
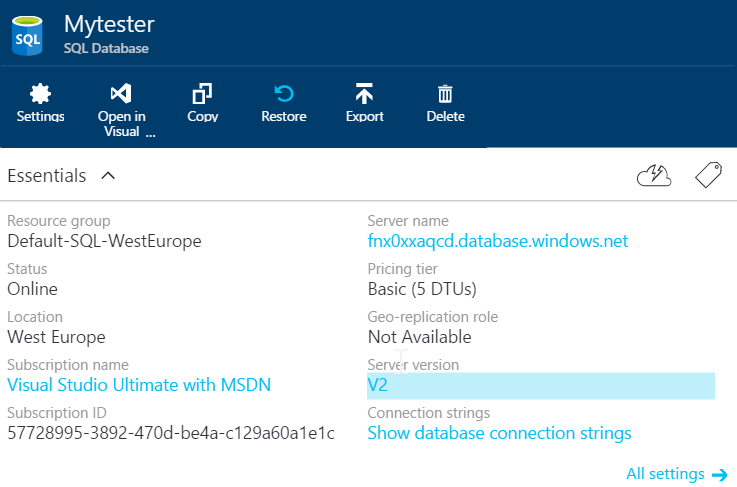
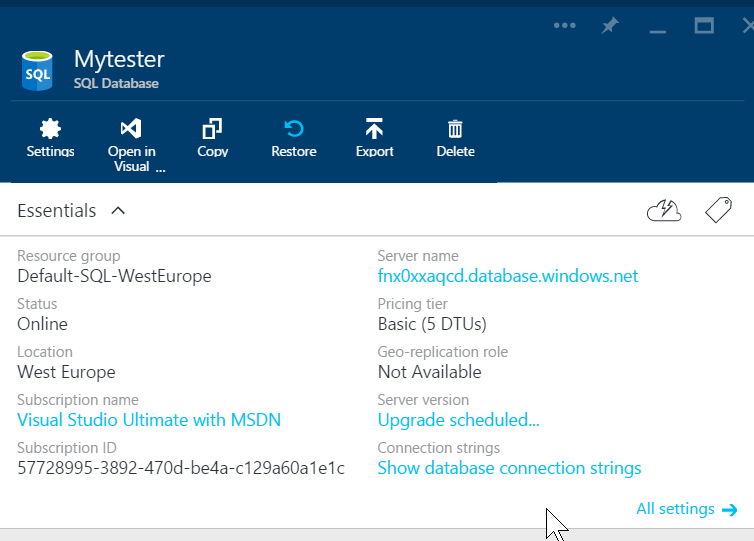
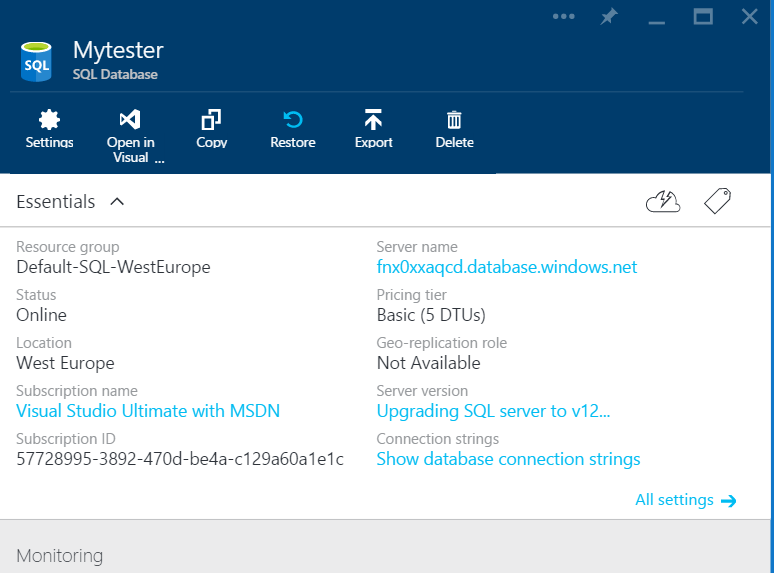
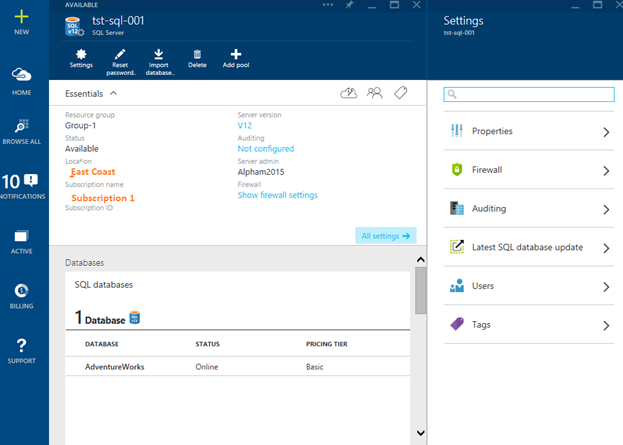
    If I select the database, I can see details.
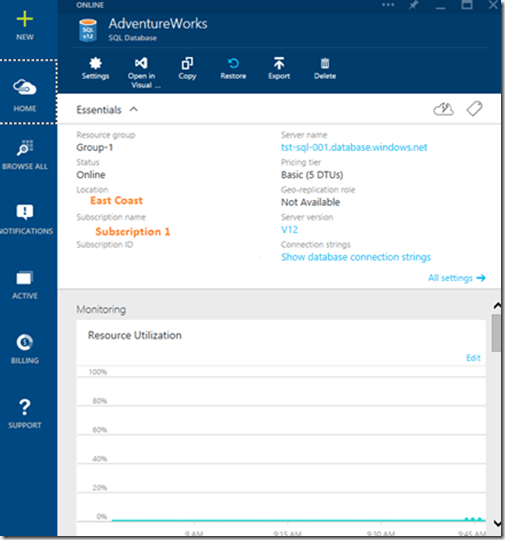
    paas_u

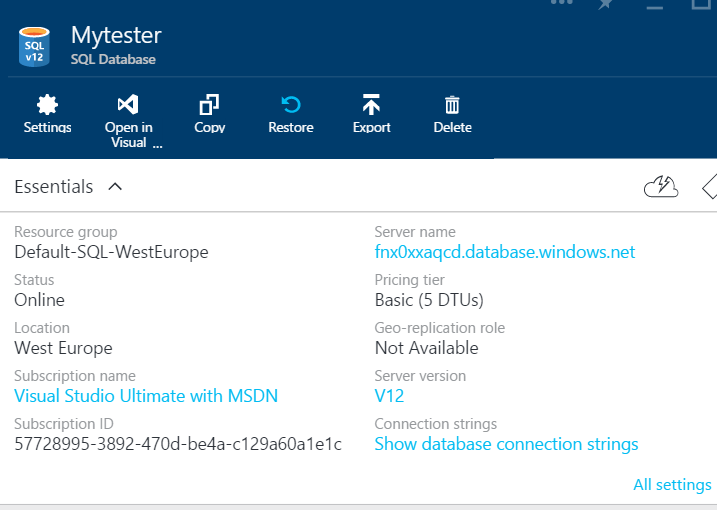
    I can select “Settings” at the top and get more options. One of which is what I need. Note that the version is v12.
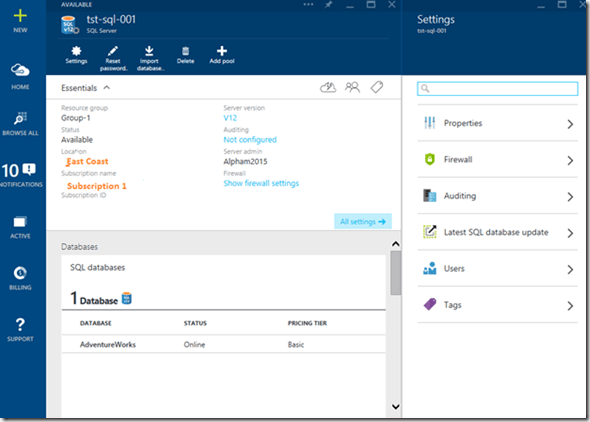
    paas_v

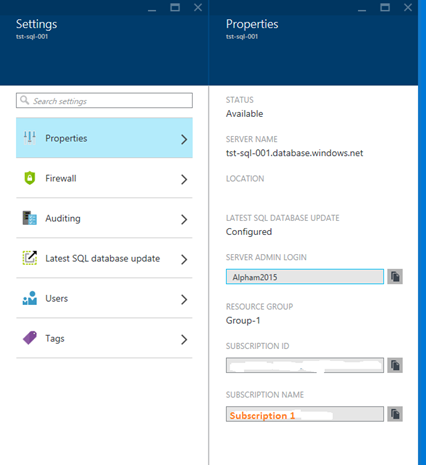
    The Properties item gives me the ability to change a few things.

    paas_w

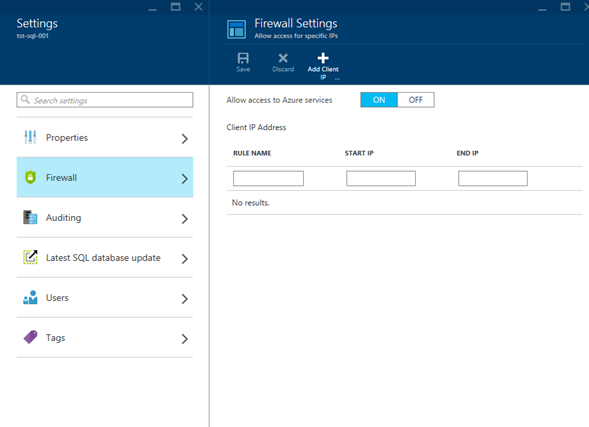
    The Firewall allows me to limit access to specific hosts.
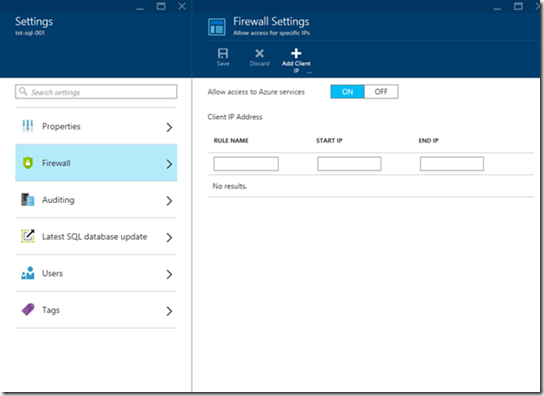
    paas_x

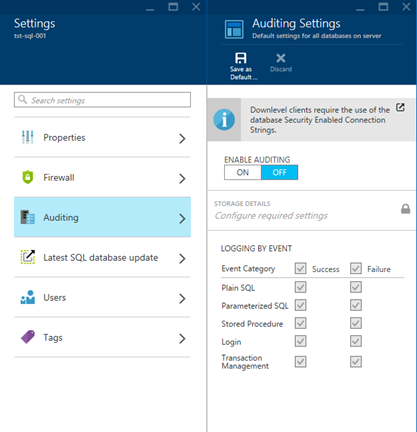
    Auditing has the ability to let you audit by events, success of failure
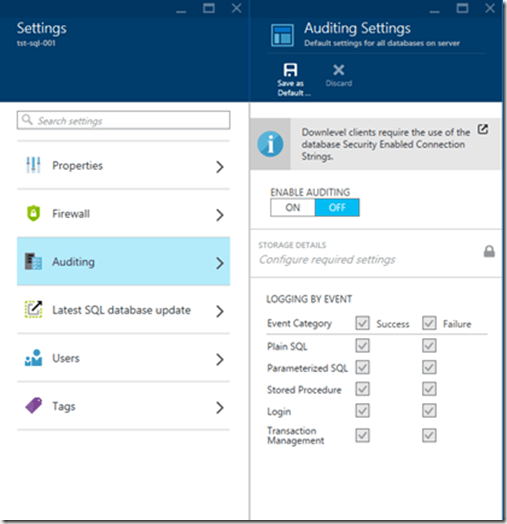
    paas_y

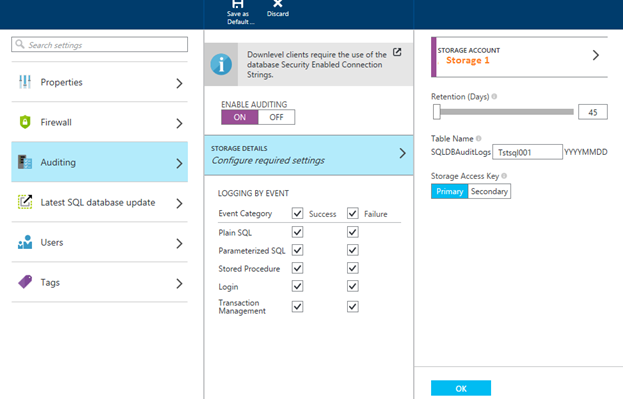
    If I want to audit things, I need a place where I can store the audit data. The cloud charges by everything, so be aware.
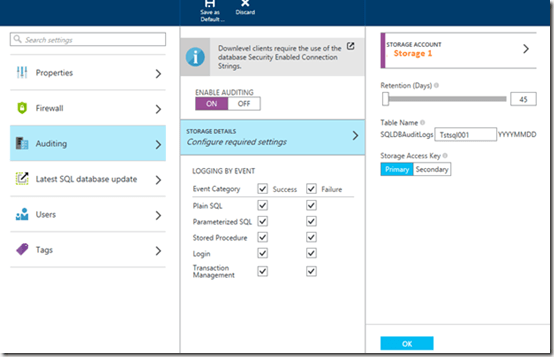
    paas_z

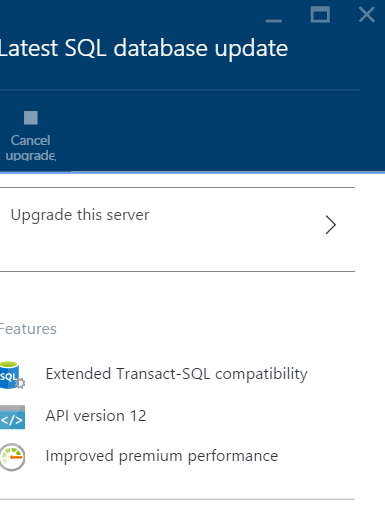
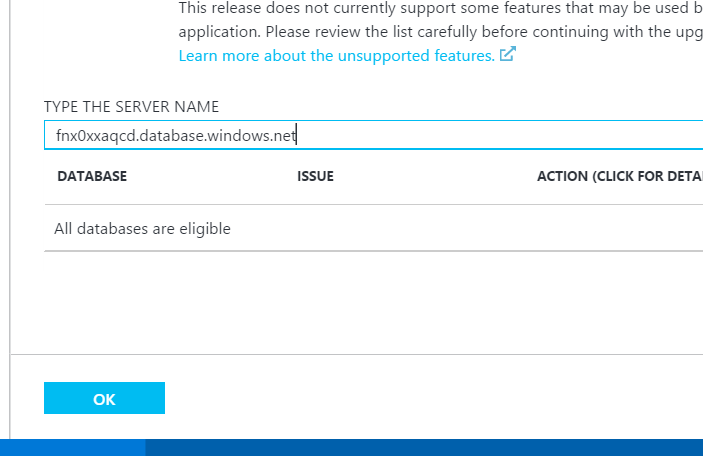
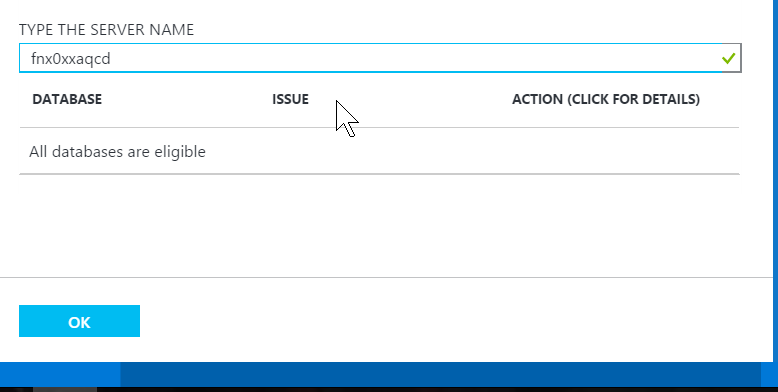
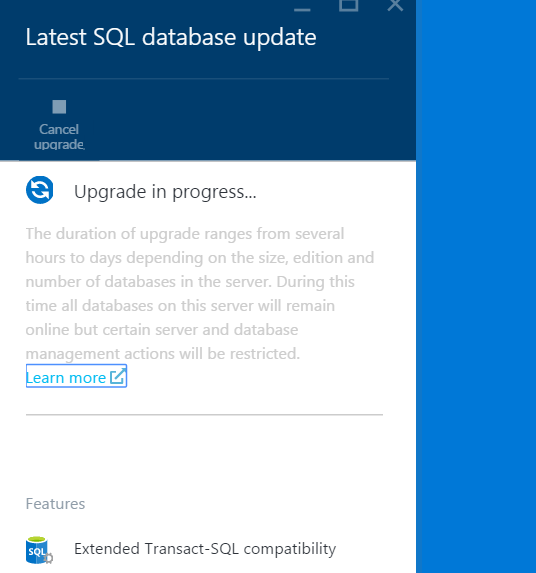
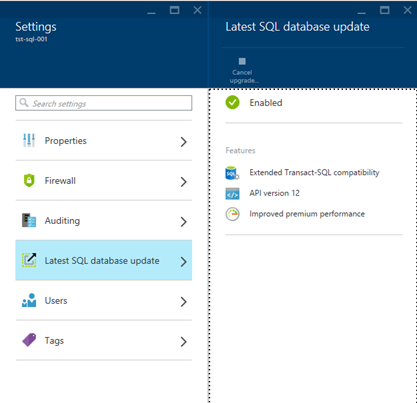
    The item I really care about is the “Latest SQL database update” item. When I pick that I can see the items that will be enabled.
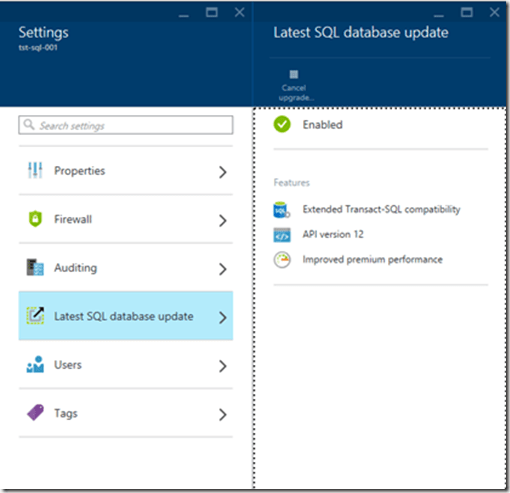
    paas_zc

    If I pick Users and tags, I can specify accounts and labels, but that’s not really important for a test system. Really it’s me using it, so I’ll leave those alone.

    It’s really easy to set up, and worth practicing if you want some cloud experience. You can connect from SSMS and work with the system, which is really SQL Server, but if you have other stuff in the cloud, or an app, you can connect and see what is possible.

    Be aware, however, that you get charged for this stuff. Use your MSN subscription and keep an eye on usage. It’s pretty cheap, but no one wants an unexpected bill. Be especially careful about VMs. Those can really rack up charges.

    paas_zf


    SQLNewBlogger

    This one took awhile. After I completed the process, I immediately deleted the database and started to take screen shots as I went through the steps. The steps don’t take too long, but refreshes on the Portal are sometimes slow.

    This actually sat in my drafts folder as a single sentence (creating an Azure db) and a bunch of pictures. It took me about 20 minutes to load the pictures into Live Writer and then work my way through them, adding notes. I also created a new database as I was writing this to walk through the same steps again (and then deleted it).

    References

    None I used. I’ve done this before and didn’t bother to look around. The Portal does a good job of leading you along.
  • Create a SQL Azure Database–Old Portal

    Another post for me that is simple and hopefully serves as an example for people trying to get blogging as #SQLNewBloggers.
    I worry about beta software, so when I wanted to create a new Azure database, I stuck with the old portal. Call me nervous, but the new portal worries me at times. It works, but since the default is the old one, I often use that one.

    You can use either, but here I’ll show you how to create a database with the old (which will be gone someday) portal.  It’s simple and easy, and this only takes a few minutes.

    Creating a Database

    Here’s the “old” portal. I wish it had a major version number, because that’s what it needs.

    2015-08-14 13_36_27-Movies & TV

    I’ve got a few things running here. In the lower left corner is a “New” button, which I can pick. When I do, I choose Data Services and get this.

    2015-08-14 13_36_42-SQL Databases - Microsoft Azure

    I select SQL Database and then click “Custom.” You could click quick create, but I wanted to show more options. There aren’t a lot, but you can put in a few.

    You get the settings page. The first thing you need is a database name. You can pick your subscription as well as the size of the system. Be aware of charges when you pick sizes. S0 is not cheap.

    2015-08-14 12_21_27-SQL Databases - Microsoft Azure

    I had an existing server, so I used that, but the system will create one for you if you need it. This is really the name you connect to, so if you care, create one first and then use it here.

    The next screen is really for the main admin account. Enter a decent password and save it. You can reset this form the portal once it’s up, so don’t be too concerned, but build good habits. Don’t use the same password everywhere and use a password manager so you pick strong ones.

    2015-08-14 12_22_28-Store

    Once that’s done, create the database. It will take a little time, but you’ll see a moving “Creating” item in the status. There’s no percentage, but I think it was about 3-4 minutes for me one afternoon.

    2015-08-14 12_22_39-SQL Databases - Microsoft Azure

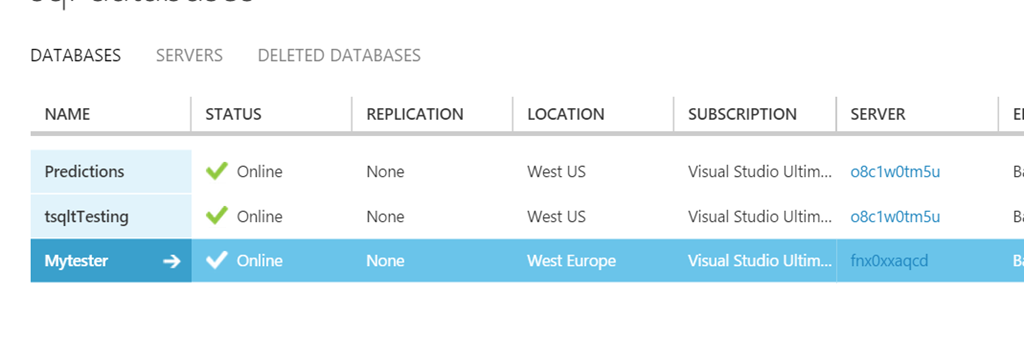
    Once it’s done, the database list will show you the database as online.

    2015-08-14 12_28_16-Store

    If you go to the dashboard, you’ll see  a number of items listed.

    2015-08-14 12_28_47-Greenshot capture form

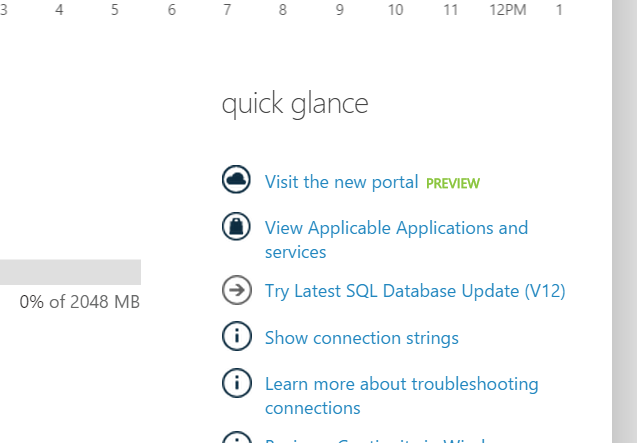
    Scrolling down, you might see the important item that you care about. How to connect. The server is listed, and if you’re using an app with ADO, PHP, OLEDB, etc, you can click the link and get the strings you will use.

    2015-08-14 12_29_01-SQL Databases - Microsoft Azure

    That’s it. Simple, easy, and ready for you to use.

    SQLNewBlogger

    I was actually working on something in the new portal and wanted to go back to the old portal to see how things worked. As I waited for the main screen to refresh, I though, hey, write a post.

    So I captured screen shots. It took maybe 10-15 minutes to type this up.

    References

    None used.

  • Start SQL Server in Single User Mode

    Another post for me that is simple and hopefully serves as an example for people trying to get blogging as #SQLNewBloggers.

    I saw someone recently ask how to reset the sa password, and myself (along with a few others) suggested starting SQL Server in single user mode as an administrator. The poster had problems and at one point I suggested using the command line, which I had used in the past. However that didn’t’ work,  and when I tried it myself, it gave me errors.

    The errors were Operating System errors, which indicated that the errorlog location wasn’t accessible by me. So I decided to elevate my privileges.

    2015-07-06 13_48_41-Start menu

    Once I did that, I was able to get the service to start:

    2015-07-06 13_52_27-Administrator_ Command Prompt - sqlservr   -m -s sql2012

    I’m not sure what was hard here, and this is how I’ve always managed to start and stop SQL Server in single user mode from the command line. I then see the output of what is sent to the error log at the console.

    However I also searched around and found a few other ways that are easy to accomplish.

    Net Start

    I haven’t often used net start for commands, but I have a few times. In this case, I looked at BOL and found I could do this:

    2015-07-06 13_43_20-Administrator_ Command Prompt

    This is essentially what clicking "start" in the services applet or Configuration Manager does. However I can add in my "m" parameter with a slash (/) instead of a dash.

    To stop the service, I use NET STOP.

    2015-07-06 13_43_44-Administrator_ Command Prompt

    Configuration Manager

    If you run Configuration Manager, you can also add parameters. First, right click the service and get the properties. Then you want the "Startup Parameters" tab. In there, you can add a parameter in the top box, as I’ve done here.

    2015-07-06 13_44_19-SQL Server (SQL2012) Properties

    Clicking "Add" will put it in the list.

    2015-07-06 13_44_26-SQL Server (SQL2012) Properties

    When you stop the service, the next startup will have this parameter take effect.

    2015-07-06 13_44_06-Sql Server Configuration Manager

    Beware that when you start things up, the first connection that successfully logs into SQL Server will be the only one allowed. Any applications looking to connect, monitoring programs (SQL Monitor or DLM Dashboard) or other clients can take your connection, so be careful and quick.

    SQLNewBlogger

    This was really a quick writeup. I stopped my service and played for 10 minutes, ran a few searches, and took some screenshots. I would have been faster, but I wanted to document this.

    This is great practice for a skill you need rarely, but when you do, you’ll be stressed. Be sure you can start and stop SQL Server a few ways, and add parameters like trace flags and the -m for emergencies.

    References

  • Using the DAC

    Another post for me that is simple and hopefully serves as an example for people trying to get blogging as #SQLNewBloggers.

    The DAC is a really important tool for anyone managing a SQL Server. You might not use it often, but when you need it, you really need it. I’d suggest you connect to your instances one a month or so using the DAC, just to be sure you know how to do it.

    The most common reason to use the DAC is when a runaway query is consuming so many resources the user can’t connect. The DAC is guaranteed resources, so you can always connect.

    When you use SQLCMD, the -A switch lets the connection method know you want to use the DAC. The DAC only allows one connection, so only one admin can connect. This also means it’s important to disconnect quickly if you don’t need the DAC.

    To connect, I use a normal set of parameters, -S for my server and -E for Windows auth. However I then add the -A, which connects me through the DAC.

    2015-07-13 10_48_04-Command Prompt

    Once I connect, I can run any of the normal commands, I need, like rebuilding master or killing a connection.

    2015-07-13 10_48_23-SQLCMD

    Keep this as a tool in your toolbox and practice regularly.

    SQLNewBlogger

    This was a quick post that follows on from starting SQL in single user mode as well as using the DAC in SSMS. I really just took some shots as I connected from SQLCMD.

    References

    The first link I saw was from my friend, Pinal Dave.