One of the things I needed to do recently was get Jenkins running as a demo for a customer. We have some pre-built VMs to do this, but I wanted to experiment with a container.
This post covers what I did to get this running.
There are other posts in this series:
Getting Jenkins Working
The first stop was to download a container. A search on the Docker Hub first brought me to jenkinsci\blueocean. This is a nicer interface for Jenkins, for some things, and that’s fine. Really, I need the server and decided to try the blueocean project interface. First things first, get the image:
docker pull jenkinsci/blueocean
Next, we need to run this. I know how to run a container. Here, I glanced at the docs, which note this runs on 8080 by default.
docker run --name blueo -p 8080:8080 jenkinsci/blueocean
Once things are running, you get output at the console. I left off the –d so I could see this start. This is a Linux image, so you do need WSL running on Windows. Once things were running, I popped over to the address in a browser, and saw this:
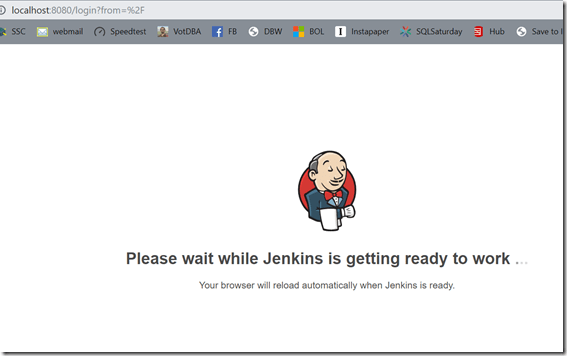
I’m impatient. If you wait a minute or so, you will actually see this when the browser reloads.
![2019-07-26 12_24_56-Sign in [Jenkins]](https://voiceofthedba.com/wp-content/uploads/2019/07/2019-07-26-12_24_56-sign-in-jenkins_thumb.png?w=577&h=317 "2019-07-26 12_24_56-Sign in [Jenkins]")
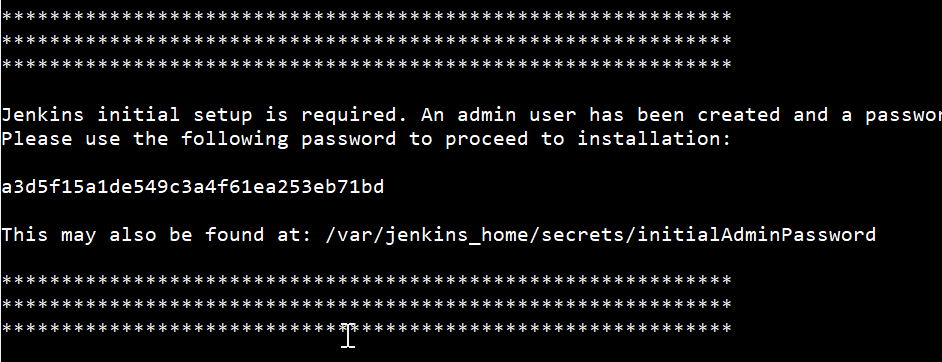
This password is in the console output, in this area:

If you don’t see it, or you ran the container as detached, this command will get the output:
docker logs blueo
Paste in the password, and you’ll get to install plugins. I just let the normal plugins install, since I wasn’t sure what I might need. I know I’ll be adding some Redgate ones, but for now, get the typical ones.
![2019-07-26 12_27_50-SetupWizard [Jenkins]](https://voiceofthedba.com/wp-content/uploads/2019/07/2019-07-26-12_27_50-setupwizard-jenkins_thumb.png?w=530&h=324 "2019-07-26 12_27_50-SetupWizard [Jenkins]")
Next, create a new user. If you don’t create the user, you’ll need admin and that password to log in again. Create a user; you’ll appreciate having a user. Click Save, not continue as admin. I made that mistake.
![2019-07-26 12_29_00-SetupWizard [Jenkins]](https://voiceofthedba.com/wp-content/uploads/2019/07/2019-07-26-12_29_00-setupwizard-jenkins_thumb.png?w=587&h=315 "2019-07-26 12_29_00-SetupWizard [Jenkins]")
Last it’s the port. We know the default, I just left this.
![2019-07-26 12_29_50-SetupWizard [Jenkins]](https://voiceofthedba.com/wp-content/uploads/2019/07/2019-07-26-12_29_50-setupwizard-jenkins_thumb.png?w=538&h=211 "2019-07-26 12_29_50-SetupWizard [Jenkins]")
Save, continue, and you ought to see this. Note BlueOcean isn’t the default. This is a new way of building pipelines.
![2019-07-26 12_30_32-Dashboard [Jenkins]](https://voiceofthedba.com/wp-content/uploads/2019/07/2019-07-26-12_30_32-dashboard-jenkins_thumb.png?w=593&h=409 "2019-07-26 12_30_32-Dashboard [Jenkins]")
I know I need the Redgate plugin, but I’ll drop that in a different post on a database build.
Now, I need an agent. Why? I don’t want to customize the container with SQL Server and other stuff, plus it’s Linux. I could configure things in another container, but it’s not simple. The simplest is using the SQL stuff on the host, so I’ll drop an agent there.
The Agent
I had to have java on the host, which was what I wanted to avoid, but I can’t. The container can’t see the host, and I didn’t want to do some crazy networking between containers. That ought to be my next project, but for now, I wanted to build with local resources.
One note here. You need a second
port for the container. If you didn’t start the container as below, you’ll need to stop it, remove it, and then create a new one with two ports.
docker run --name blueo -p 8080:8080 -p 50000:50000 -d jenkinsci/blueocean
I won’t go through Java, but once it’s there, you can set up a node. The first step for me was to “manage nodes”. Click Manage Jenkins and scroll down.
![2019-07-26 12_33_08-Manage Jenkins [Jenkins]](https://voiceofthedba.com/wp-content/uploads/2019/07/2019-07-26-12_33_08-manage-jenkins-jenkins_thumb.png?w=523&h=318 "2019-07-26 12_33_08-Manage Jenkins [Jenkins]")
Click this, and the “Add Node” on the left menu.
![2019-07-26 13_38_00-Nodes [Jenkins]](https://voiceofthedba.com/wp-content/uploads/2019/07/2019-07-26-13_38_00-nodes-jenkins_thumb.png?w=485&h=253 "2019-07-26 13_38_00-Nodes [Jenkins]")
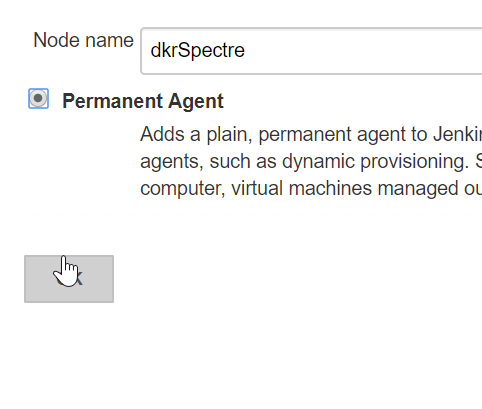
Give this a name. I chose the name of my host machine, and I want this to be permanent. Meaning, I’ll save this container as an image, so I can start it when I want Jenkins running.
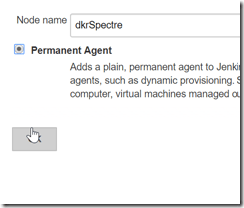
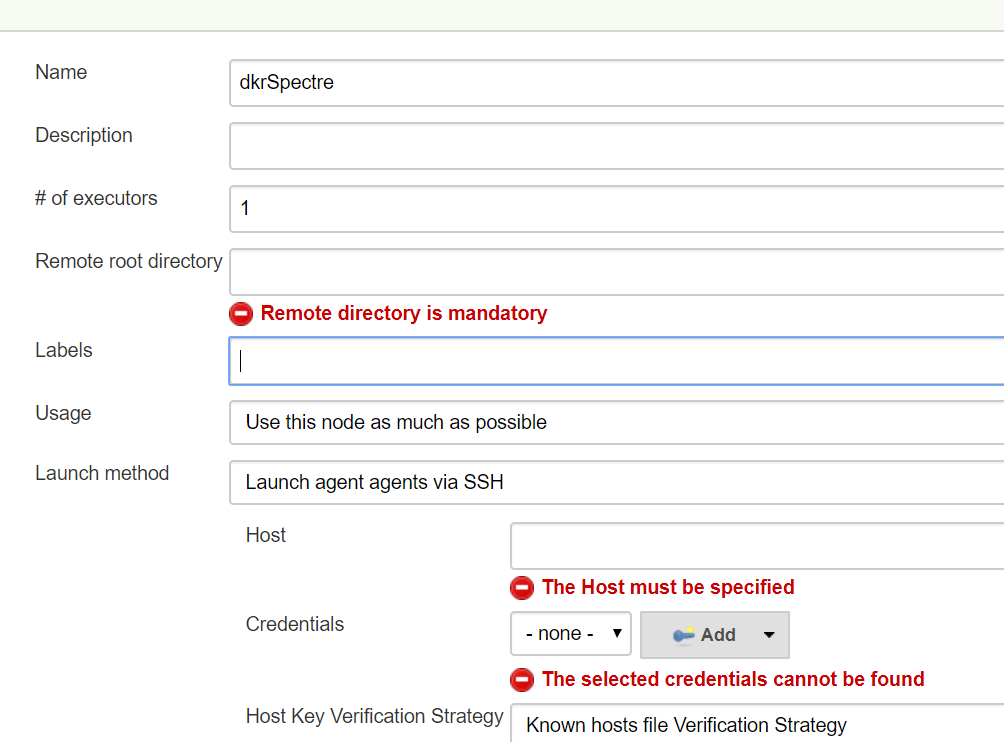
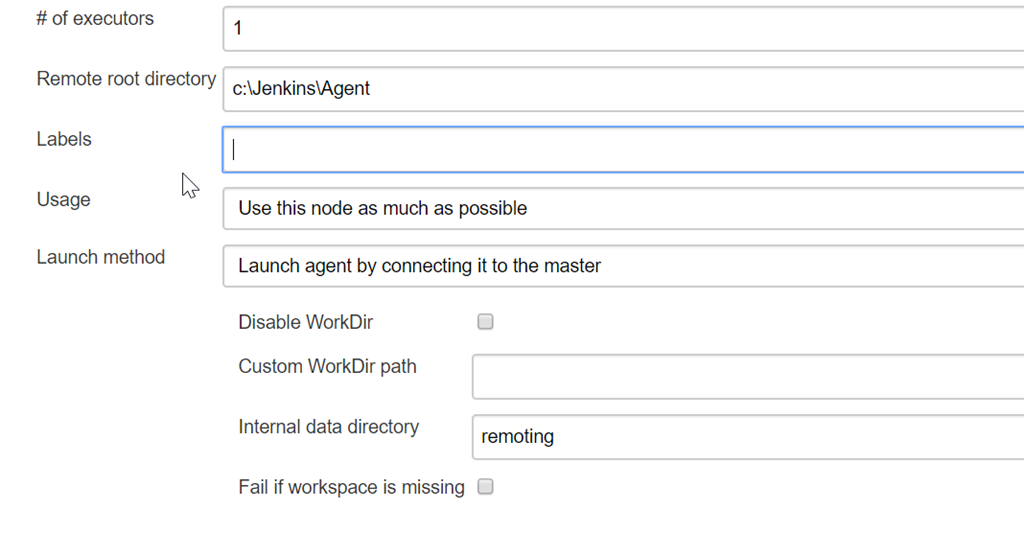
There looks like a lot of configuration now, but there are really only a few things to do. Don’t let all the red bother you. First, leave executors at 1. This is for my personal setup, not a team.
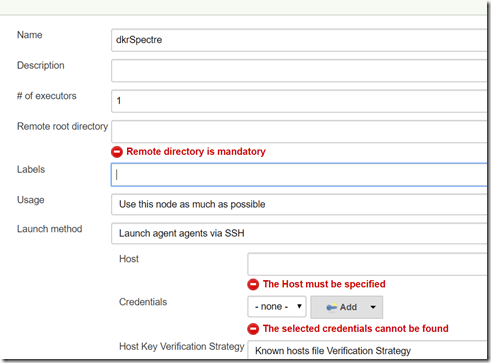
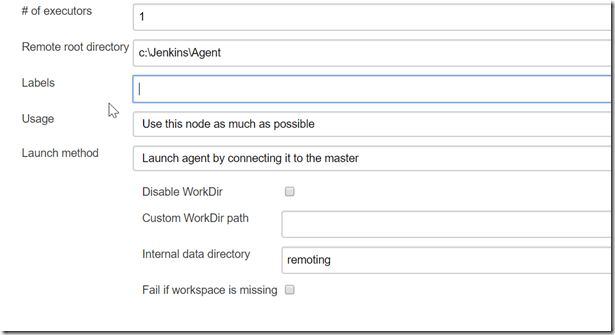
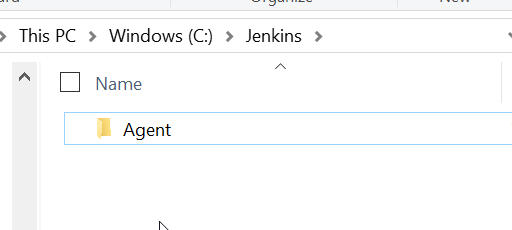
Next, I need a place for Jenkins to work. I created a c:\Jenkins folder, then added a subfolder for the agent itself. I’ll use the subfolder as the agent location. This does look weird, but the server is in the container, so the host is really remote to the server.

For the agent connection, I don’t want this running all the time. I also don’t want this as another service. You can set up Jenkins agents as Windows services, but here I’ll just let the agent connect when I start it. I do the same thing with Azure DevOps. I’ll save this config.
I have two nodes, one of which isn’t running.
![2019-07-26 13_44_04-Nodes [Jenkins]](https://voiceofthedba.com/wp-content/uploads/2019/07/2019-07-26-13_44_04-nodes-jenkins_thumb.png?w=572&h=250 "2019-07-26 13_44_04-Nodes [Jenkins]")
If I click the Agent, I get what I need. There is a command line to run and an agent.jar file I need. First, download agent.jar and drop it in your c:\Jenkins folder. Then, copy the command line into a .cmd file as is. Put that in the same space.
![2019-07-26 13_44_35-dkrSpectre [Jenkins]](https://voiceofthedba.com/wp-content/uploads/2019/07/2019-07-26-13_44_35-dkrspectre-jenkins_thumb.png?w=616&h=269 "2019-07-26 13_44_35-dkrSpectre [Jenkins]")
I named my file runagent.cmd. When I run this, my agent will start.

And the agent is connected and data shown:
![2019-07-26 13_57_04-Nodes [Jenkins]](https://voiceofthedba.com/wp-content/uploads/2019/07/2019-07-26-13_57_04-nodes-jenkins_thumb.png?w=616&h=231 "2019-07-26 13_57_04-Nodes [Jenkins]")
That’s it. Now I can build. That’s the subject of another post.
![2019-07-27 17_23_07-Dashboard [Jenkins]](https://voiceofthedba.com/wp-content/uploads/2019/08/2019-07-27-17_23_07-dashboard-jenkins.png "2019-07-27 17_23_07-Dashboard [Jenkins]")
![2019-07-27 17_24_04-New Item [Jenkins]](https://voiceofthedba.com/wp-content/uploads/2019/08/2019-07-27-17_24_04-new-item-jenkins.png "2019-07-27 17_24_04-New Item [Jenkins]")
![2019-07-27 17_30_56-SimpleTalkDB Demo Build Config [Jenkins]](https://voiceofthedba.com/wp-content/uploads/2019/08/2019-07-27-17_30_56-simpletalkdb-demo-build-config-jenkins.png "2019-07-27 17_30_56-SimpleTalkDB Demo Build Config [Jenkins]")
![2019-07-27 17_31_04-SimpleTalkDB Demo Build Config [Jenkins]](https://voiceofthedba.com/wp-content/uploads/2019/08/2019-07-27-17_31_04-simpletalkdb-demo-build-config-jenkins.png "2019-07-27 17_31_04-SimpleTalkDB Demo Build Config [Jenkins]")
![2019-07-27 17_35_56-SimpleTalkDB Demo Build Config [Jenkins]](https://voiceofthedba.com/wp-content/uploads/2019/08/2019-07-27-17_35_56-simpletalkdb-demo-build-config-jenkins.png "2019-07-27 17_35_56-SimpleTalkDB Demo Build Config [Jenkins]")
![2019-07-27 17_36_15-SimpleTalkDB Demo Build Config [Jenkins]](https://voiceofthedba.com/wp-content/uploads/2019/08/2019-07-27-17_36_15-simpletalkdb-demo-build-config-jenkins.png "2019-07-27 17_36_15-SimpleTalkDB Demo Build Config [Jenkins]")
![2019-07-27 17_36_38-SimpleTalkDB Demo Build Config [Jenkins]](https://voiceofthedba.com/wp-content/uploads/2019/08/2019-07-27-17_36_38-simpletalkdb-demo-build-config-jenkins.png "2019-07-27 17_36_38-SimpleTalkDB Demo Build Config [Jenkins]")
![2019-07-27 17_36_47-SimpleTalkDB Demo Build Config [Jenkins]](https://voiceofthedba.com/wp-content/uploads/2019/08/2019-07-27-17_36_47-simpletalkdb-demo-build-config-jenkins.png "2019-07-27 17_36_47-SimpleTalkDB Demo Build Config [Jenkins]")
![2019-07-27 19_05_12-SimpleTalkDB Demo Build [Jenkins]](https://voiceofthedba.com/wp-content/uploads/2019/08/2019-07-27-19_05_12-simpletalkdb-demo-build-jenkins.png "2019-07-27 19_05_12-SimpleTalkDB Demo Build [Jenkins]")
![2019-07-27 19_05_28-SimpleTalkDB Demo Build [Jenkins]](https://voiceofthedba.com/wp-content/uploads/2019/08/2019-07-27-19_05_28-simpletalkdb-demo-build-jenkins.png "2019-07-27 19_05_28-SimpleTalkDB Demo Build [Jenkins]")
![2019-07-27 19_06_03-SimpleTalkDB Demo Build #1 Console [Jenkins]](https://voiceofthedba.com/wp-content/uploads/2019/08/2019-07-27-19_06_03-simpletalkdb-demo-build-_1-console-jenkins.png "2019-07-27 19_06_03-SimpleTalkDB Demo Build #1 Console [Jenkins]")
![2019-07-27 19_06_17-SimpleTalkDB Demo Build #1 Console [Jenkins]](https://voiceofthedba.com/wp-content/uploads/2019/08/2019-07-27-19_06_17-simpletalkdb-demo-build-_1-console-jenkins.png "2019-07-27 19_06_17-SimpleTalkDB Demo Build #1 Console [Jenkins]")
![2019-07-27 17_14_17-Manage Jenkins [Jenkins]](https://voiceofthedba.com/wp-content/uploads/2019/08/2019-07-27-17_14_17-manage-jenkins-jenkins.png "2019-07-27 17_14_17-Manage Jenkins [Jenkins]")
![2019-07-26 15_41_18-Manage Jenkins [Jenkins]](https://voiceofthedba.com/wp-content/uploads/2019/08/2019-07-26-15_41_18-manage-jenkins-jenkins.png "2019-07-26 15_41_18-Manage Jenkins [Jenkins]")
![2019-07-26 15_41_29-Update Center [Jenkins]](https://voiceofthedba.com/wp-content/uploads/2019/08/2019-07-26-15_41_29-update-center-jenkins.png "2019-07-26 15_41_29-Update Center [Jenkins]")
![2019-07-26 15_41_35-Update Center [Jenkins]](https://voiceofthedba.com/wp-content/uploads/2019/08/2019-07-26-15_41_35-update-center-jenkins.png "2019-07-26 15_41_35-Update Center [Jenkins]")
![2019-07-26 15_41_46-Update Center [Jenkins]](https://voiceofthedba.com/wp-content/uploads/2019/08/2019-07-26-15_41_46-update-center-jenkins.png "2019-07-26 15_41_46-Update Center [Jenkins]")
![2019-07-26 15_43_32-Update Center [Jenkins]](https://voiceofthedba.com/wp-content/uploads/2019/08/2019-07-26-15_43_32-update-center-jenkins.png "2019-07-26 15_43_32-Update Center [Jenkins]")

![2019-07-26 12_24_56-Sign in [Jenkins]](https://voiceofthedba.com/wp-content/uploads/2019/07/2019-07-26-12_24_56-sign-in-jenkins.png "2019-07-26 12_24_56-Sign in [Jenkins]")
![2019-07-26 12_27_50-SetupWizard [Jenkins]](https://voiceofthedba.com/wp-content/uploads/2019/07/2019-07-26-12_27_50-setupwizard-jenkins.png "2019-07-26 12_27_50-SetupWizard [Jenkins]")
![2019-07-26 12_29_00-SetupWizard [Jenkins]](https://voiceofthedba.com/wp-content/uploads/2019/07/2019-07-26-12_29_00-setupwizard-jenkins.png "2019-07-26 12_29_00-SetupWizard [Jenkins]")
![2019-07-26 12_29_50-SetupWizard [Jenkins]](https://voiceofthedba.com/wp-content/uploads/2019/07/2019-07-26-12_29_50-setupwizard-jenkins.png "2019-07-26 12_29_50-SetupWizard [Jenkins]")
![2019-07-26 12_30_32-Dashboard [Jenkins]](https://voiceofthedba.com/wp-content/uploads/2019/07/2019-07-26-12_30_32-dashboard-jenkins.png "2019-07-26 12_30_32-Dashboard [Jenkins]")
![2019-07-26 12_33_08-Manage Jenkins [Jenkins]](https://voiceofthedba.com/wp-content/uploads/2019/07/2019-07-26-12_33_08-manage-jenkins-jenkins.png "2019-07-26 12_33_08-Manage Jenkins [Jenkins]")
![2019-07-26 13_38_00-Nodes [Jenkins]](https://voiceofthedba.com/wp-content/uploads/2019/07/2019-07-26-13_38_00-nodes-jenkins.png "2019-07-26 13_38_00-Nodes [Jenkins]")
![2019-07-26 13_44_04-Nodes [Jenkins]](https://voiceofthedba.com/wp-content/uploads/2019/07/2019-07-26-13_44_04-nodes-jenkins.png "2019-07-26 13_44_04-Nodes [Jenkins]")
![2019-07-26 13_44_35-dkrSpectre [Jenkins]](https://voiceofthedba.com/wp-content/uploads/2019/07/2019-07-26-13_44_35-dkrspectre-jenkins.png "2019-07-26 13_44_35-dkrSpectre [Jenkins]")

![2019-07-26 13_57_04-Nodes [Jenkins]](https://voiceofthedba.com/wp-content/uploads/2019/07/2019-07-26-13_57_04-nodes-jenkins.png "2019-07-26 13_57_04-Nodes [Jenkins]")

